-9-
Fig.#14
14
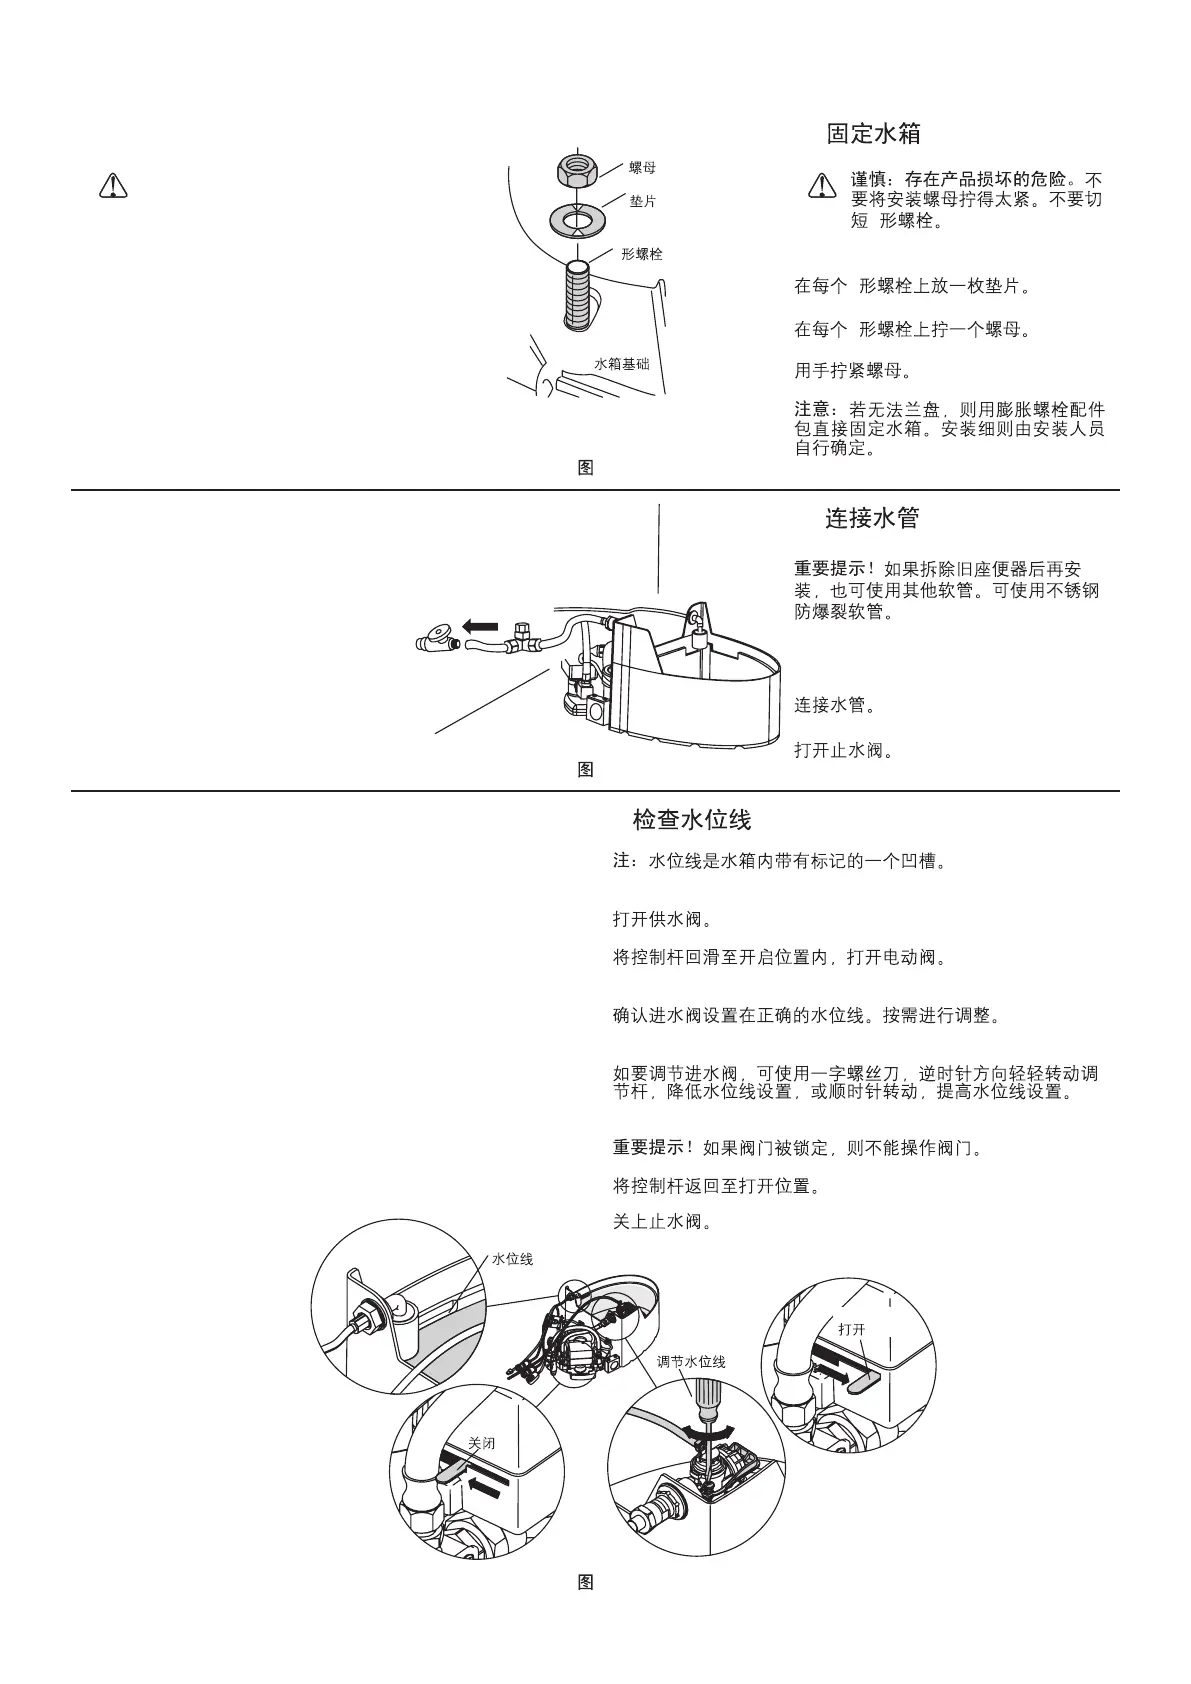
G. Secure the Tank
CAUTION: Risk of product
damage.
Note:
Do not overtighten
the mounting nuts. Do not
shorten the T-bolts.
Place a washer on each T-bolt.
Thread a nut onto each T-bolt.
Hand tighten the nuts.
In case there is no floor flange,
please fix the tank with the expansion
bolt kits. Specific installation steps are
decided by the installer.
G.
T
T
T
Fig.#12
12
Nut
Washer
T-Bolt
T
Base of
Tank Unit
H. Connect the Water
IMPORTANT! If this installation
replaces an existing toilet, a hose
other than the one shipped with the
water supply may be used. Use a
stainless steel, burst-resistant hose.
Connect the water.
Open the shut-off valve.
H.
Fig.#13
13
I. Check the Waterline
NOTE:
IMPORTANT!
The waterline is a notch in the inside of the tank,
marked with a label.
Turn on the water supply.
Open the motorized valve by sliding the lever back into the
open position.
Verify the inlet valve is set to the correct waterline. Adjust if
needed.
To adjust the waterline, use a flathead screwdriver to gently
turn the adjustment rod counterclockwise to lower and
clockwise to raise the waterline setting.
The valve will not operate if the valve is locked.
Return the lever back into the unlocked position.
Stop the shut off value.
I.
Waterline
Adjust waterline
Locked
Unlocked
1144585-T01-A
 Loading...