13. Install the screw to secure the power adapter bracket to the wall mount bracket.
14. Install the power cord to the power adapter. See “Power adapter and power cord” on page 34.
15. Reconnect the external cables and power adapter to the corresponding connectors on the computer,
and then reconnect the power cord to the electrical outlet.
VESA mount bracket
Note: The VESA mount bracket is available only on some models.
Prerequisite
Before you start, read Appendix A “Important safety information” on page 51 and print the following
instructions.
Replacement procedure
1. Remove any media from the drives and turn off all connected devices and the computer.
2. Disconnect the power cord from the electrical outlet and disconnect all cables from the computer.
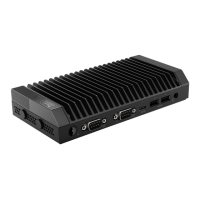
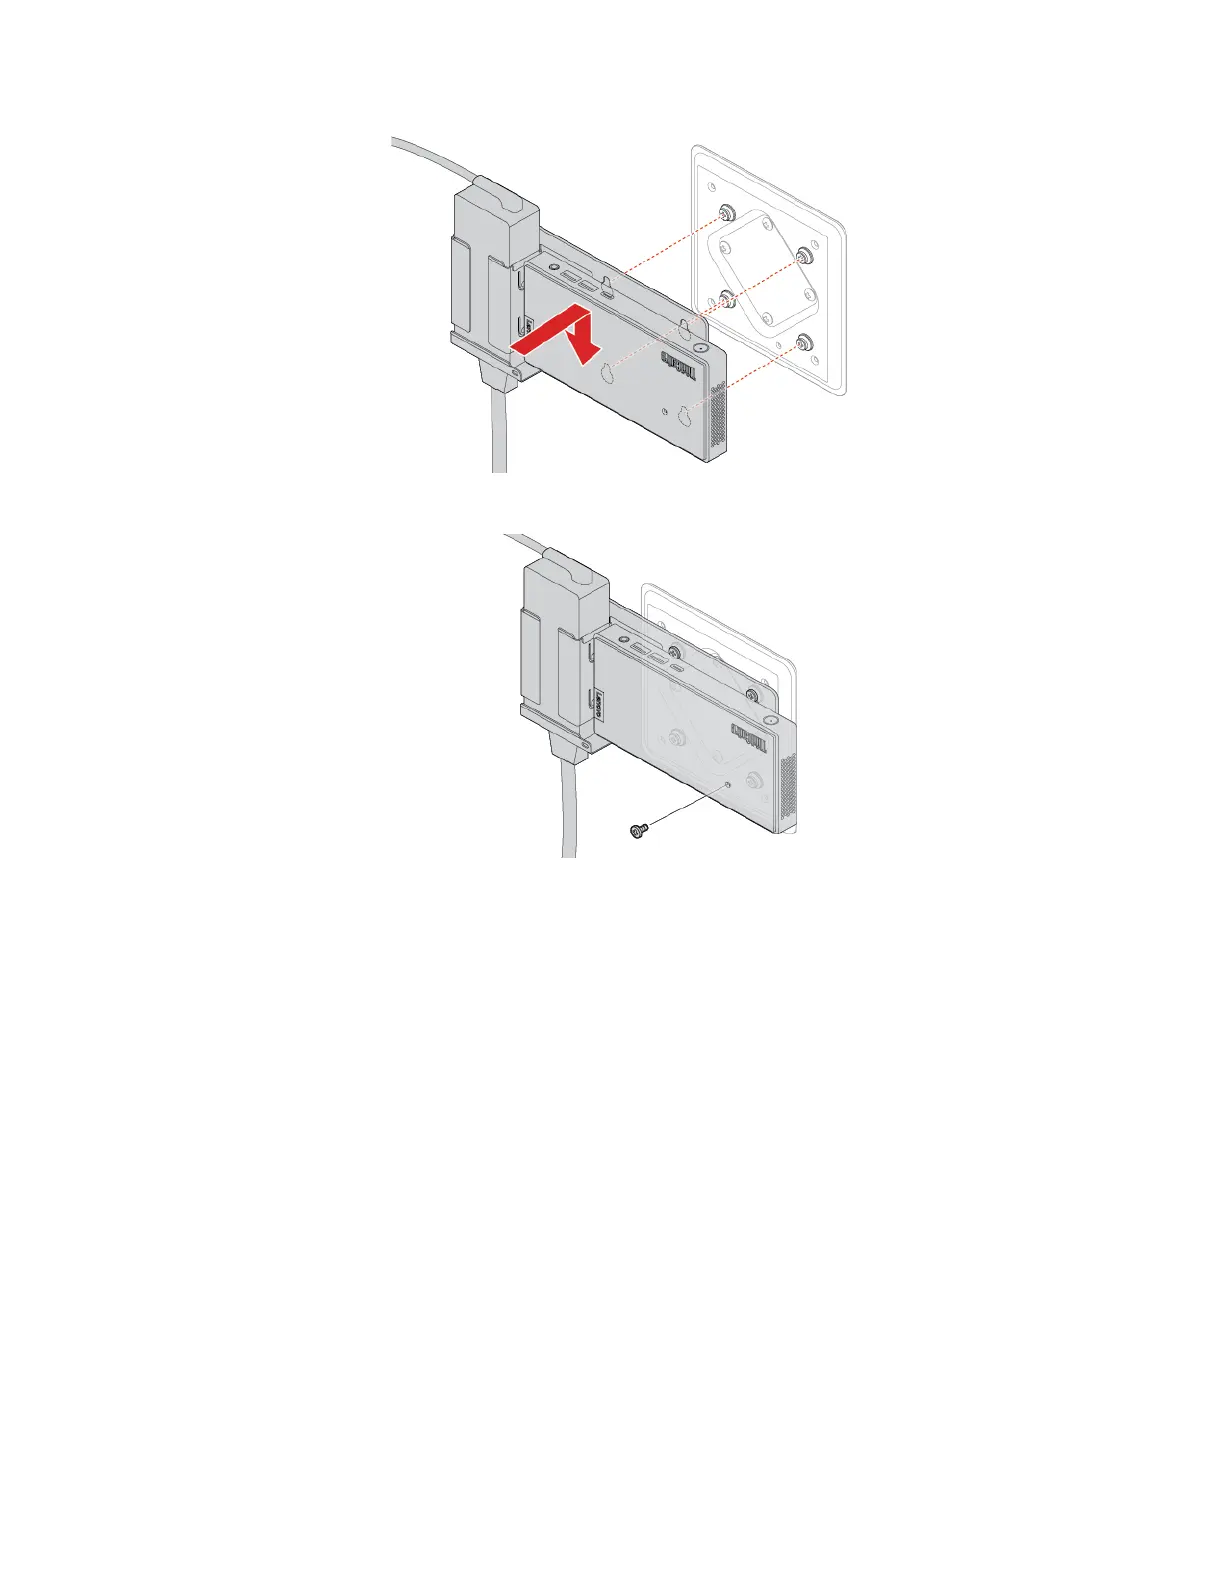
3. Remove the screw that secures the VESA mount bracket to the wall mount bracket.
Chapter 7. CRU replacement 39
 Loading...