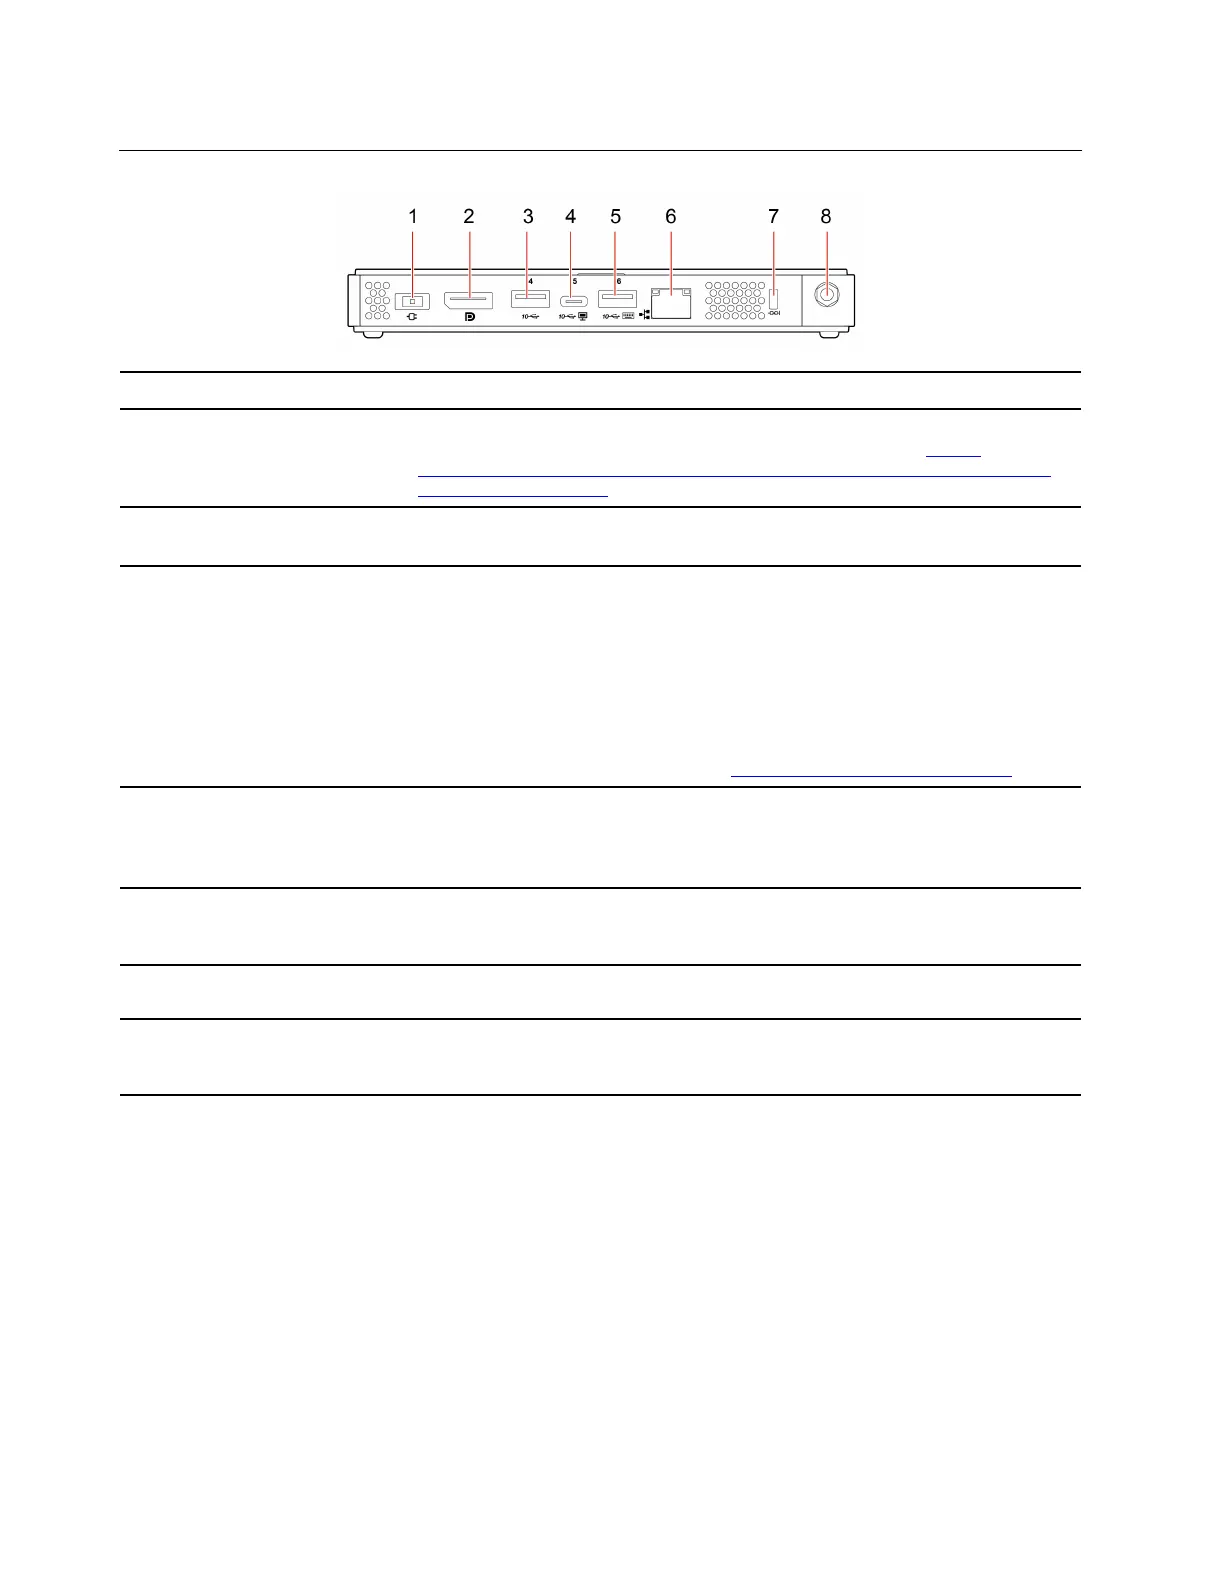
Rear
1. Power adapter connector Connect the power adapter to your computer for power supply.
2. DisplayPort 1.2 out connector
Send audio and video signals from the computer to another audio or video device,
such as a high-performance monitor. For more information, see
https://
www.vesa.org/wp-content/uploads/2010/12/DisplayPort-DevCon-Presentation-DP-
1.2-Dec-2010-rev-2b.pdf
.
3. USB 3.1 connector Gen 2
Connect USB-compatible devices, such as a USB keyboard, USB mouse, USB
storage device, or USB printer.
4. USB-C connector (USB 3.1
Gen 2)
• Output voltage and current of 5 V and 0.9 A.
• Transfer data at USB 3.1 speed, up to 10 Gbps.
• Connect to an external display:
– USB-C to VGA: 1900 x 1200 pixels, 60 Hz
– USB-C to DP: 3840 x 2160 pixels, 60 Hz
• Connect to USB-C accessories to help expand your computer functionality. To
purchase USB-C accessories, go to
https://www.lenovo.com/accessories.
5. USB 3.1 connector Gen 2
Connect USB-compatible devices, such as a USB keyboard, USB mouse, USB
storage device, or USB printer. This connector supports the smart power-on
feature. For more information, see “Enable or disable the smart power-on feature”
on page 19.
6. Ethernet connector
Connect to a local area network (LAN). When the green indicator is on, the
computer is connected to a LAN. When the yellow indicator blinks, data is being
transmitted.
7. Security-lock slot
Lock your computer to a desk, table, or other fixtures through a Kensington-style
cable lock.
8. Wi-Fi antenna slot *
Used to install the rear Wi-Fi antenna cable connector that is available only on
some models. The rear Wi-Fi antenna is installed on the rear Wi-Fi antenna cable
connector.
* for selected models
2
M90n-1 User Guide
 Loading...