Version 1.0 Page 40 / 43
5. Firmware upgrade
The unit can be upgraded with new firmware versions via RS232 port using a PC computer
or Laptop. Please contact Lightware for the latest firmware version at sales@lightware.hu
Before upgrading the new firmware, run the " LW_matrix_bundle.exe " wich installs the
current " Lightware_matrix_controller.jar" and " LW_bootloader_v10.jar " softwares, which
are available from STARTmenu/Lightware location.
The new firmware is a .hex file. The name of the file contains the router type and the
firmware version, ex.: MX4x4DVI_v17.hex
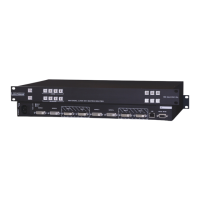
FRONT PANEL ENABLED UPGRADE
Front Panel Enabled Upgrade is the simplest mode for software upgrade. For
preventing unwanted software modifications via RS232 commands, the user must
enable the router using front panel buttons to go in bootloader state. Follow the
steps described below.
1. Connect the RS232 port of the router to the PC RS232 port via null modem
cable.
2. Switch ON the router connecting to the AC power
3. Check if the router is in LW protocol mode: switch the unit in TAKE mode
than lock the panel by pressing CONTROL LOCK. Now theCONTROL
LOCK lights red. Press the OUTPUT LOCK button. During pressed, the
SOURCE1 or SOURCE2 button lights up according to the selected protocol.
If SOURCE1 button lights, LW protocol is selected. Firmware upgrade is
possible.
4. Launch "LW_bootloader_v10.jar" program from
START/Programs/Lightware on you computer
5. Select the desired COM PORT using Com Port menu
6. Open the new firmware file (file name: MX8x8DVI_v17.hex) using File-Open
menu from it's current location
7. Click DOWNLOAD using Firmware menu. Now the computer requests the
router to confirm the firmware upgrade. User must enable the firmware
upgrade pressing front panel buttons as requested on the screen or
described below:
8. Enable Firmware Upgrade: Switch the unit in TAKE mode, than press and
release CONTROL LOCK button. Now Control lock button lights red. Press
and release source buttons 1 than 2 than 3 than 4 after each other. Now the
TAKE, LOAD and SAVE buttons start blinking indicating, that the router is in
bootloader mode. This state will remain until powering down the unit.
9. Start the download process by pressing OK button on the computer. The
download status appears on processbar. Never disconnect the RS232 cable
during firmware upgrade! When download completes, READY message
appeares in red colour.
10. Disconnect the router from AC power, than power it up again. After powering
the unit up, all buttons will light up for a while indicating, that the unit is ready
for operation. In case of failure repeat steps 7 to 10.
Info Once the firmware upgrade failed, the router will NOT indicate it's bootloader
enabled state with TAKE LOAD SAVE buttons blinking, because previous software
has been deleted, but steps 1 to 10 can still be repeated.
 Loading...