13 ENGLISH
Preparation before work
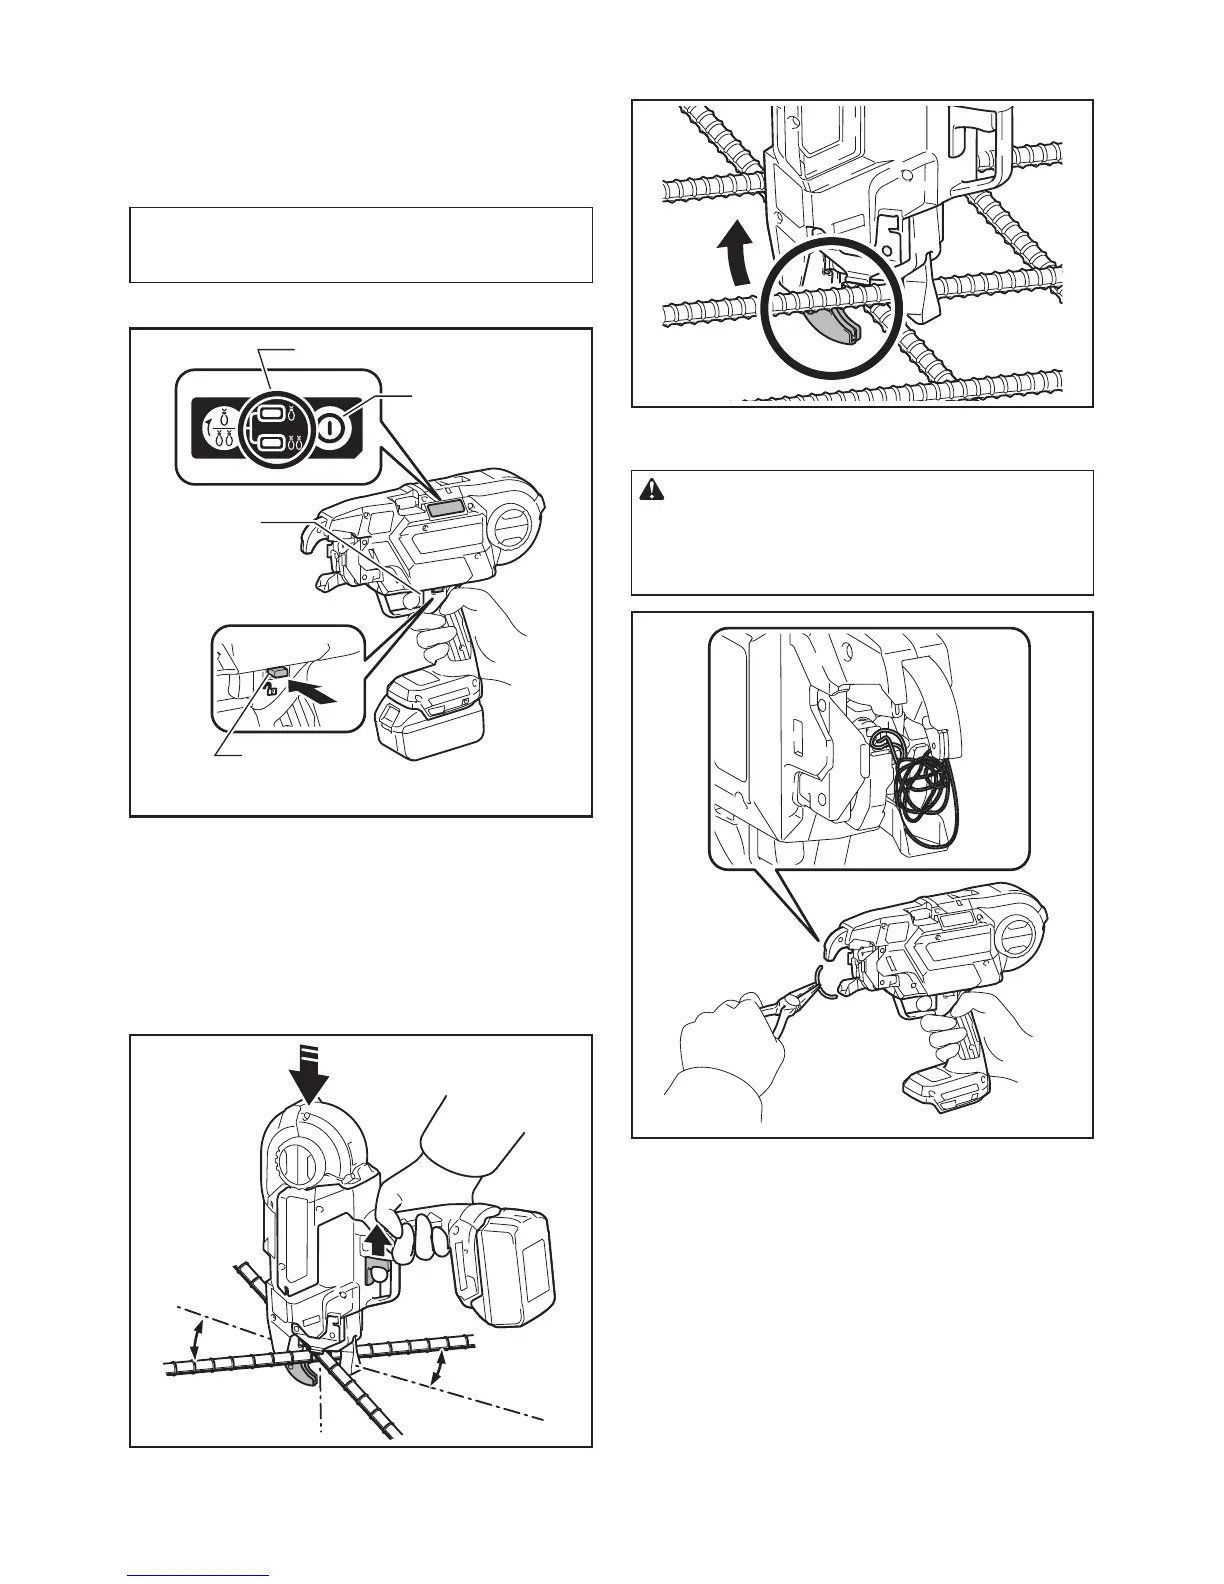
1. Make sure that the battery cartridge is removed
and the trigger is locked.
2. Insert the battery cartridge into the tool, and turn
the power on. When you turn the power on, the wire is
cut automatically.
NOTICE: Make sure that the tying mode lamp
lights up when the power is turned on. If it does
not light up, recharge the battery.
3. Release the trigger lock.
4
3
1
2
►1. Trigger-lock button 2. Switch trigger 3. Power
button 4. Tying mode lamp
Single actuation mode
1. Push the arm securely against the tying point.
Push the tool vertically against the rebars, and press
the arm against the point where the rebars cross at a
45-degree angle.
45°
45°
2. Pull the switch trigger once.
3. The wire is fed and cut automatically.
4. The hook holds and twists the wire, then returns to
the original position after the wires have been tied.
5. After tying, exercise care not to hook the arm on
the rebars and pull the tool up.
CAUTION: If the wire has clung to the binding
part of the tool tip, turn the power of the tool off.
Lock the trigger, remove the battery cartridge,
and remove the wire using tools such as nippers
or pliers.

 Loading...