8 ENGLISH
Overheat protection
When the tool or battery is overheated, the tool stops
automatically and the corresponding error number is
displayed on the display panel. In this case, let the tool
and battery cool before turning the tool on again.
Overdischarge protection
When the battery capacity is not enough, the tool stops
automatically and the corresponding error number is
displayed on the display panel. In this case, remove the
battery from the tool and charge the battery.
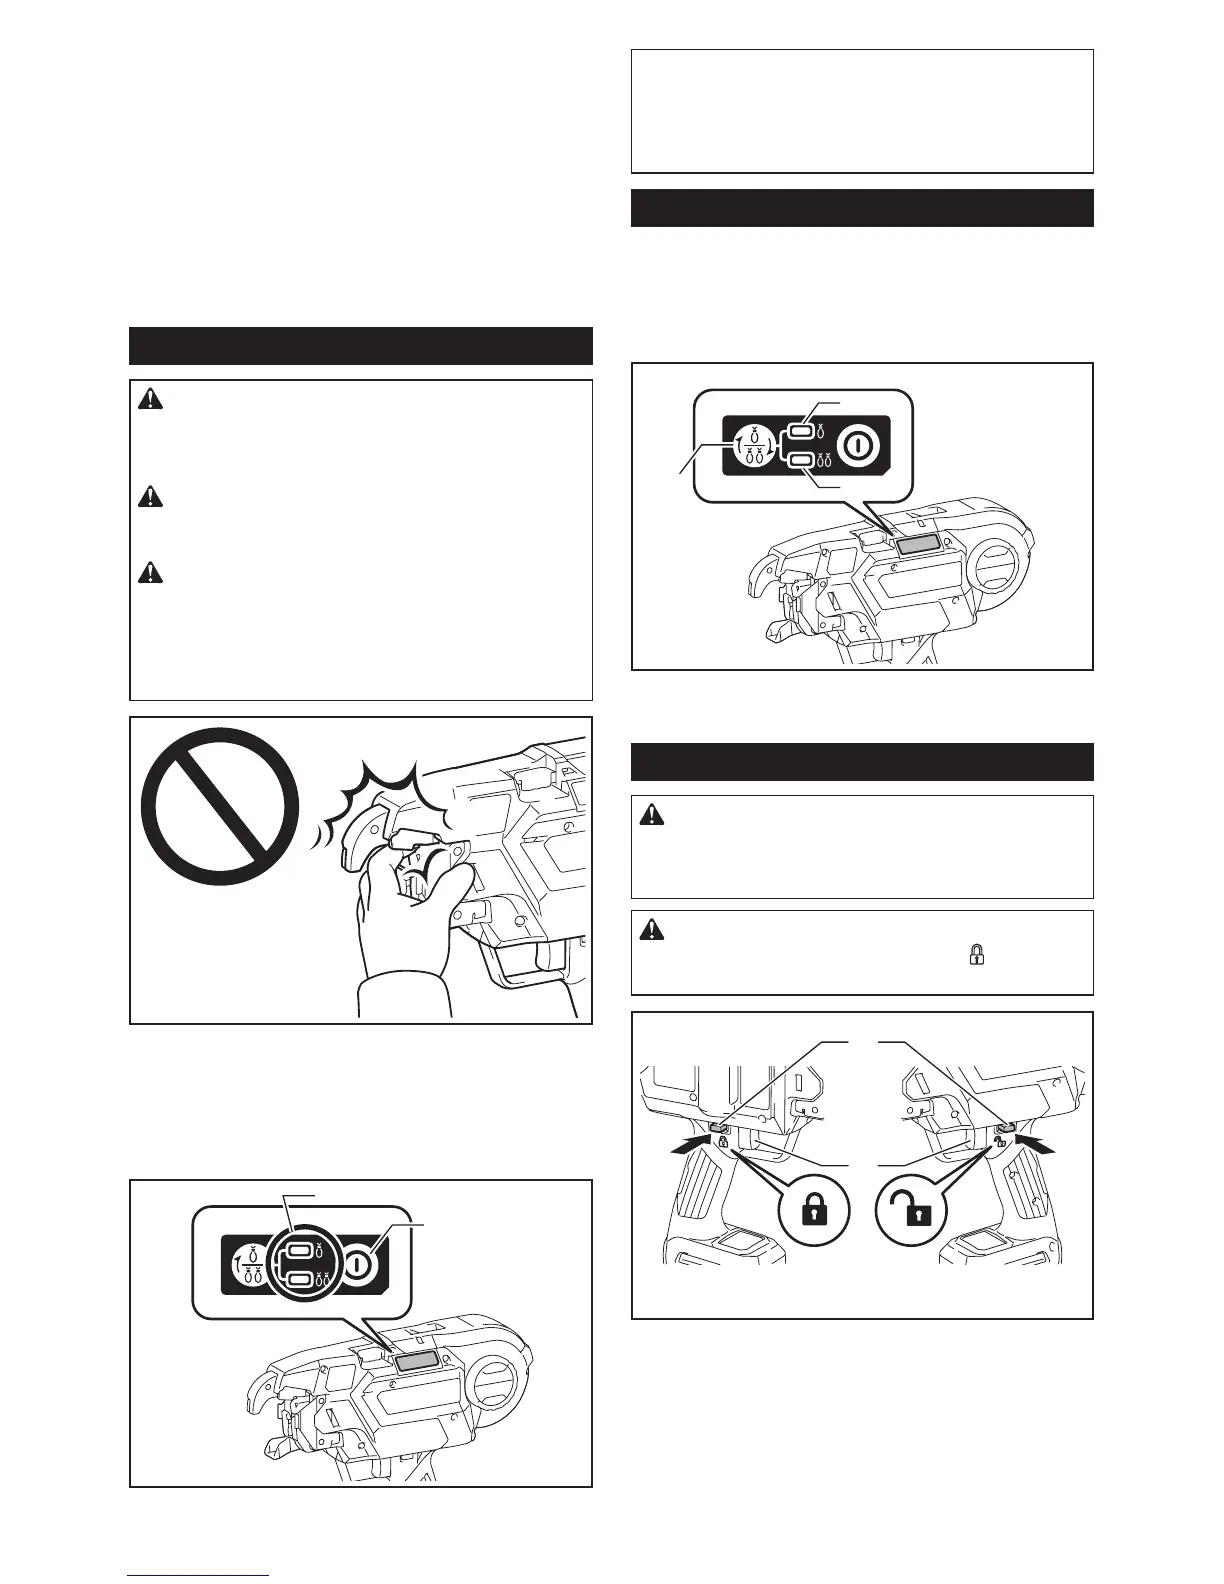
Main power switch
CAUTION: When you turn the power on, never
bring your limbs or face close to the binding or
rotating parts of the tool tip. Otherwise, you may
beinjured.
CAUTION: When the power is turned on,
never touch the binding or rotating parts of the
tool tip.Otherwise,youmaybeinjured.
CAUTION: Before inserting the battery car-
tridge, be sure to release your ngers from the
switch trigger and lock the trigger. If you insert
the battery cartridge while the switch trigger is being
pulled, it may cause an accident if the wire tying
process is accidentally carried out.
When you press the power button, the power turns
on and the tying mode lamp lights up. In order for the
tooltoadjustitsinitialposition,itoperatestemporarily.
Whenadjustmenthascompleted,thetoolstopsauto-
matically. When you press the power button again, the
power turns off and the tying mode lamp goes out.
1
2
►1. Tying mode lamp 2. Power button
NOTE: The tool has an auto power-off function. If the
switch trigger is not pulled for 10 minutes, the tool
is automatically turned off to reduce battery power
consumption.
NOTE: To restart the tool, turn the power on again.
Mode switching button
When the power is turned on and the tying mode lamp
is lit, you can select the single actuation mode or the
continuous actuation mode via the mode switching but-
ton. When you turn the power on again, the tool starts in
the mode that was most recently selected.
1
2
3
►1. Mode switching button 2. Single actuation mode
3. Continuous actuation mode
Switch action
WARNING: Before installing the battery car-
tridge into the tool, always check to see that the
switch trigger actuates properly and returns to
the "OFF" position when released.
CAUTION: When not operating the tool,
depress the trigger-lock button from
side to
lock the switch trigger in the OFF position.
2
1
AB
►1. Switch trigger 2. Trigger-lock button
To prevent the switch trigger from accidentally pulled,
the trigger-lock button is provided. To start the tool,
depress the trigger-lock button from A side and pull the
switch trigger. Release the switch trigger to stop. After
use, press in the trigger-lock button from B side.
 Loading...