17 ENGLISH
Assembling
Whencleaningisnished,assemblethepartsaccord-
ing to the following procedure.
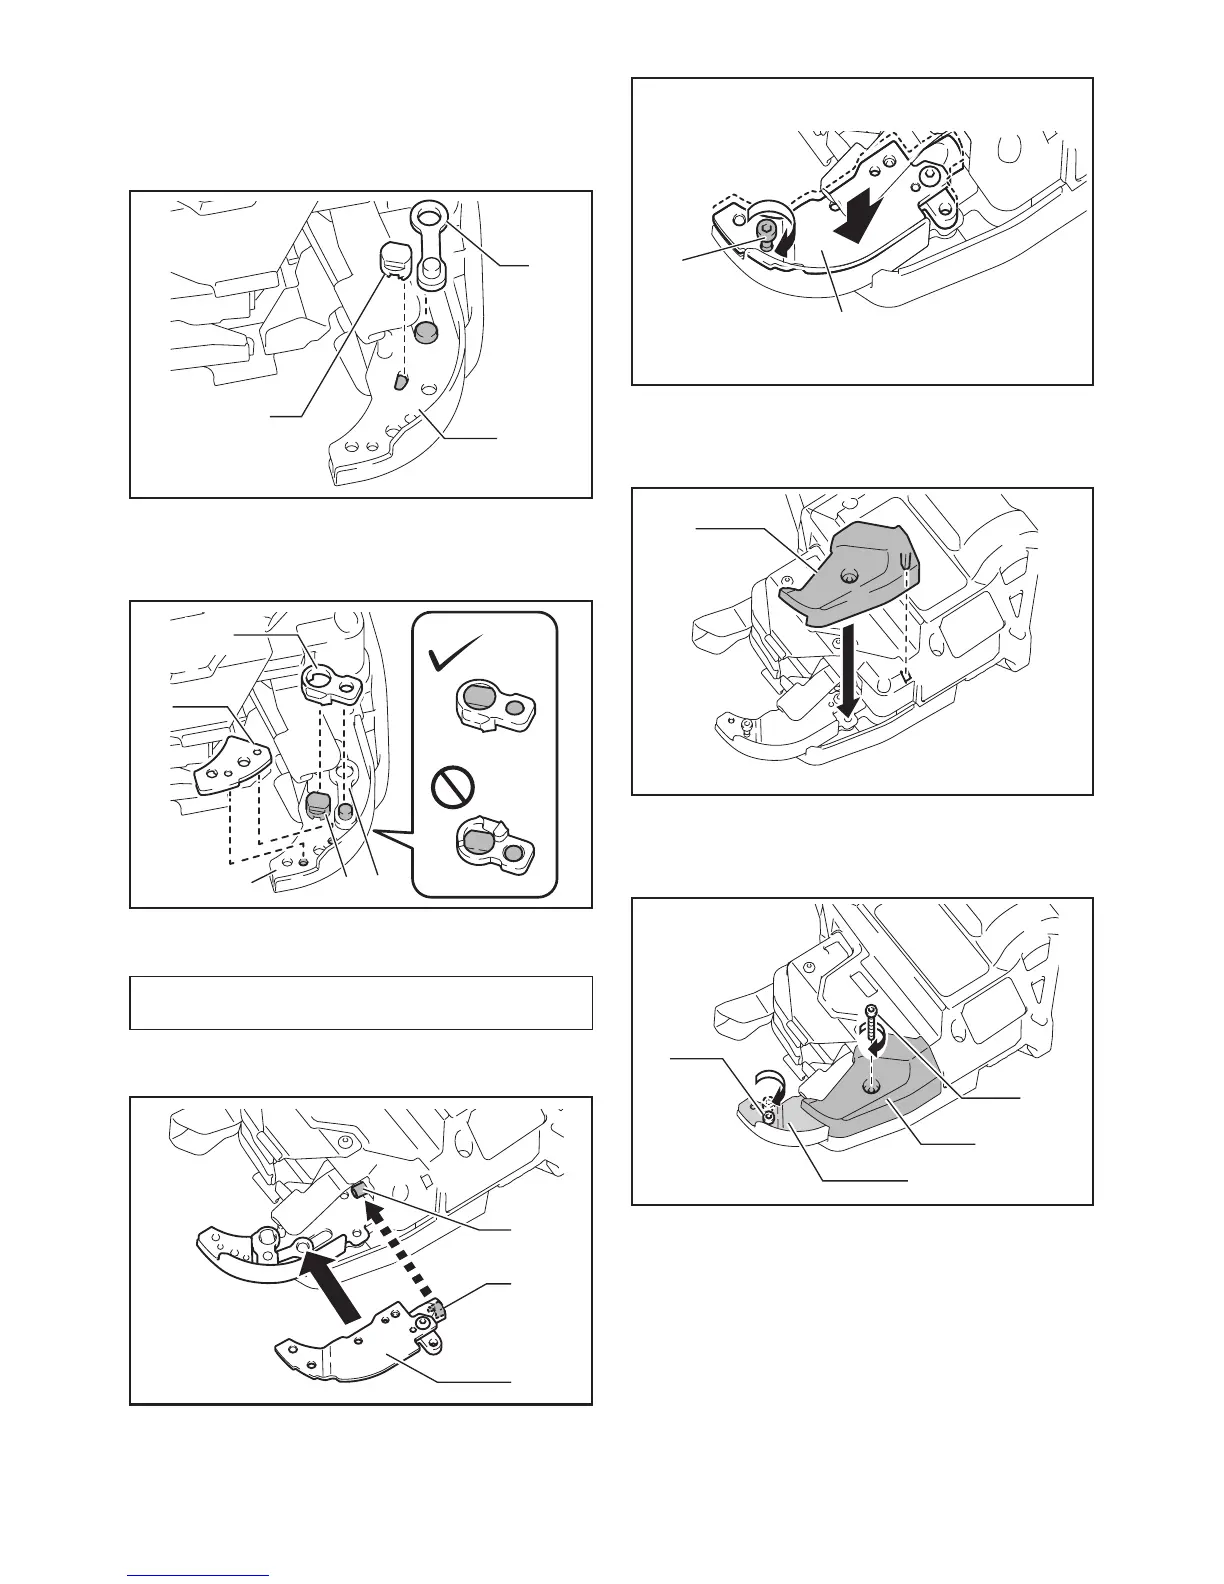
1. InstallcutterAandlinkarmAtottheshapeof
arm plate A.
1
2
3
►1. Cutter A 2. Link arm A 3. Arm plate A
2. Install cutter B and the top plate onto arm plate A.
(Install cutter B on cutter A and link arm A.)
1
2
3 45
►1. Cutter B 2. Top plate 3. Arm plate A 4. Cutter A
5. Link arm A
NOTICE: Face the projection of cutter B down-
ward, and install the cutter as shown in the gure.
3. Align the pipe of the tool with the groove inside the
wire guide B, and assemble them.
1
2
3
►1. Pipe 2. Groove 3. Wire guide B
4. Fix wire guide B by temporarily tightening bolt A.
1
2
►1. Bolt A 2. Wire guide B
5. Install the contact plate cover in the direction of
the arrow.
1
►1. Contact plate cover
6. Fix wire guide B and contact plate cover securely
by tightening bolt A and bolt B.
1
2
3
4
►1. Wire guide B 2. Contact plate cover 3. Bolt A
4. Bolt B

 Loading...