Manitowoc Published 05-15-17, Control # 043-09 4-41
999 LUFFING JIB OPERATOR MANUAL SETUP AND INSTALLATION
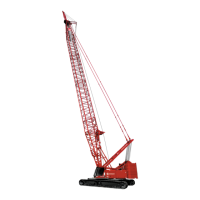
See Figure 4-20 for the following procedure.
1. Check that jib straps and links are in brackets and that
intermediate suspension pendants are clear of jib straps.
If not, luff up and down (raise and lower jib strut).
2. Attach lifting slings from assist crane between vertical
lacings and connectors at end of insert next to jib top
(Figure 4-18
, View A and Figure 4-20, View C).
3. Raise luffing jib with assist crane until jib point rollers are
approximately 1 ft (0,3 m) off ground.
4. Remove bottom pins between jib insert and top
(View F).
5. Lower jib top to ground (View A). LUFF UP as required
to keep jib straps from sliding down jib.
6. Pin rollers to bottom connectors at end of last jib insert
(View E).
To prevent excessive side load on boom and jib,
release 999 swing brake and disengage swing lock
while rollers are touching ground.
7. Lower jib until rollers are on ground and lifting slings are
slack.
8. Disconnect lifting slings from jib insert (View C).
9. Remove retaining pins from insert connectors (View E).
10. Remove pins from between links and straps on boom
top (View D) and rotate links back onto jib insert.
11. Store pins and collars in boom top straps.
12. Remove strap storage pins from stored position (View
D) and install in shipping position to secure boom top
straps (View E).
13. Unplug electric cable from boom top junction box (View
B) and store. Fasten dust cover to junction box.
14. If necessary, remove fixed jib backstay pendants from jib
top.
15. Disconnect jib stop cable from winch on boom top at
cable in jib butt.
16. Remove wind speed indicator from jib top to prevent
damage during shipping (see Wind Speed Assembly
drawing at the end of this section).
a. Disconnect electrical cable to wind speed indicator
at base of mounting bracket.
b. Remove nuts, star washers, and bolts from base of
wind speed mounting bracket.
c. Store wind speed assembly in a safe place on
crane.
17. Remove load line from jib top and tie it off securely to
end of last jib insert (Figure 4-16
, View E) with chain.
Load line should have some slack but be tight enough to
keep it from falling off top of inserts.
This step is required to prevent load line on boom side of
attachment from overhauling load line on jib side of
attachment.
18. Attach lifting slings from assist crane to jib top (four point
hook-up).
19. Remove jib top and set to side.
20. Slide round bar through connector holes in last jib insert
and through holes in strap links (Figure 4-16
, View D).
Bar must be installed to prevent straps from
accidentally sliding off inserts as boom and luffing
jib are lowered.
Lower Boom
See Figure 4-19 for the following procedure.
1. Attach lifting slings from assist crane at location shown
in Figure 4-17
, View D.
2. Using assist crane, raise partial jib so rollers are 1 - 2 ft
(0,3 - 0,6 m) above ground. Rollers must not touch
ground while completing steps 3
through 9.
3. Slowly BOOM DOWN until luffing jib stop pendants start
going into tension (168° boom to luffing jib angle).
Raise jib as needed with assist crane to keep rollers off
ground.
4. Disengage luffing jib stop strut pins (View C).
5. Slowly lower boom to retract inner strut stop and pin in
retracted position (View B).
6. Unpin luffing jib stop pendants (View B).
CAUTION
Structural Damage Hazard!
Prevent side load damage to boom and luffing jib:
• Do not induce any side load with assist crane.
• Disengage swing lock and release swing brake when
rollers are on ground.
CAUTION
Structural Damage Hazard!
To prevent structural damage while lowering boom:
• Do not allow jib rollers to touch ground. Maintain a 1 -
2 ft (0,3 - 0,6 m) clearance while lowering boom.
• Travel assist crane forward and hoist as needed to
maintain required clearance between jib rollers and
ground. Do not side load jib.
 Loading...


