3. Awning installation
1
4
2
3
5
6
67
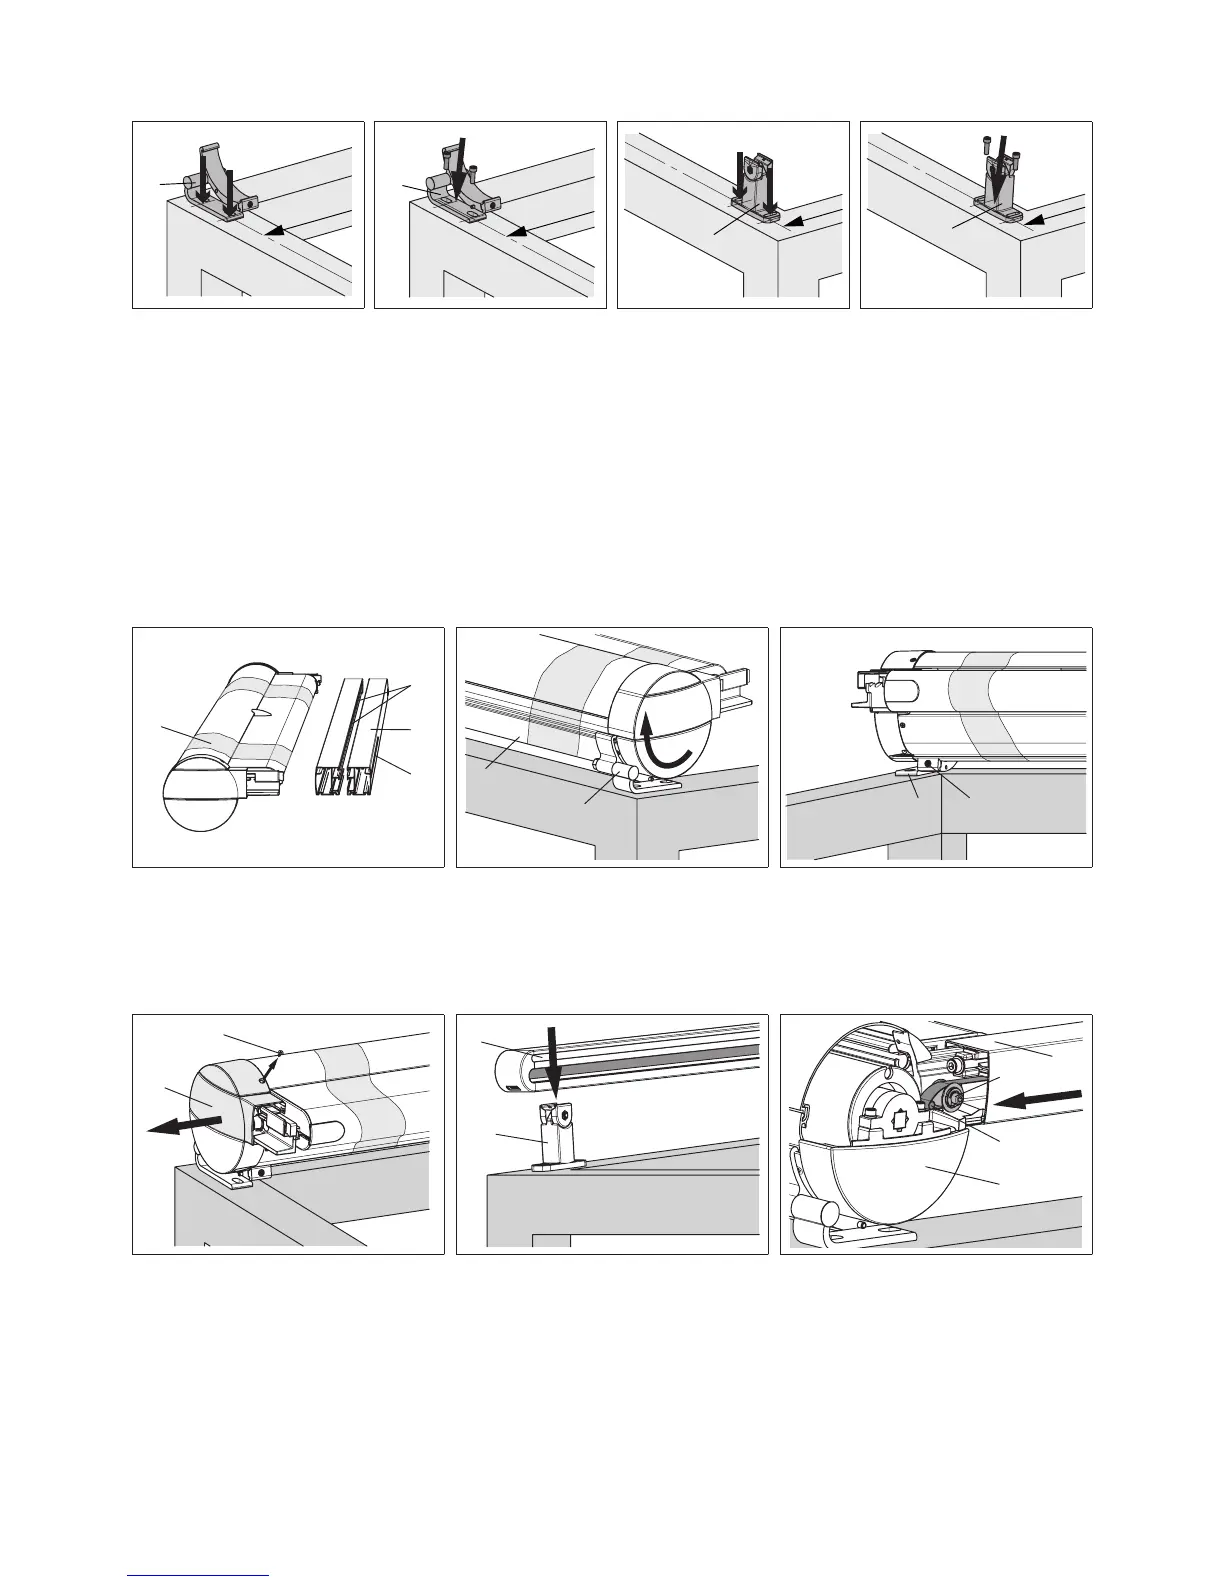
1. Unpack awning from the box (pay
attention to marking "top"). Do not
remove the protective foil (1) of the front
prole and the transport belt xings (3
- adhesive strips, 4 - Styrofoam wedges)
from the guide tracks (2).
2. Fit the cassette (5) to the bottom
xture bracket (6) you have already
tted.
3. Tighten the SW 5 allen key size
cheese-head screws in the clamp plate
(7) of the bottom xture brackets (6).
9
2
10
2
13
12
11
4. Unscrew the countersunk head screw
(8) at the left side cheek and remove the
inspection cover (9).
5. Place the left guide track (2) the on
track bracket (10) and clip it in place; do
not screw it down tight yet.
6. Slide the guide track prole (2) about
2 to 3 cm over the rollers of the front pro-
le bogey onto the end cap (11).
Remove the tape holding the drive belt
in place (adhesive strip) from the guide
track prole. The lug-end of the drive
belt (12) must be fed over the belt roller
(13).
2. Fitting the brackets (e.g. bottom xture)
1
MA
MA
1
MA
2
2
MA
1. Hold the cassette bracket
(1) in place, mark the drill
holes at axial distance from
one another and drill (M8
screws).
Attention! All brackets
must be aligned with each
other!
2. Fix the bottom xture
cassette brackets in place(1).
3. Hold the track brackets (2)
in place [from H = 401 cm,
also (3)], mark the xing
points at axial distance from
one another and drill the
holes (M8 screws).
Attention! Observe
respective gure under
chapter 1.3.1 to 1.3.3!
4. Fix the track brackets (2) in
place. Measure all brackets
diagonally!!
 Loading...