markilux 8800 / 8800 tracx coupled units
02-06-2014 7061442 TK + QS
Attention! Observe the technical instructions as for the single unit!
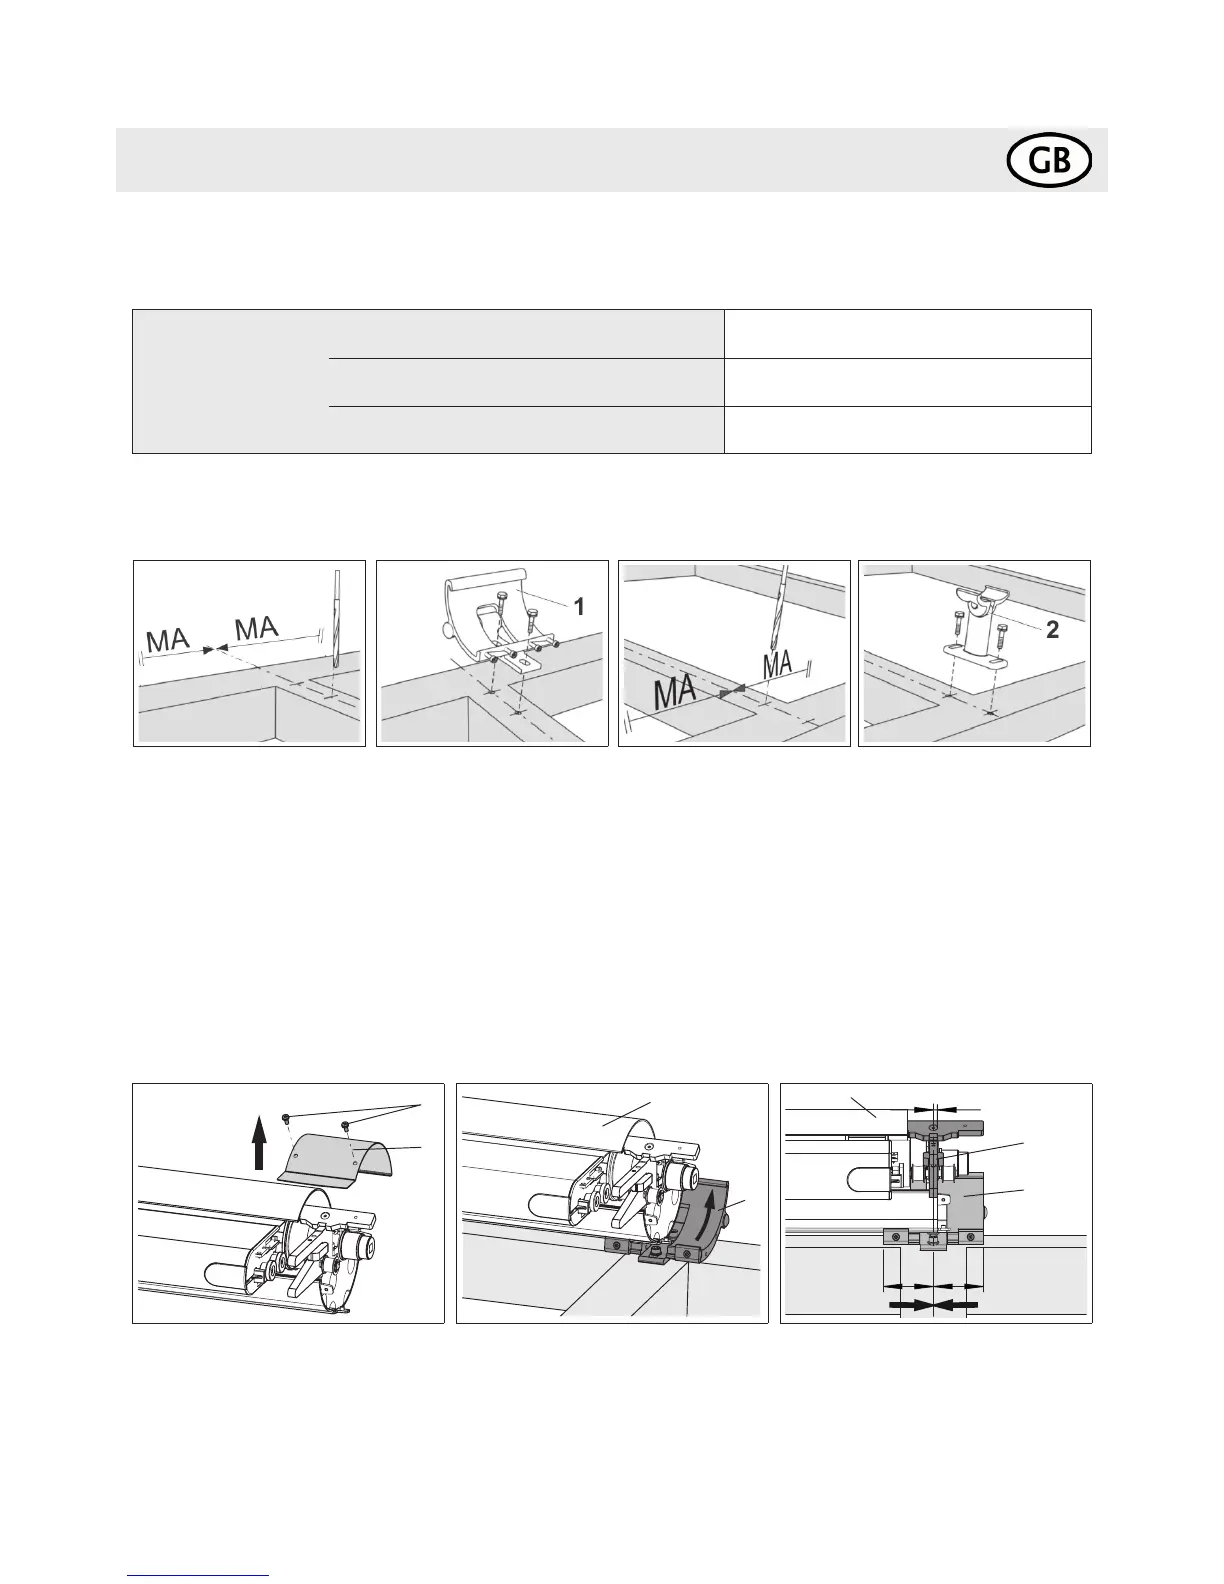
7. Fixing the coupling bracket (example bottom xture)
Place the brackets as described in the instructions for the single unit. The middle brackets are to be xed as follows:
1. The coupling bracket is
centred directly at the coup-
ling spot of the awning!
Hold the bottom coupling
bracket (1), mark the drill
holes at axial distance from
one another and drill (screws
M 8).
Attention! All brackets
must be aligned with each
other!
MA = awning xture width
2. Fix coupling bracket (1). 3. Hold the track brackets (2),
mark the xing points at axial
distance from one another
and drill the holes (M8
screws). A second track
bracket has to be tted from
an extension of 401 cm.
4. Fix the track brackets (2) in
place. Measure all brackets
diagonally!!
8. Couple single awnings
5
4
75 75
1. Unscrew the raised head screws (1)
and remove the inspection cover (2).
2. Fix the drive awning (3) in the bottom
xture bracket (4). The bottom coupling
bracket has to be aligned centred.
3. Align the drive awning (3) in such a
way that the coupling point of the casset-
tes (5) is in the middle of the bottom
coupling bracket (4).
[dimensions in mm]
6.3 Motor connection data coupled unit markilux 8800 / 8800 tracx
markilux 8800 / 8800
tracx
wireless (433 MHz) U = 230 V~ / 290 W, 50 Hz, I = 1.25 A
with radio IO technology (868 - 870 MHz) U = 230 V~ / 290 W, 50 Hz, I = 1.50 A
wired U = 230 V~ / 260 W, 50 Hz, I = 1.15 A
 Loading...