36
1. Turn o power and disconnect the cord from the machine.
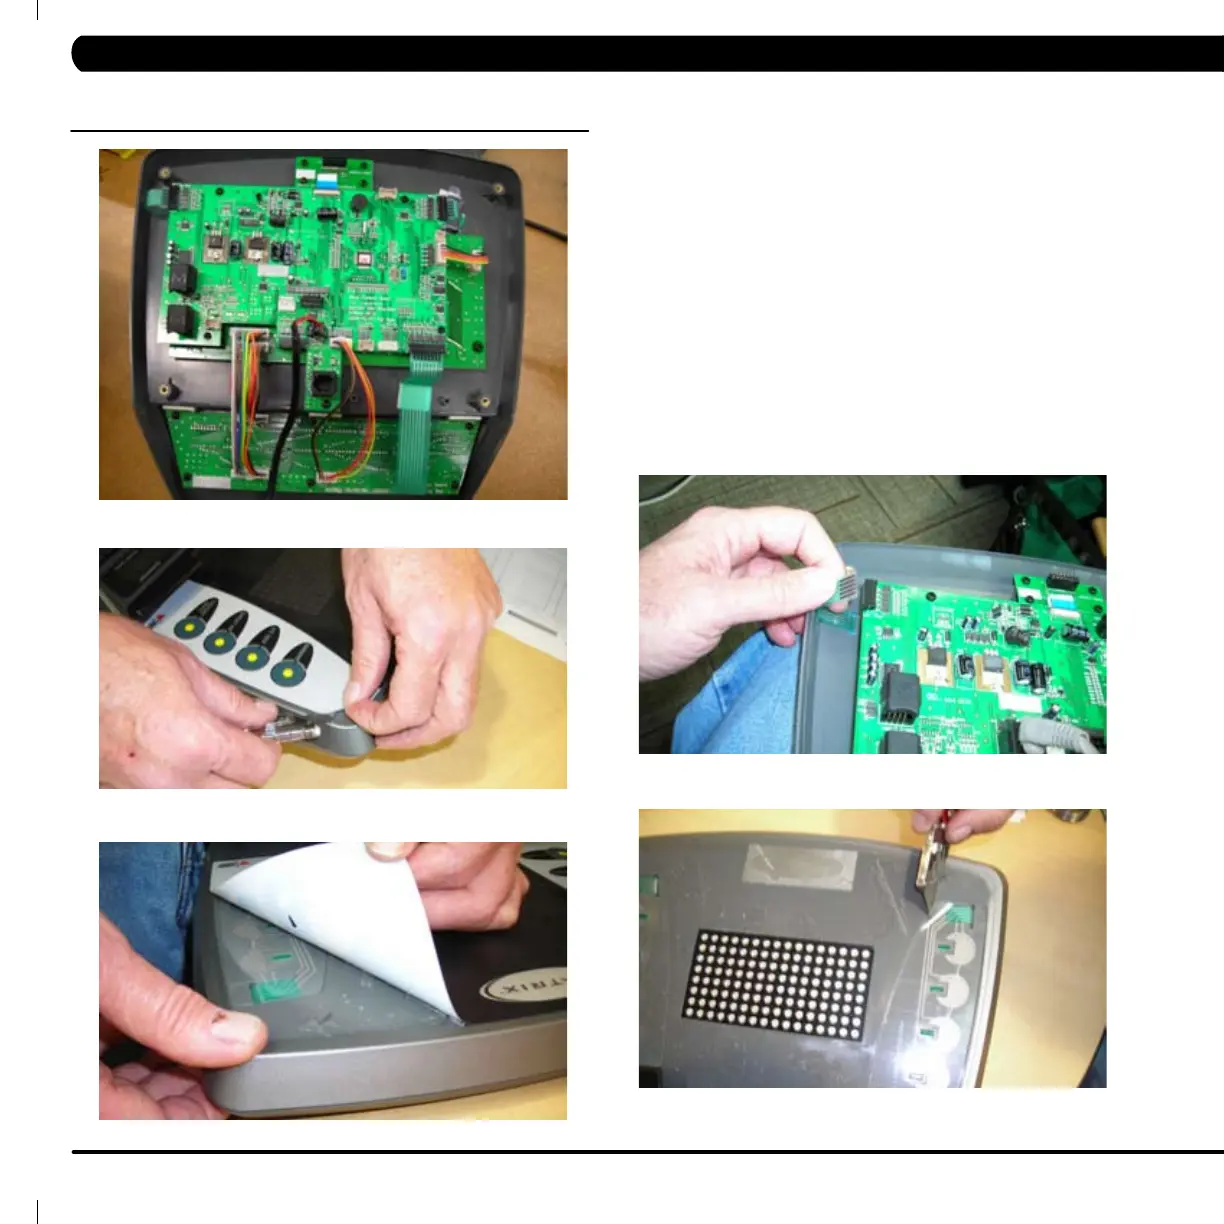
2. Disconnect the console from the machine as outlined in section
9.9 and remove the back of the console. 6 screws (Figure A)
Note: skip this step if not changing keypads.
3. Using a razor blade, carefully peel up one corner of the overlay
(Figure B) and then remove the entire overlay. (Figure C) Remove
excess adhesive from the plastic.
4. Remove the keypad(s) by disconnecting the ribbon(s) from the
circuit board. (Figure D) Use a razor to peel up an edge of the
keypad and remove from console. (Figure E)
Figure A
Figure D
Figure B
Figure C
Figure E
9.8.1 CONSOLE – OVERLAYS & KEYPADS REM0VAL AND INSTALLATION
CHAPTER 9: PART REPLACEMENT GUIDE

 Loading...