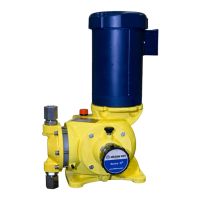
20
Disassembly
1. Remove oil drain plug and drain oil.
2. Remove screws that attach motor to pump.
3. When removing a direct motor unit (XT only);
worm shaft may come out as well. If motor
separates from worm shaft, use care not to
lose shaft key.
4. When removing a API mounted motor, the
entire motor, mount and coupling can be
removed as a unit if separation is made by
removing lower bolts (XT, Item 400, Figure
10 and 11 or XW, Item 770, figure 13).
5. Remove worm assembly.
6. Inspect components and replace any that
are worn.
Reassembly
1. Reinstall by reversing steps 1 through 4.
4.8.3 Worm Gear
Disassembly
1. Remove motor assembly, following instruc-
tions shown in “Motor and Worm Compo-
nents” section.
2. Remove worm gear shaft.
3. Lift worm gear (XT, Item 320, Figures 9, 10,
and 11 or XW, Item 120, Figure 13) up and
out of pump housing.
4.8.4 Connecting Rod
Disassembly
NOTE: The worm gear must first be removed.
1. Lift connecting rod up and back to disengage
piston from bore.
2. Use arbor press or hammer and brass punch
to remove wrist pin from connecting rod and
plunger.
3. To asure proper installation, note position of
oil hole in connecting rod (bottom).
Reassembly
1. Reverse steps 1 through 3 above. Be sure
oil hole in connecting rod is on bottom, as
noted in step 3.
4.8.5 Stroke Adjuster (XT, Figure 7)
1. Remove drain plug at bottom of XT pump,
and drain pump of all oil.
2. Unscrew and remove stroke locking knob
(Item 70, Figure 7). Remove e-clip (Item 90)
and adjuster knob (Item 100).
3. Using a 1/16” hex wrench, remove set screw
(Item 60) from stroke adjuster seal cap (Item
40). Remove control rod (Item 80).
4. Using a 1-3/8” wrench, unscrew stroke
adjuster seal cap (Item 40). Remove O-rings
(Items 130, and 30) and back-up ring (Item
120) from seal cap.
5. Clean all components with an appropriate
solvent. Contact Milton Roy for a recom-
mended solvent. Inspect al parts and
replace them if they are worn.
Reassemble the XT Stroke Adjuster as Follows:
1. Slide O-rings (Items 130 and 30) and back-
up ring (Item 120) into appropriate grooves in
stroke adjuster seal cap (Item 40). Apply O-
ring lubricant (or equivalent grease) to out-
side surface of O-rings.
2. Carefully screw stroke adjuster seal cap into
pump housing, so O-ring (Item 30) does not
fall out of recess in face.
3. Tighten stroke adjuster seal cap (Item 40)
until snug.
4. Apply O-ring lube (or equivalent grease) to
outside surface of control rod (Item 80) and
insert it into seal cap.
5. Apply a removable thread-locking adhesive
to set-screw (Item 60). With slot in control
rod located at 12 o’clock, and rod fully
 Loading...