MN003109A01_aa
Standard Configurations Radio Mounting 2-33
2.2.2.3 Cable Installation
Route the cables where they are protected from pinching, sharp edges or crushing. Use grommets in
any holes where the cable passes through metal panels. Figure 2-20 shows how the cables and
components are connected. It is not recommended to route cabling or wiring inside the wheel wells
of a vehicle.
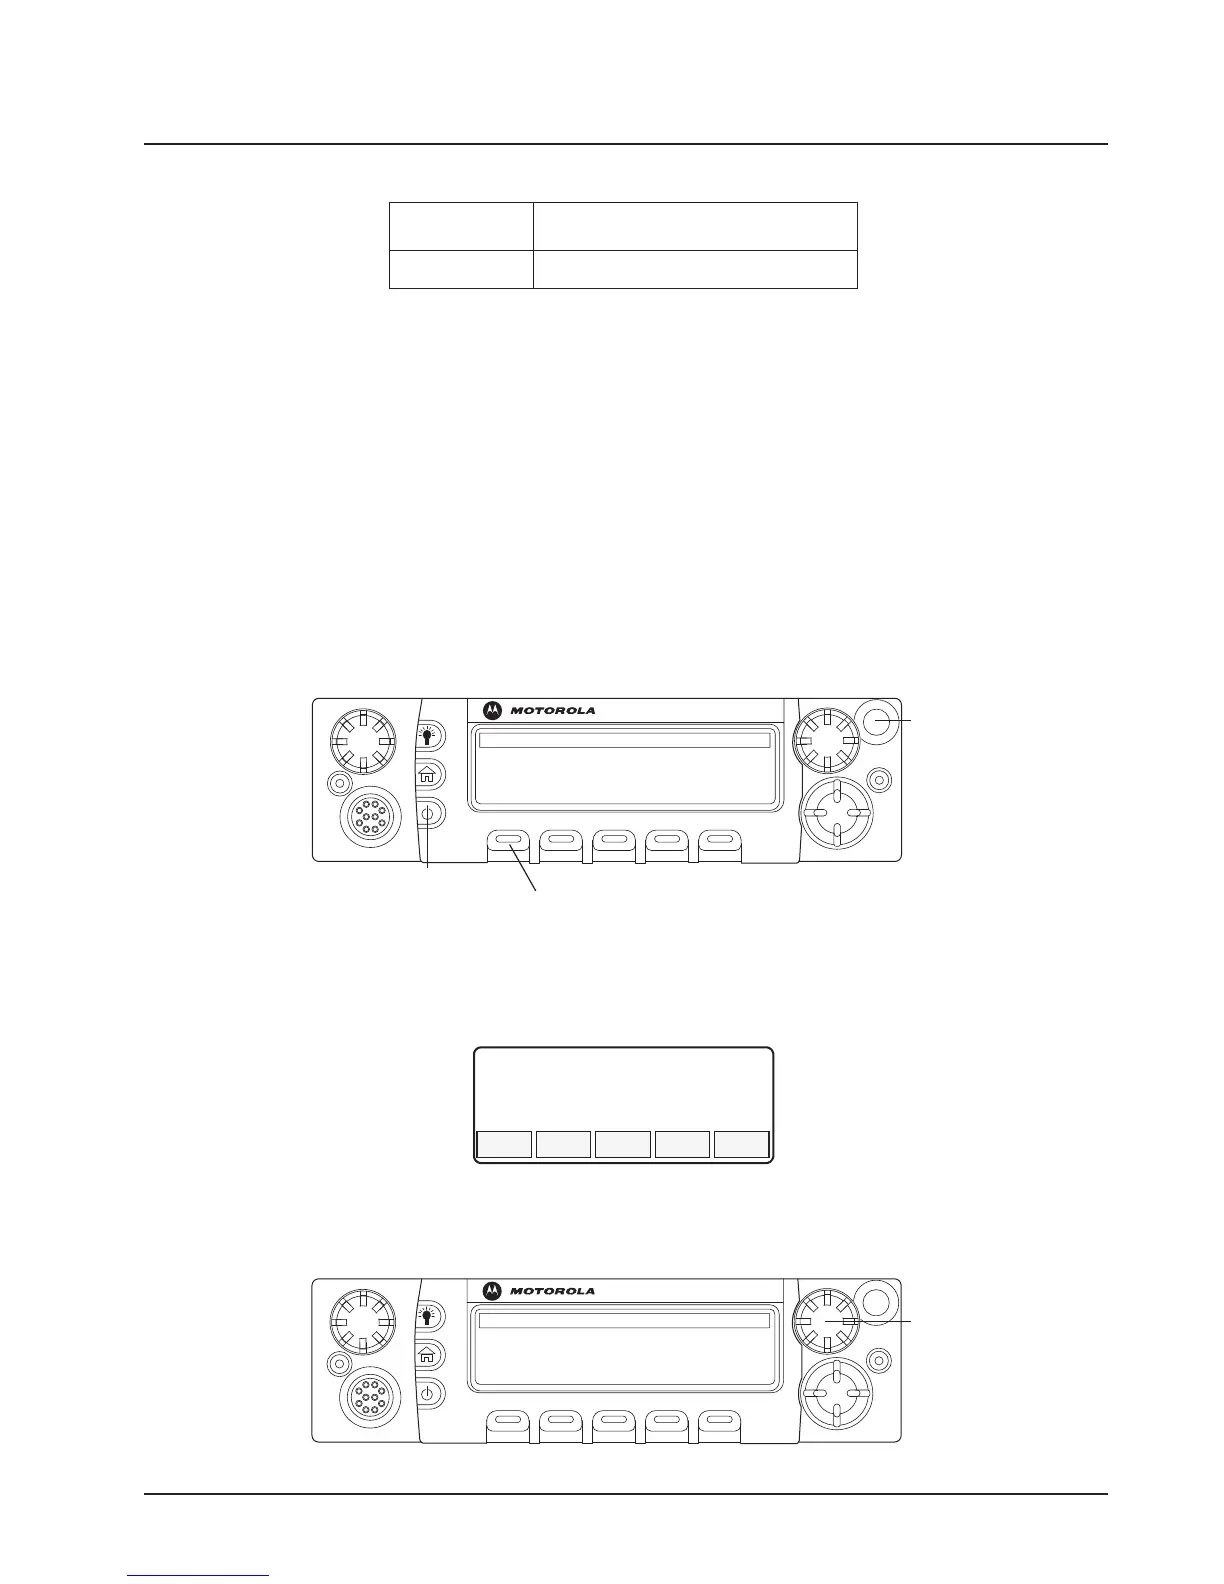
2.2.2.4 Setting the Initial Control Head ID
The Front Panel Programming (FPP) mode allows you to define which control head in a Multi Control
Head system becomes control head number 1-4.
Set the control head ID number for each attached head the first time Multi Control Head is used.
1. Press the power button to power off the radio.
2. Press and hold left-most menu and the orange button on the control head simultaneously.
Figure 2-36. APX Mobile O5 Control Head Front View
3. Press the power button to power on the control head. The head powers on into FPP mode
and display the current control head ID number:
Figure 2-37. Radio Display with Current Control Head ID
4. Turn the Mode knob to change the control head ID number.
PMLN4958_ Cable, O3 Extension, 5 m (17 ft)
Table 2-7. Available CAN Cables
Part Number Description
O5
Left-most
Menu Button
Power Button
Emergency
Button
CH ID#
1
O5
Mode Knob
Draft
 Loading...


