31
ENGLISH
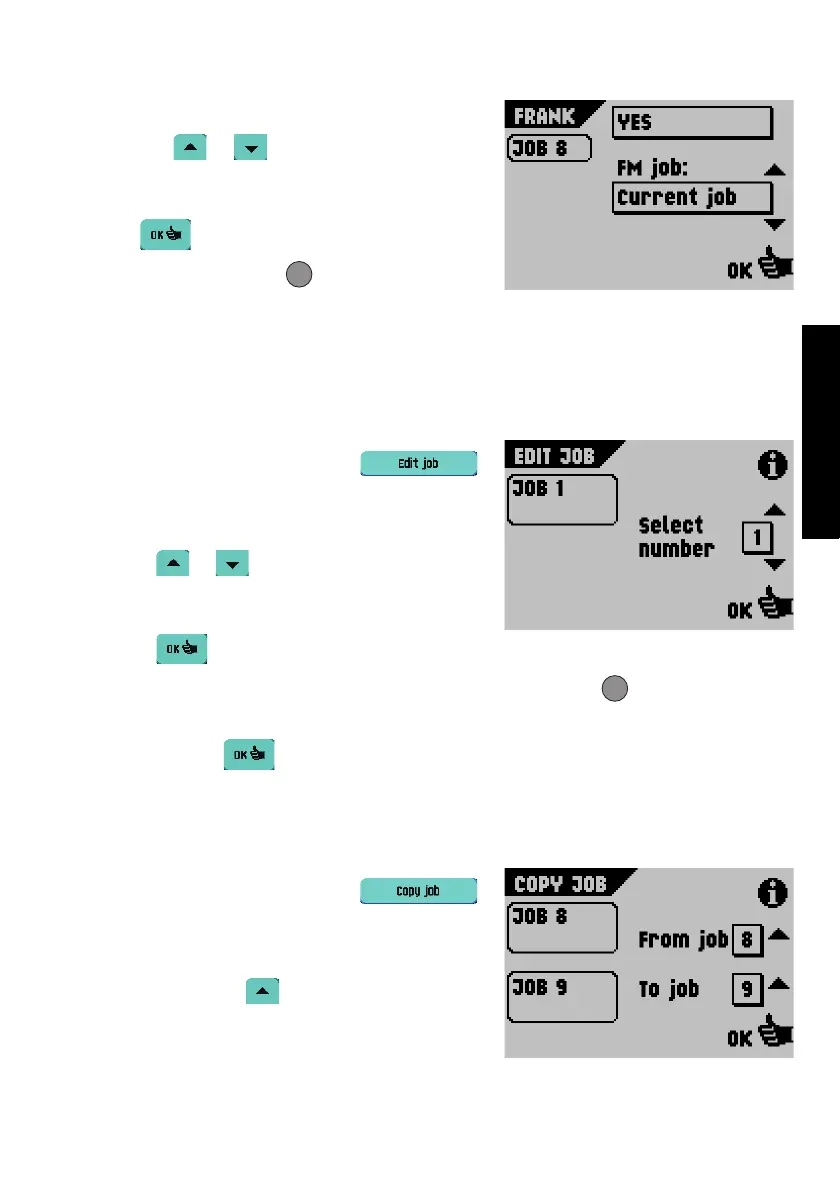
- When “Yes” is displayed, mailing/franking is
enabled.
- Select or to remotely select a
mailing/franking job for the mailing/franking
machine.
• Select to confirm the changed settings, or
press the escape button to return to the
previous screen without changing the settings.
Refer to the appendix for an extensive description of this option.
4.4 Edit job
This function allows you to edit a job.
From the Job Menu 1 screen, select .
The Edit Job screen will appear (see also “Note: The
number of feeders varies with the configuration, just
like the system's functions.” on page 21).
1. Select or to select a higher or lower job
number. The selected job number will be
displayed in the black box.
2. Select to confirm the selected job number
and to go to the following screen, or press the escape button to return to the
previous screen without changing the settings.
After selecting , the Job Settings screen for the selected job will be displayed.
This screen is described in chapter “Create job” on page 23.
4.5 Copy job
This function allows you to copy a job.
From the Job Menu 2 screen, select .
The Copy Job screen will appear (see also “Note:
The number of feeders varies with the configuration,
just like the system's functions.” on page 21).
1. Select “From job” to select the job you want
to copy from. The selected job will be displayed
in the black box.
ESC
ESC

 Loading...