28
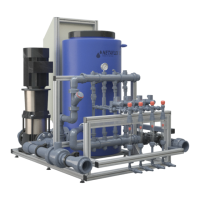
NETAJET
™
4G USER MANUAL
TROUBLESHOOTING
If there is no clogging but the dosing valve
F
D
still does not open - replace it
(consult your Netafim™ representative).
9) Visually check the non-return valve
G
for any internal deformation or damage to its flat ring gasket.
If present - replace the non-return valve (consult your Netafim™ representative).
10) Check the non-return valve
G
for clogging by injecting water at low pressure through it
(make sure to respect the direction of flow).
If there is clogging - thoroughly clean the non-return valve
G
with running water.
11) Disconnect the Venturi
H
from the manifolds and from the dosing channel and check it for clogging,
visually and by injecting water through it at low pressure.
If there is clogging - thoroughly clean the Venturi
H
with running water.
12) Visually check the Venturi
H
for chemical damage (internal deformation).
If internal deformation is present - replace the Venturi (consult your Netafim™ representative).
If after implementing all the above steps the malfunction is still not fixed - consult your Netafim™ representative.
Symptoms while idle
If the following symptoms occur while the NetaJet™ 4G is idle, perform the actions listed below:
Controller warnings
• High EC
• Low pH
• While idle - Uncontrolled fertilizer/acid flow rate or a fertilizer/acid leak or breach
Action
NOTE
• When using an analog dosing valve, make sure the dosing valve selector is in the AUTO position.
• When using a digital dosing valve (S22), make sure the dosing valve selector is in the CLOSED
position.
Check if the dosing valves leak when closed:
1) Close all the manual valves
B
for fertilizers and acid.
2) Make sure the level of the solution in all the the stock tanks is higher than the
dosing valves.
3) With the controller in MANUAL mode, set all the dosing valves to OFF
(see the enclosed Controller Manual).
4) Disconnect one of the the dosing valves from the non-return valve
(downstream from the dosing valve).
5) Open the fertilizer manual valve
B
.
If a leak from the dosing valve is visible - disconnect the dosing valve from the dosing channel.
6) With the controller in MANUAL mode, set the dosing valve to ON
(see the enclosed Controller Manual).
7) Thoroughly clean the dosing valve with running water.
8) Repeat steps 4-7 for each fertilizer and acid dosing channel.
 Loading...