Network Settings
22
ProSAFE 8-Port and 16-Port Gigabit Web Managed Click Switch
from links that do not contain a multicast listener. Essentially, IGMP snooping helps optimize
multicast performance at Layer 2 and is especially useful for bandwidth-intensive IP multicast
applications such as IPTV.
Use Browser-Based Access to Customize IGMP Snooping
By default, IGMP snooping is enabled. You can customize the settings for your network.
To customize IGMP snooping:
1. Connect your computer to the same network as the switch.
You can use a WiFi or wired network connection, or connect directly to a switch that is
of
f-network using an Ethernet cable.
2. Launch a web browser.
3. In the address field of your web browser
, enter the IP address of the switch.
If you do not know the IP address of the switch, see Access the Switch Using a Web
Browser on page 14.
The login window opens.
4. Enter the switch’
s password in the password field.
The switch’s default password is password.
The Switch Information page displays.
5. Select System > Multicast.
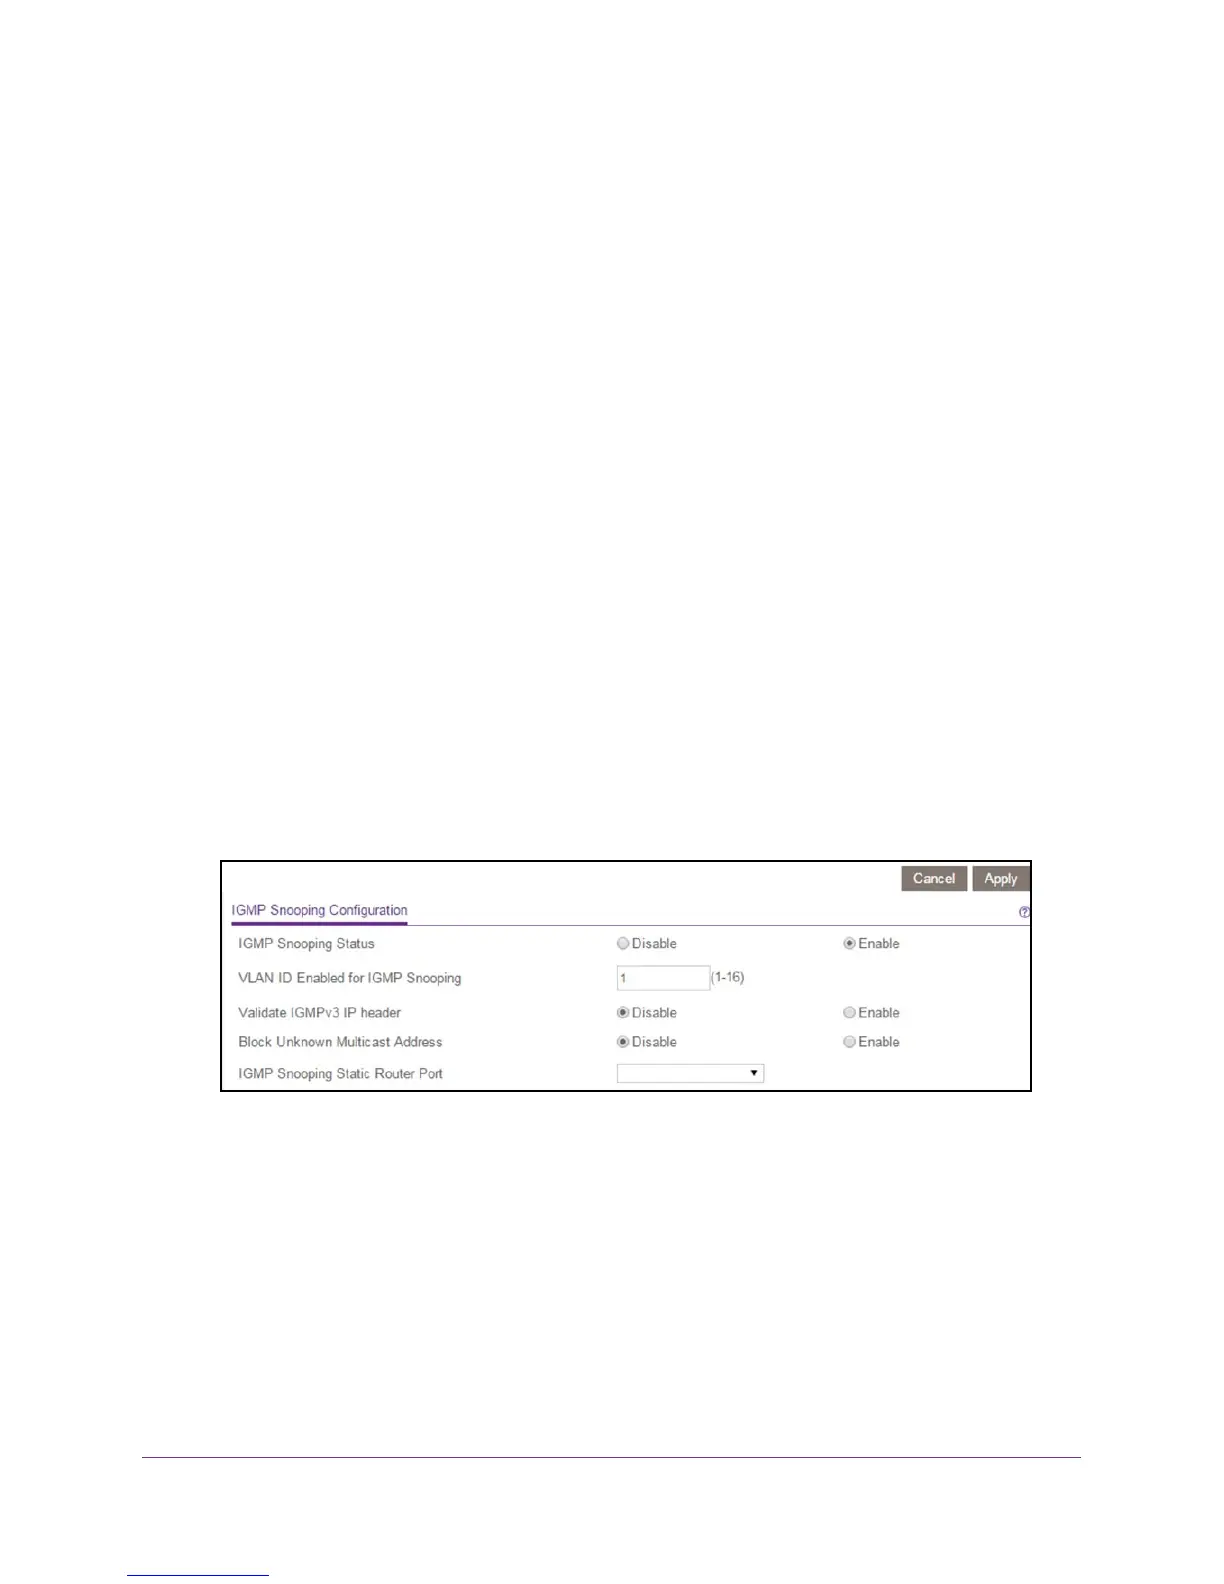
6. Select the IGMP Snooping Status Enable radio button.
7. (Optional) Select the V
alidate IGMPv3 IP header Enable radio button.
Some network devices might not conform to the IGMPv3 standard. When the Validate
IGMPv3 IP header option is enabled, IGMP messages are required to include
TTL = 1,
ToS Byte = 0xC0 (Internetwork Control), and the router alert IP option (9404) must be set.
Otherwise, the packets are ignored.
8. (Optional) Select the Block Unknown MultiCast
Address Enable radio button.
When this feature is enabled, multicast packets are forwarded only to the ports that are in
the multicast group learned from IGMP snooping.
All unknown multicast packets are
dropped.
 Loading...