Preparations
1.
Check that the switch (SF1) is in position " ".
2.
Check for water in any hot water heater and climate
system.
Caution
Check the miniature circuit-breaker and the
motor protection breakers. They may have
tripped during transportation.
NOTE
Do not start F1155 if there is a risk that the
water in the system has frozen.
NOTE
At the time of commissioning, complete all
relevant sections of the Benchmark Checklist
located at the back of this document.
Completion of the Benchmark Checklist is a
condition of warranty. For full terms and condi-
tions of warranty, please see our website
nibe.co.uk.
Filling and venting
Caution
Insufficient venting can damage internal com-
ponents in F1155.
FILLING AND VENTING THE CLIMATE
SYSTEM
Filling
1.
Open the filling valve (external, not included in the
product). Fill the climate system with water.
2.
Open the vent valve.
3.
When the water that exits the vent valve is not
mixed with air, close the valve. After a while the
pressure starts to rise.
4.
Close the filling valve when the correct pressure is
obtained.
Venting
1.
Bleed the heat pump via a vent valve and the rest
of the climate system via their relevant vent valves.
2.
Keep topping up and venting until all air has been
removed and the pressure is correct.
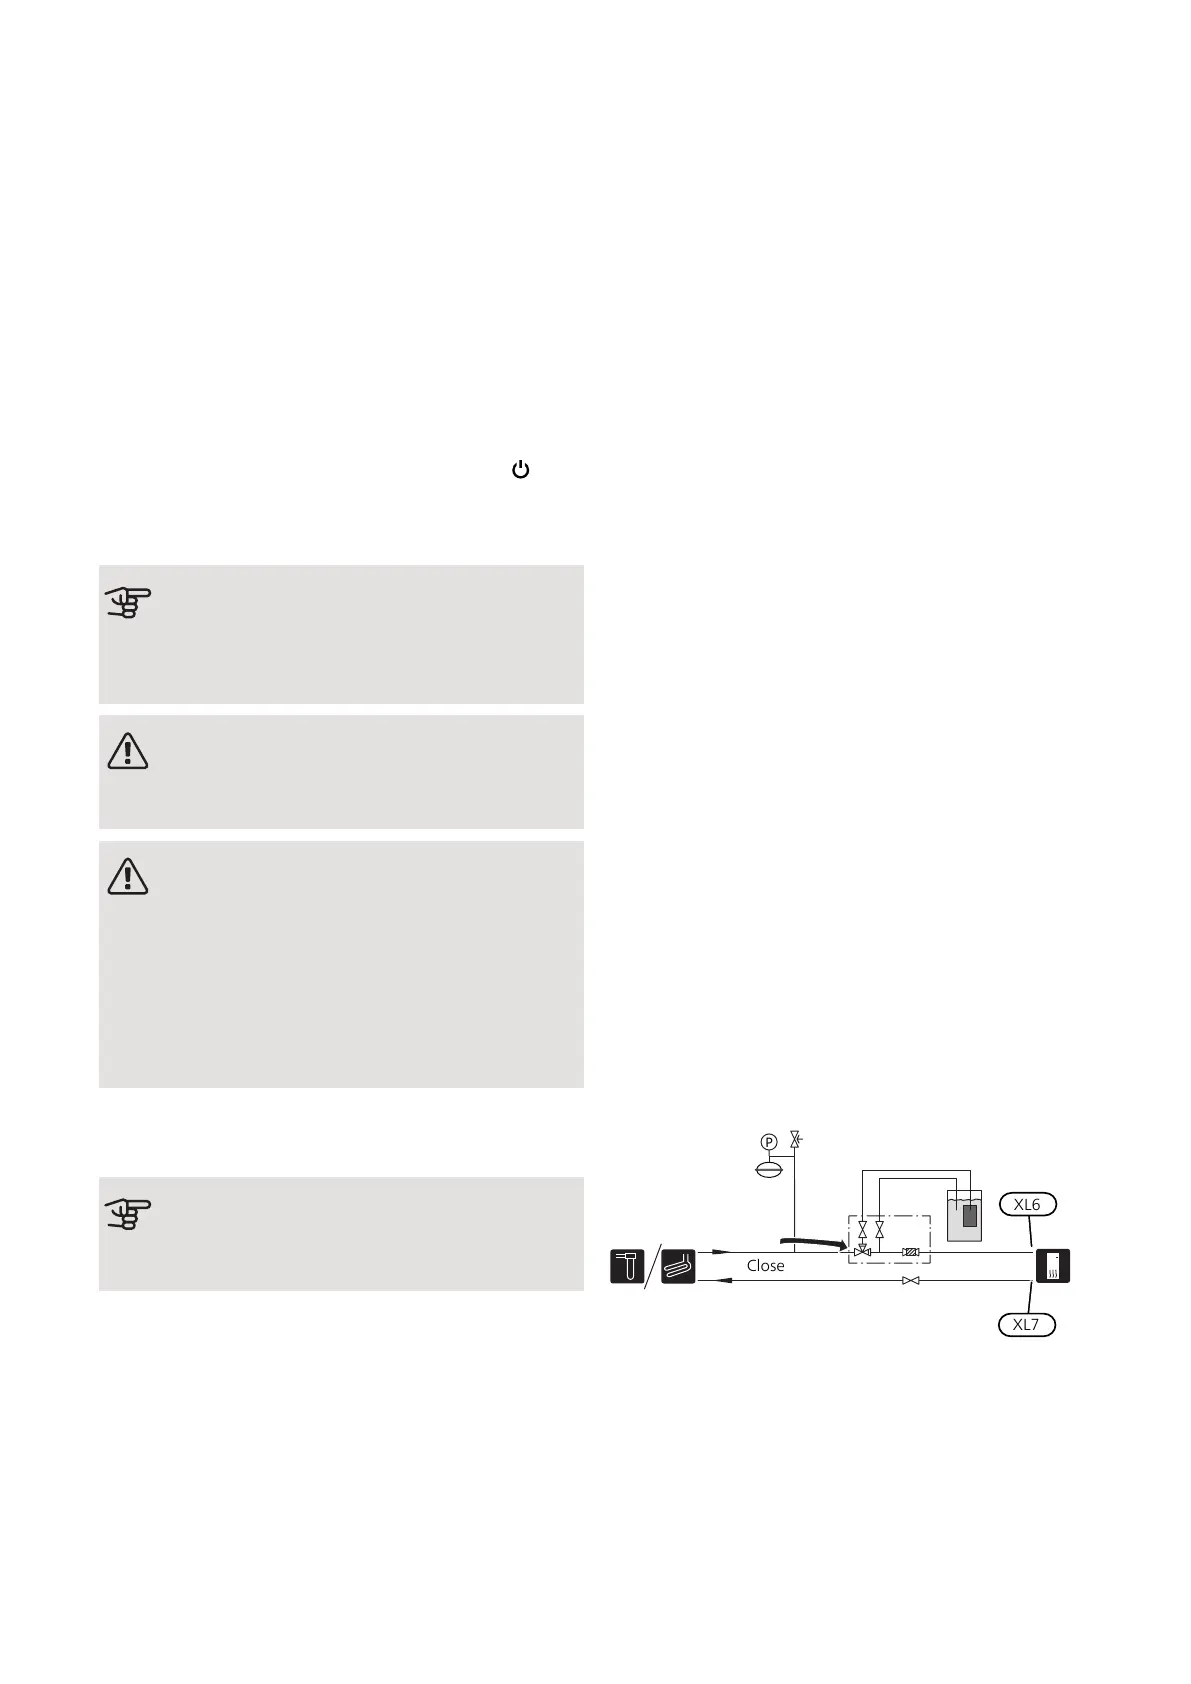
FILLING AND VENTING THE BRINE SYSTEM
When filling the brine system, mix the water with anti-
freeze in an open container. The mixture should be
protected against freezing down to about -15°C. The
brine is topped up by connecting a filling pump.
1.
Check the brine system for leakage.
2.
Connect the filling pump and return line on the brine
system's filling connection (accessory).
3.
Close the reversing valve in the filling connection.
4.
Open the valves on the filler connector.
5.
Start the filling pump.
6.
Fill until liquid enters the return pipe.
7.
Close the valves on the filler connector.
8.
Open the reversing valve in the filling connection.
NIBE F1155Chapter 6 | Commissioning and adjusting30
6 Commissioning and adjusting
 Loading...