14
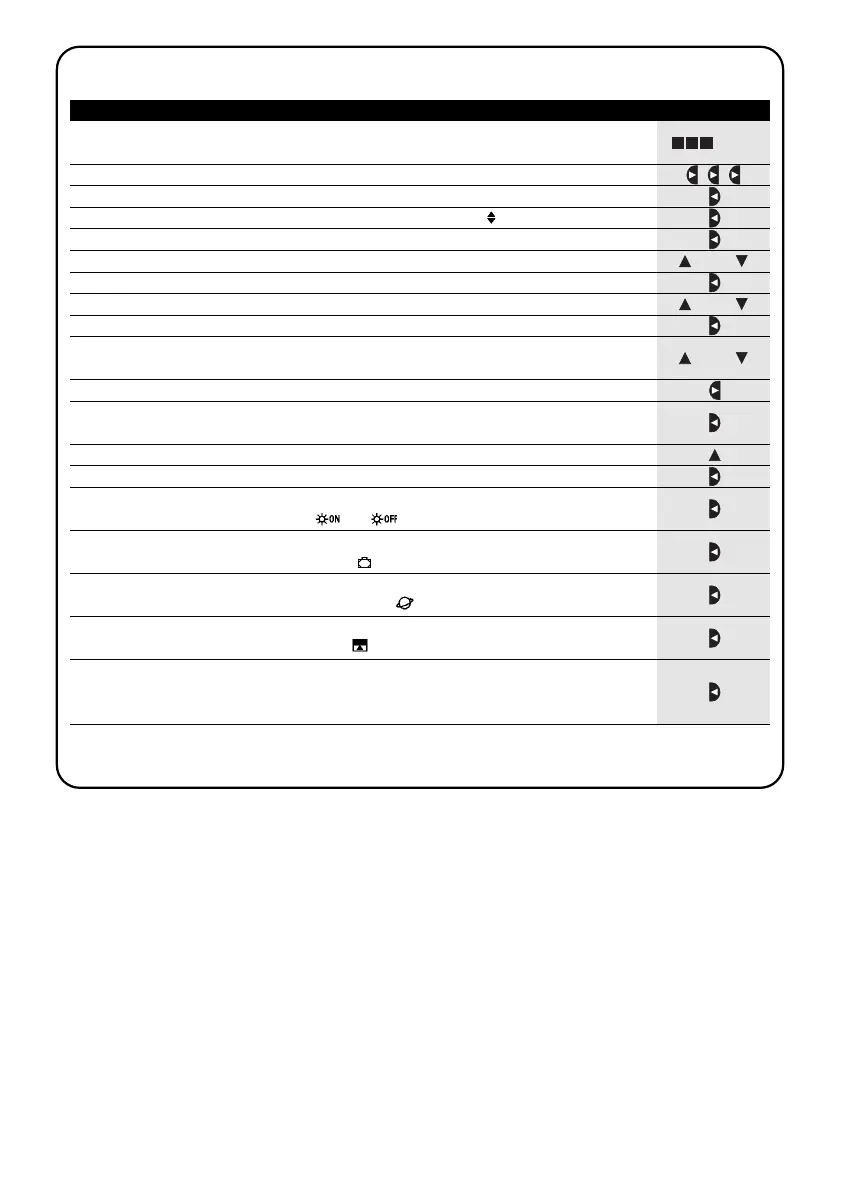
1. Press key ■ repeatedly a number of times until Auto starts flashing
2. Press key 3 times to select the Prog “programming” mode
▼
3. Press key to confirm the “programming” mode
▼
4. Press key to confirm the programming of “events”
▼
5. Press key to confirm the programming of a “new event” NEW
▼
6. Press key or to set the hours (in the example: 08)
▼
▼
7. Press key to confirm the hours
▼
8. Press key or to set the minutes (in the example: 30 )
▼
▼
9. Press key to confirm the minutes
▼
10. Press key or to choose the day of the week (in the example: Mo=Monday)
▼
▼
11. Press key to select the day of the week
▼
12. Press key to confirm the day of the week
(in the example: only Mo=Monday)
▼
13. Press key to select the “Up” command for group 1
▼
14. Press key to confirm the command (in the example: “Up” for group 1 )
▼
15. Press key to confirm the event (in the example: no special
(in the example: no special “ ” or “ ”)
▼
16. Press key to confirm the event
(in the example: no special “holiday” command)
▼
17. Press key to confirm the event
(in the example: no special “planetary time” command)
▼
18. Press key to confirm the event
(in the example: no special “timed” command)
▼
19. Now all the parts of the selected event start flashing to indicate that the
programming of the new event has been completed.
Press key to confirm the event or press key ■ to go back to an earlier stage.
▼
With the last confirmation the event is memorized and PLANOTIME is ready for programming another new event; you
can proceed starting from step N. 5 in this table.
5.2.1) Programming: new event NEW
... Auto
or
or
or
Table 23
Programming a simple “new event” (example 1 in table N. 22):
Example