with others. Compatible cameras, software, and other devices
can use these controls to maintain the look you want all the
way from the time you press the Shutter-release button until
you print the picture using a program like Nikon Capture
NX2.
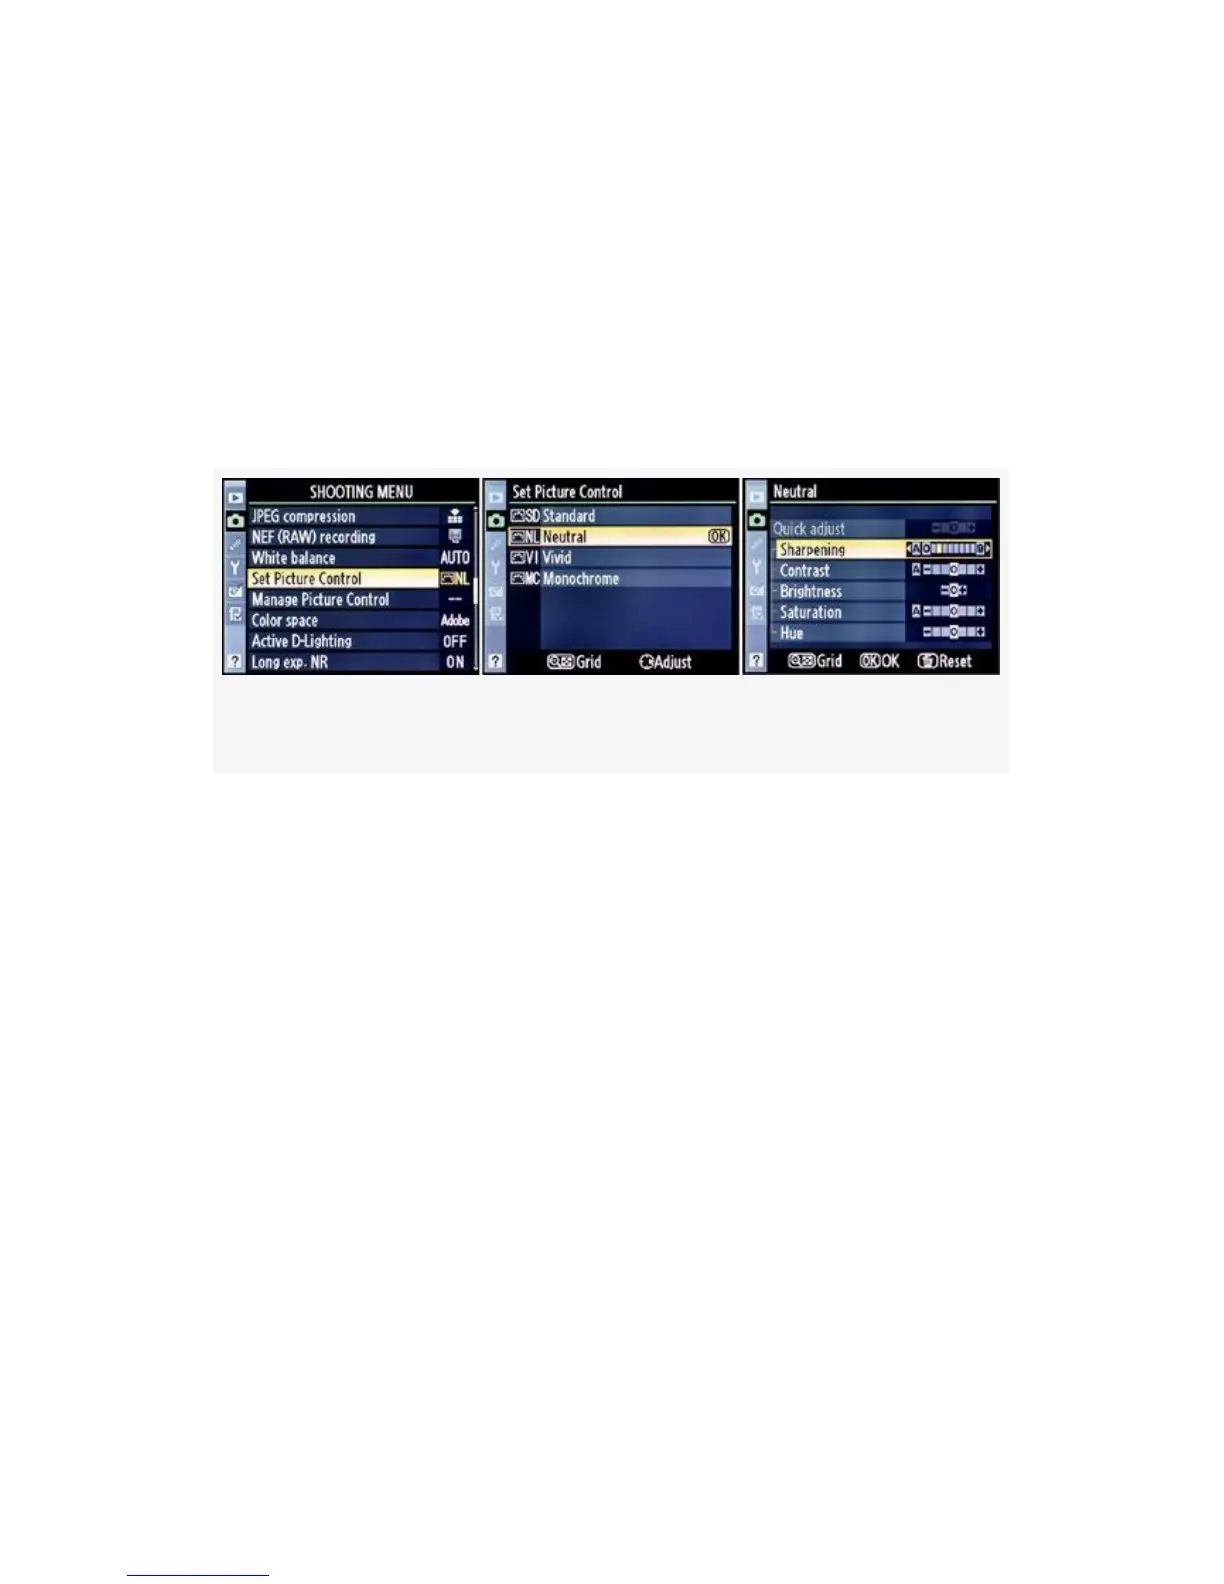
Here are the screens and steps to choose a Picture Control
from the Shooting Menu (see Figure 3-19):
Figure 3-19. Nikon Picture Controls
1. Select Set Picture Control from the Shooting Menu and
scroll to the right.
2. Choose one of the Nikon Picture Controls from the Set
Picture Control screen.
3. At this point, you can simply press the OK button and
the control you’ve chosen will be available for
immediate use. It will show up as a two-letter name in
the Shooting Menu next to Set Picture Control. You’ll
see this in Figure 3-19, image 1, where NL shows to the
right of Set Picture Control.
You can also modify the currently highlighted control by
scrolling to the right, before pressing the OK button. This will
bring you to the fine-tuning screen shown in Figure 3-19,
image 3. You can adjust the Sharpening, Contrast, Brightness,
158
 Loading...