Next, let’s see how these are used during bracketing:
▪ MTR > under > over – With this setting, the normal
exposure (MTR) is taken first, followed by the
underexposed image, then the overexposed image. If you
are taking a group of five images in your bracket (see
Custom setting e5), the camera will take the images like
this: normal exposure > most underexposed > least
underexposed > least overexposed > most overexposed.
For WB bracketing the pattern is normal > amber > blue.
This does not apply to ADL bracketing.
▪ Under > MTR > over – Using this order for bracketing
means that a five image bracket will be exposed in the
following manner: most underexposed > least
underexposed > normal exposure > least overexposed >
most overexposed. For WB bracketing the pattern is
amber > normal > blue. This does not apply to ADL
bracketing.
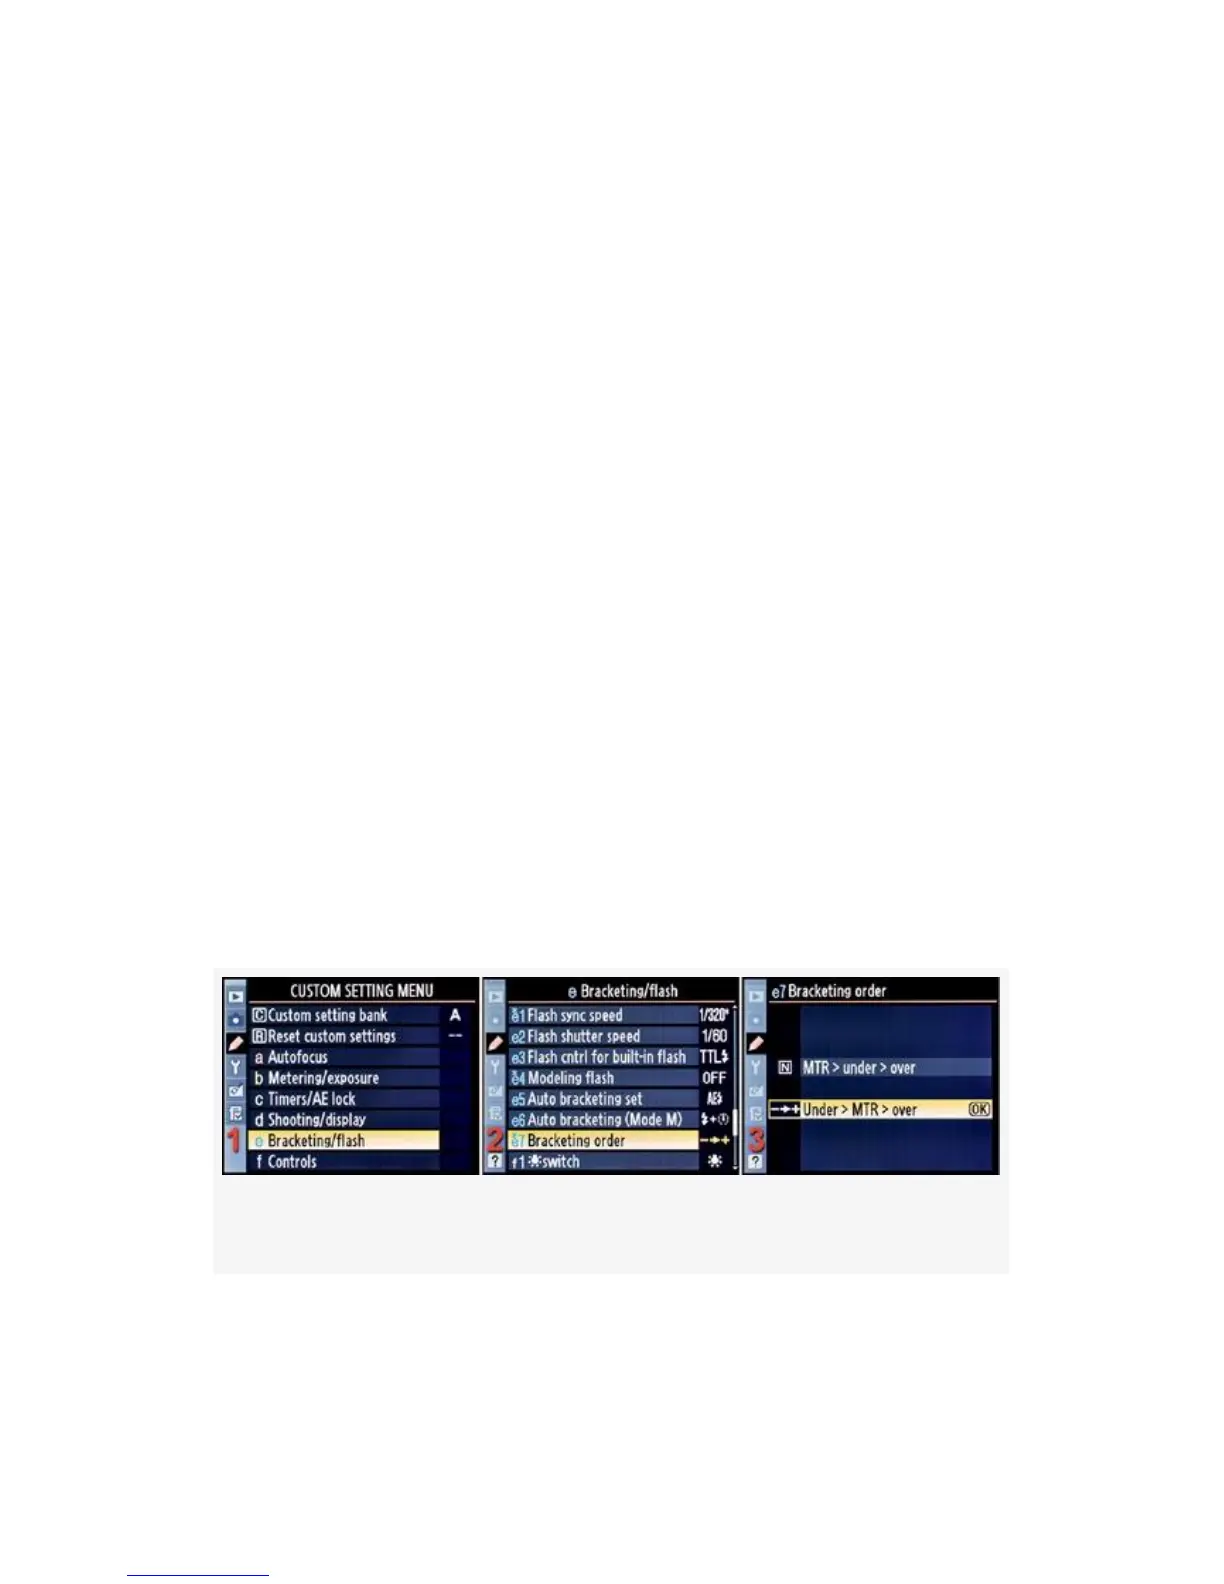
Finally, let’s look at the steps and screens to actually
configure the Bracketing order (Figure 4-62):
Figure 4-62. Bracketing order
1. Select e Bracketing/flash from the Custom Setting Menu
and scroll to the right (see Figure 4-62, image 1).
379
 Loading...


