Chapter 3 Operation of Each Part
10 Variable Magnification Double Port Attachment
31
3
10.4
Aligning the Optical Paths for the Front Port and the Rear Port
To align the optical paths for the front port and the rear
port, adjust the rear port position.
Rotate the two M4 set screws to adjust the rear port
position (for the 2/3 inch TV camera).
After the adjustment, tighten the M4 set screw on the back
of the tube.
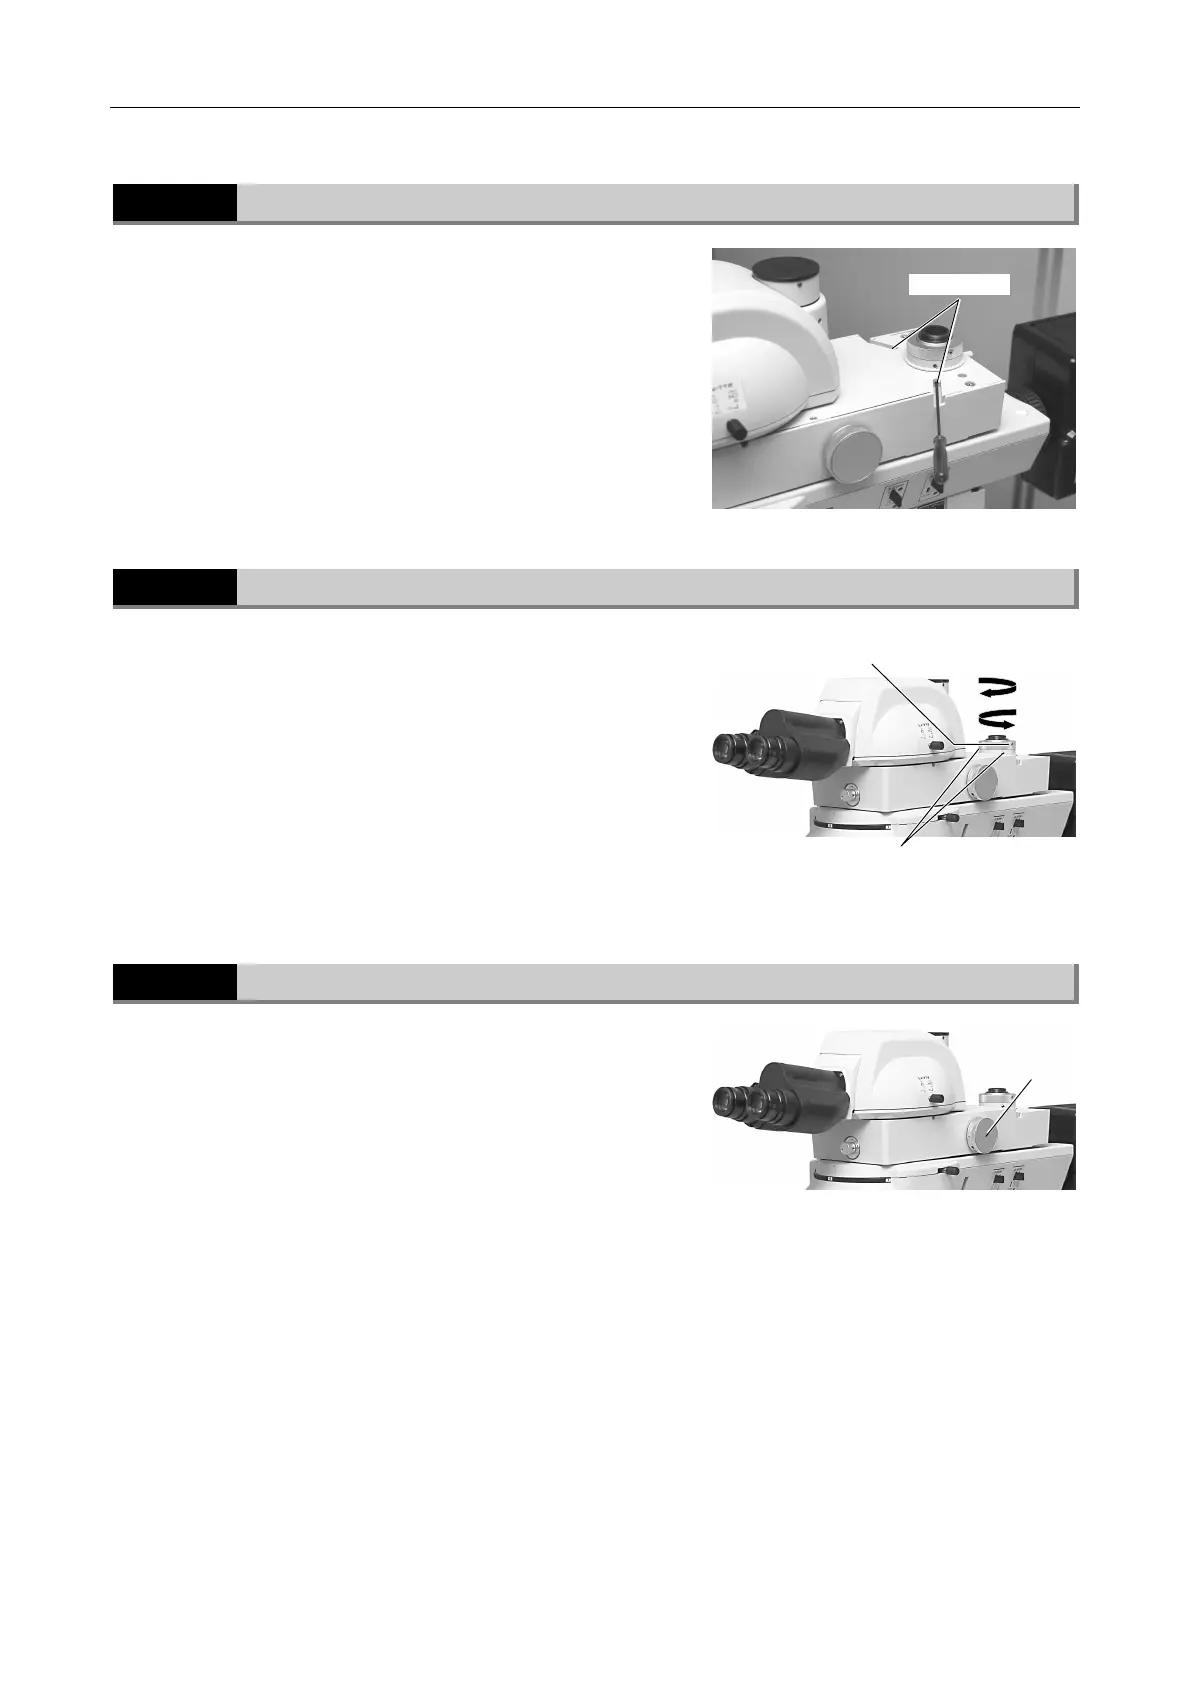
10.5
Parfocal Adjustment for the Front Port and the Rear Port
You can adjust the focus position for the rear port so that
the focus positions for the front port and the rear port
come together.
Check that the M4 set screw on the knurled ring on the
rear port is loosened and that the M4 set screws at the C
mount unit screw part is tightened.
To raise the camera position on the rear port, rotate the
knurled ring in the "A" direction. To lower the camera
position, rotate the knurled ring in the "B" direction. During
the adjustment, watch the monitor image.
10.6
Selecting the Magnification for the Rear Port
You can change the magnification of the rear port by
rotating the magnification selector dial on the right side of
the tube in the sequence of 0.35x, 2x, and 4x.
You cannot change the magnifications between 0.35x and
4x directly.
Magnification
selector dial
Set screws
M4 set screw on the knurled ring
M4 set screws at the C mount unit
screw part
A
B
 Loading...