88
Manual Flash Mode
Chapter
3
89
7
If necessary, press or button to reset the indi-
cator bar so it points to the measurement scale
that matches or nearly equals the actual flash-to-subject
distance (can be read from lens barrel).
Manipulating indication bar causes the aperture value in the
LCD panel to change.
8
On the camera, reset the aperture value obtained in the
previous step (the aperture that corresponds to the
actual flash-to-subject distance).
You have now completed all necessary adjustments for
locating the subject within an appropriate shooting distance
range for the predetermined light output and aperture.
9
Look into camera viewfinder, compose and lightly
press the shutter release button to confirm that subject
is in focus.
Check that ready-light is on in the camera’s viewfinder or
on the SB-25 .
10
Fully depress shutter release button to fire flash.
Synchronization in Continuous Shooting
The SB-25 is able to recycle fast enough to synchronize
with a motor-driven camera firing continuously at up to six
frames per sec. at 1/64 light output. This means you can
take up to 40 flash pictures in rapid succession. Batteries
must be fresh to achieve the rates indicated.
Caution
Let the flash unit rest at least 10 minutes after
continuous firing at a maximum number (see the
chart), to allow it to cool off. Overuse generates heat
that could shorten the Speedlight’s life.
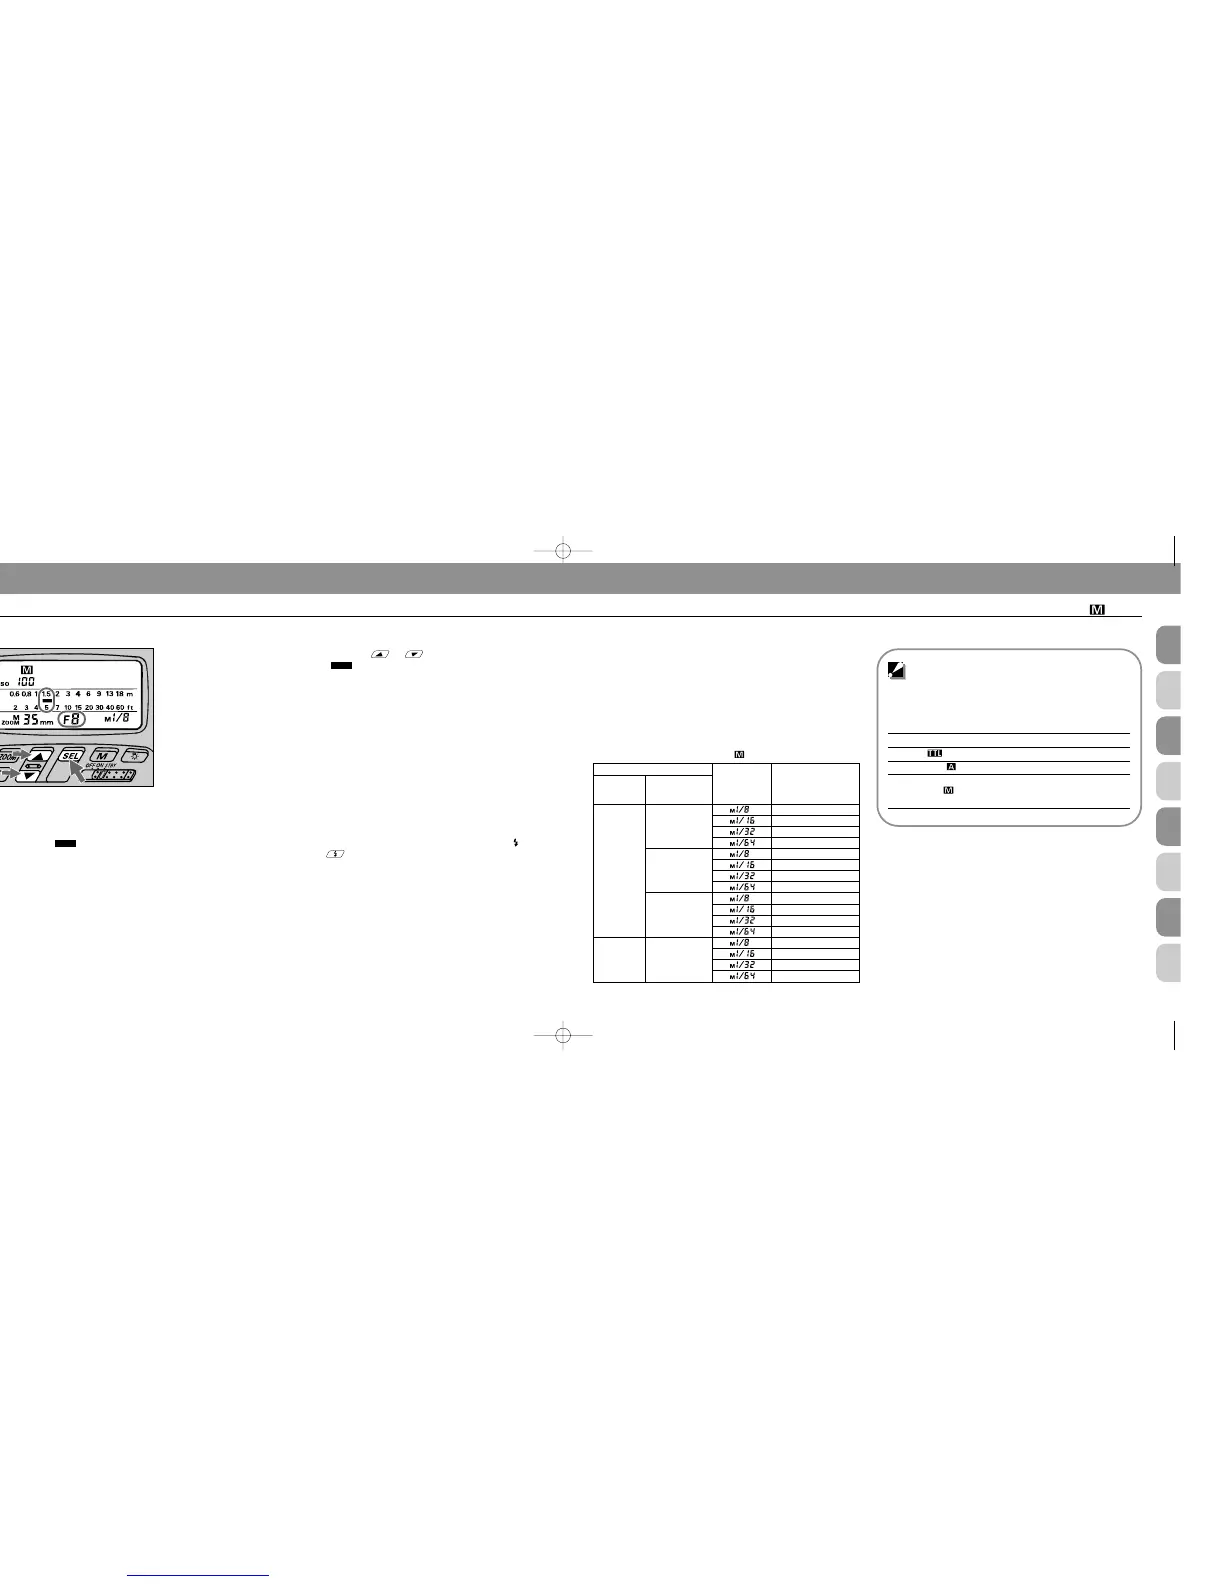
Safety range in continuous firing
Flash mode Max. number
TTL Auto 15
Non-TTL Auto 15
15 at full (1/1) or 1/2 light output,
Manual Flash
40 at 1/4, 1/8, 1/16, 1/32
or 1/64 light output
Batteries
Optional
external pow-
er source
Light output
Number of
continuous flash
(frames)
Inside
SB-25
AA-type
alkaline-
manganese
(four sets)
AA-type
NiCd (four
sets)
—
SD-7
SD-8
SD-8
(when used
with NiCd bat-
teries)
More than 4
More than 8
More than 16
More than 30
More than 6
More than 10
More than 40
More than 40
More than 5
More than 10
More than 20
More than 40
More than 5
More than 10
More than 30
More than 40
Continuous firing in Manual Flash mode
6
Set the same aperture value in the SB-25’s LCD panel.
For instruction, see “Setting Aperture Values (Manual
Adjustment),” pages 28 to 29.
An indicator bar appears to show appropriate shooting
distance for the selected aperture.
SB-25_En 03.1.14 8:18 PM Page 88
 Loading...