11
7 Filter and dust bags - CV 20, CV 25, CV 35i
7.3 Replacing the dust bag
The machine is supplied with a dust bag.
Replace the dust bag in the following way:
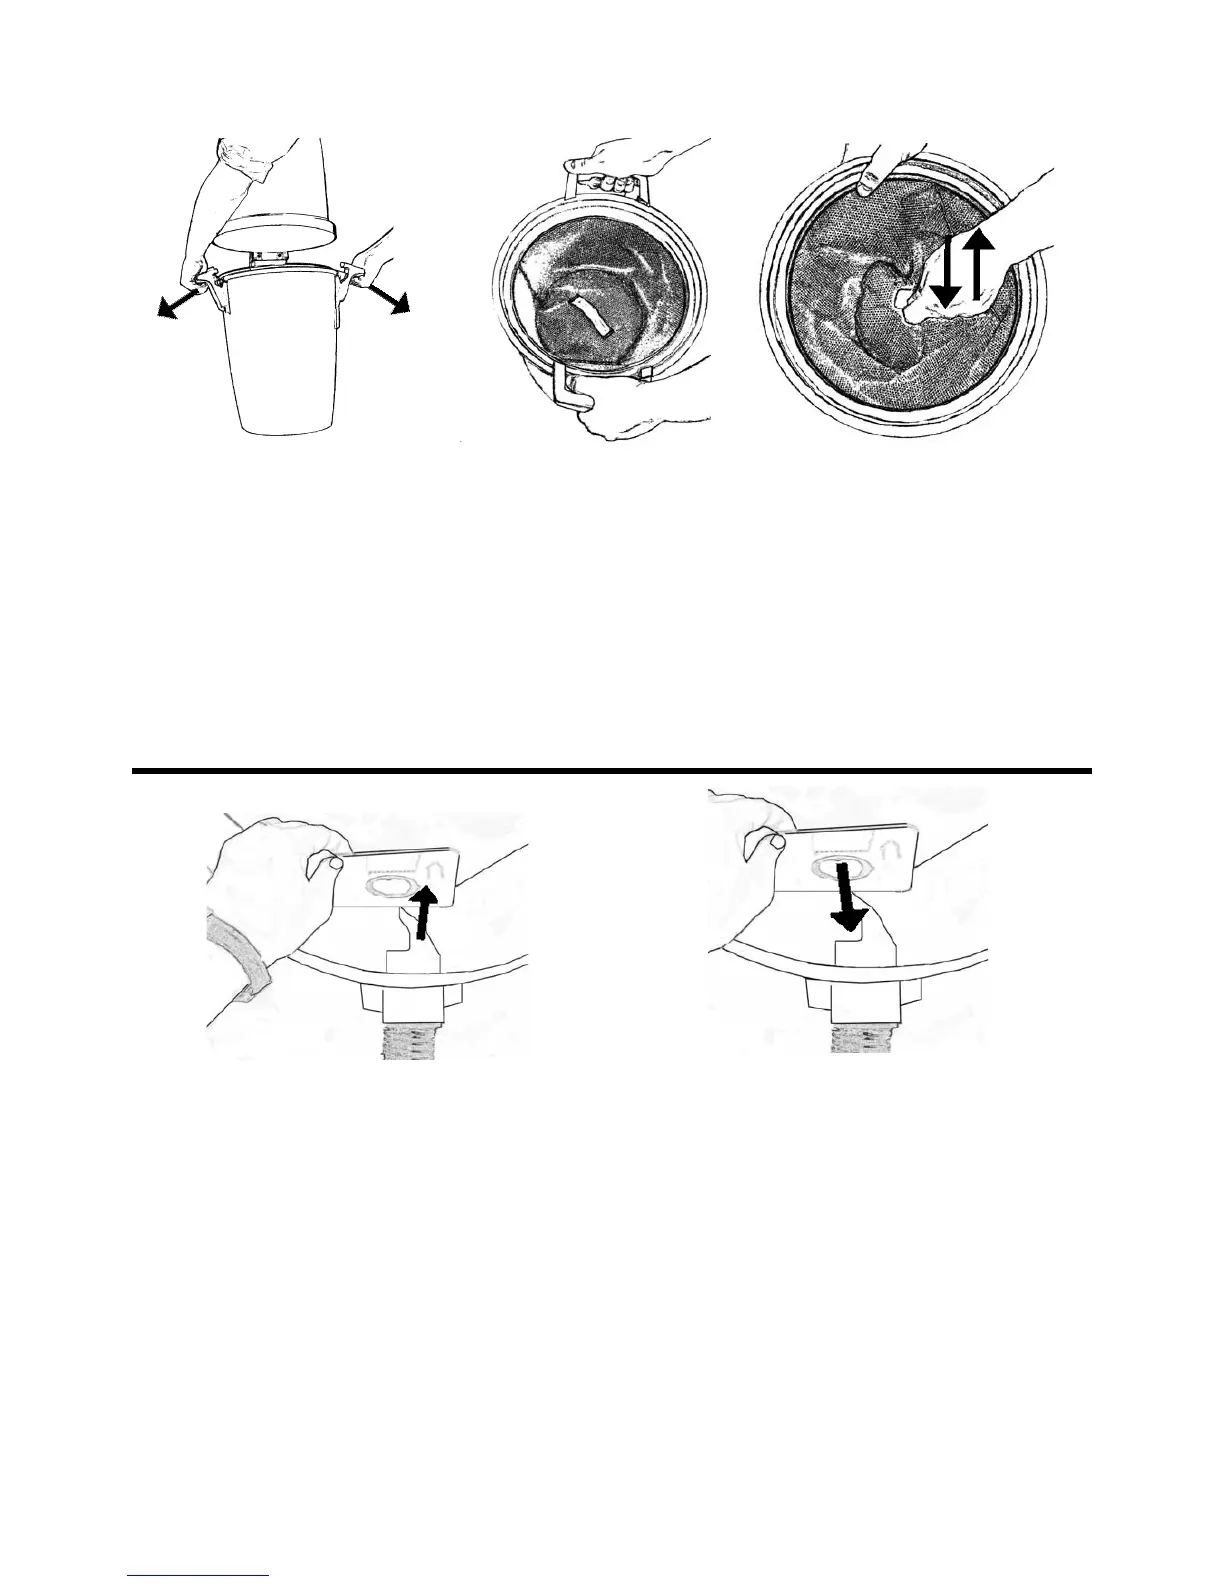
1. Release the two handles clamped on to the dust contain-
er. Free them by pulling the handles outwards away from
the container.
2. Lift off the container.
3. Shake the dust from the bag fi lter. It may be advanta-
geous for the fi lter to be installed in the container in such
a way that dust in the fi lter can be shaken down into the
dust container.
4. Lift out the bag fi lter.
5. Remove the dust bag by taking hold of the cardboard
stiffener and carefully pulling out the card and bag from
the container, Fig. 23. Fold down the perforated part of
the cardboard towards the opening of the bag in order to
prevent the bag contents to leak out.
6. Empty the container of dust.
7.1 Replacing the bag fi lter
A bag fi lter must always be installed in the dust container.
Clean the fi lter in the following way:
1. Release the two handles clamping the dust container.
Free them by pulling the handles outwards away from the
container, Fig 20.
2. Do not remove the fi lter from the container. Instead, give
the fi lter a light shaking inside the container to loosen dust
from the fi lter allowing it to fall into the container, Fig. 21.
3. Lift out the bag fi lter. If a dust bag is being used - remove
the dust bag. Then empty the container of any remaining
dust in a suitable place.
7.2 Fitting the bag fi lter
Replace the bag fi lter in the machine as follows:
1. Replace the cleaned/shaken bag fi lter in the container,
Fig. 22. Make sure the fi lter support fi ts into the inner
edge of the dust container properly. Check that the fi lter
is fi tted the right way up - the cloth handle on the fi lter
should be visible.
2. Then replace the dust container with the bag fi lter in the
cleaner’s vacuum unit.
3. Close the container on the vacuum unit by applying
inward pressure to the two handles to ensure the vacuum
unit and dust container are fi tted together properly.
7.4 Fitting the dust bag
Replace the dust bag as follows:
1. Fit the dust bag’s card with a hole into the bag holder, Fig.
24.
2. Replace the cleaned/shaken bag fi lter in the container.
Make sure the fi lter support fi ts into the inner edge of the
dust container properly.
Check that the fi lter is fi tted the right way up - the cloth
handle on the fi lter should be visible, Fig. 21.
3. Replace the dust container on the vacuum unit. Close the
container on the vacuum unit by applying inward pressure
to the two handles to ensure the vacuum unit and dust
container are fi tted together properly.
The CV 20, CV 25, CV 35i can be run with or without the
installation of a dust bag - the choice is yours. These
products must always be operated with a bag fi lter
installed.
Fig. 20
Fig. 21 Fig. 22
Fig. 23
Fig. 24
 Loading...