Choosing and finding locations
12
Copyright © 2007 Nokia. All rights reserved.
To select the route settings, select Options > Settings. Once
you have set your starting point and destination, you may
select the route settings, for example, the type of route or
the transport mode.
Once you have set a starting point and destination, and
selected your settings, you can show your route. To
display the itinerary, select Options > Show route.
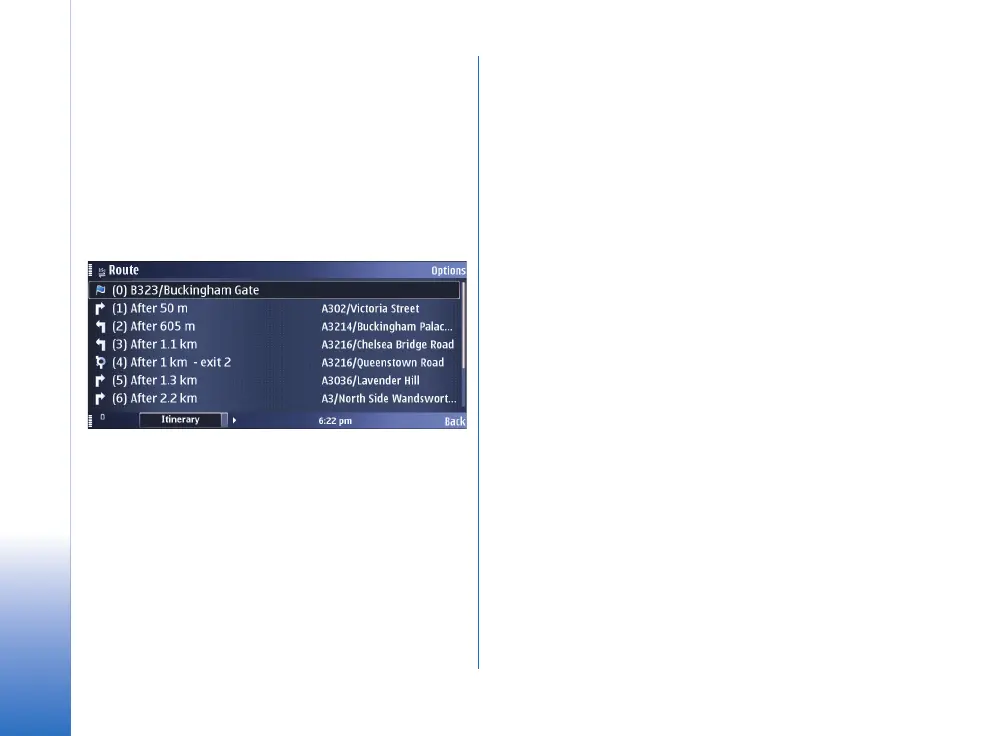
The Itinerary tab lists the single waypoints of a route, and
shows the turns and the distance between them.
To switch between the Itinerary and Summary tabs, scroll
left or right.
Select Options and from the following:
• Show on map – To show a waypoint on the map.
To switch between waypoints, scroll up or down.
• Start navigation – To start turn-by-turn navigation
(extra service) with GPS.
• Start simulation – To run a simulation of turn-by-turn
navigation without GPS.
Saving a location
You can save your favourite destinations as landmarks to
quickly access them when planning your route.
The Save command is in different context-sensitive menus
throughout the application. The following procedure is
just an example.
1 Browse the map.
2 To open the context-sensitive menu, press the scroll
key.
3 Select Save > As landmark.
4 Edit the name of the landmark if necessary, and select
OK.
5 Choose a category for the landmark, and select OK.
You can also take a screenshot of the map (Save >
As image). The image is saved in your device's default
gallery folder.

 Loading...