CH10/CH20 C. DISASSEMBLY AND ASSEMBLY PROCEDURES
C-12
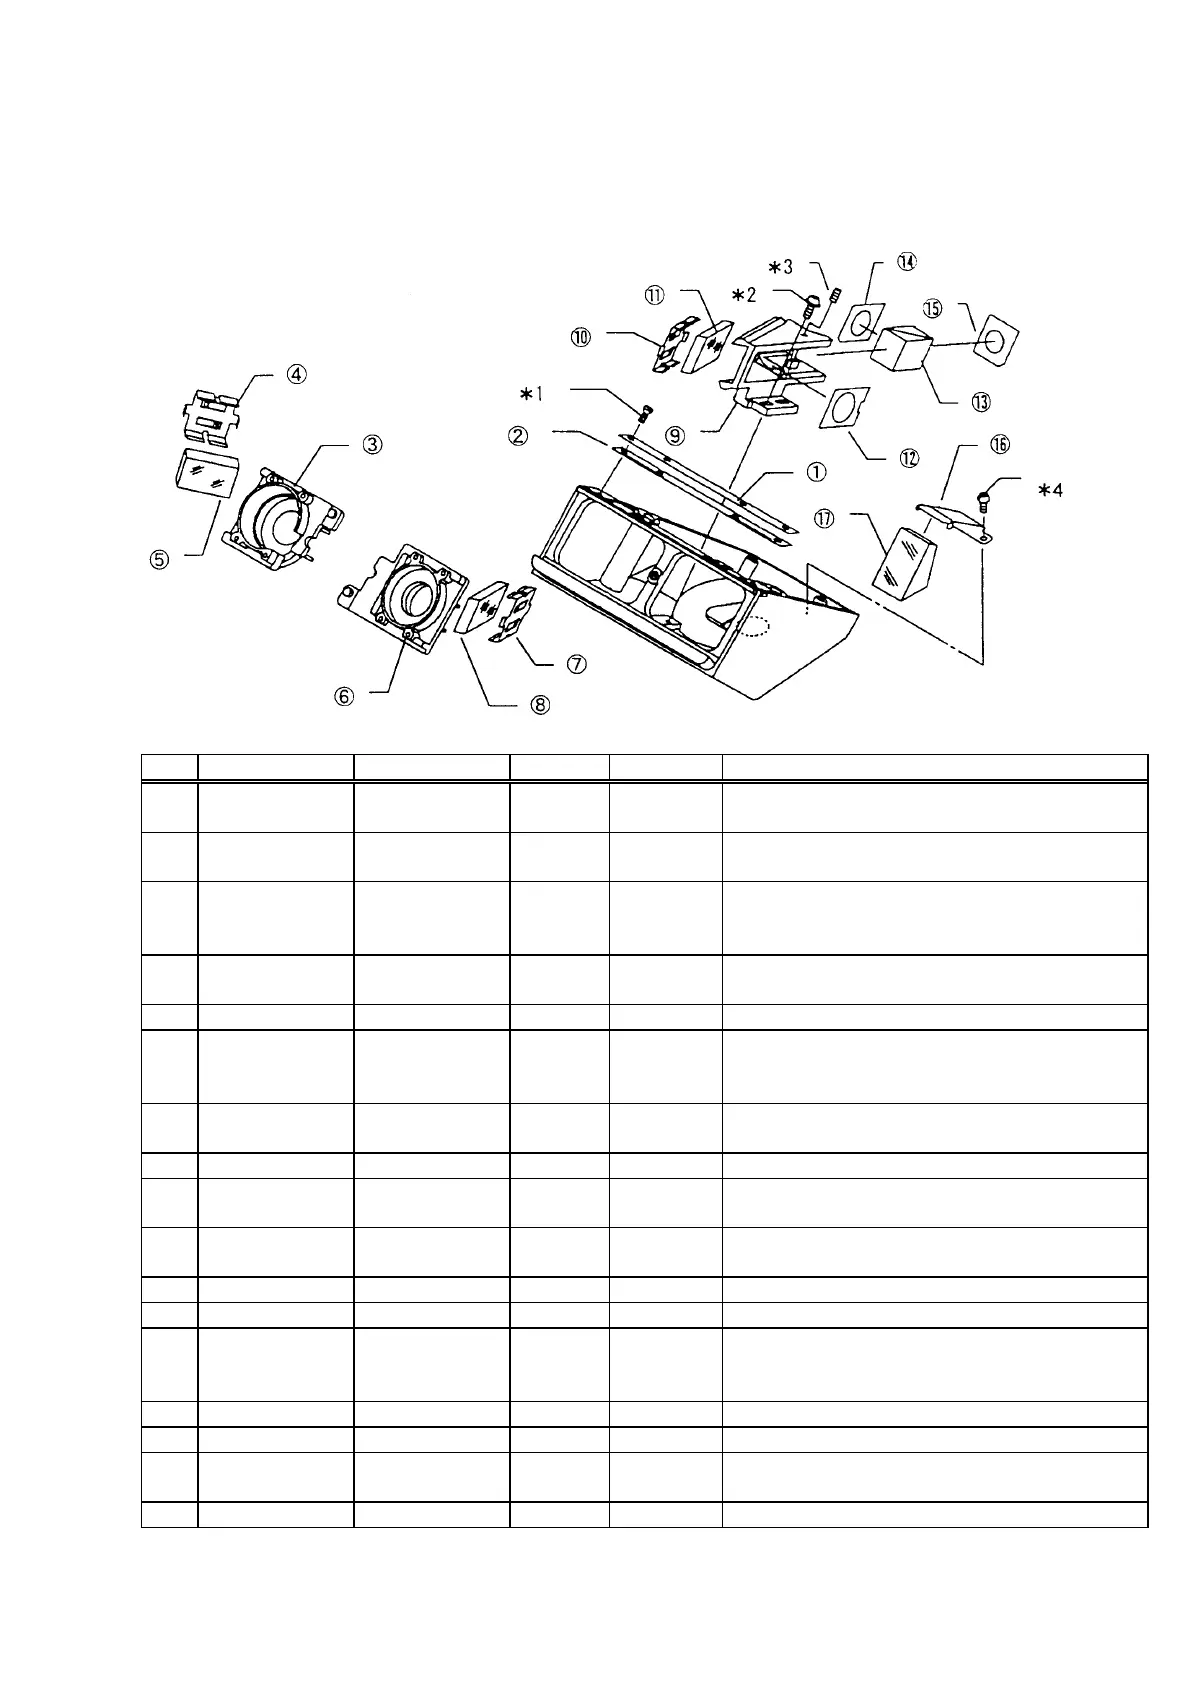
4-2 Prism ass’y and mirror ass’y
•
‚
Assemble the bent side of the dovetail spring
ƒ
Apply grease on the dovetail sliding surface.
Working force: 3.9 - 9.8N
„
…
†
Apply grease on the dovetail sliding surface.
Working force: 3.9 - 9.8N
‡
ˆ
‰
Left/right optical axis adjustment (See Repair
±
10
±
11
±
12
±
13
Fill the clearance of prism fitting part with
adhesive. Apply a small amount of adhesive on
±
14
±
15
±
16
±
17
Assemble the prism evenly on both sides.
 Loading...