CH10/CH20 D. REPAIR PROCEDURE
D-3
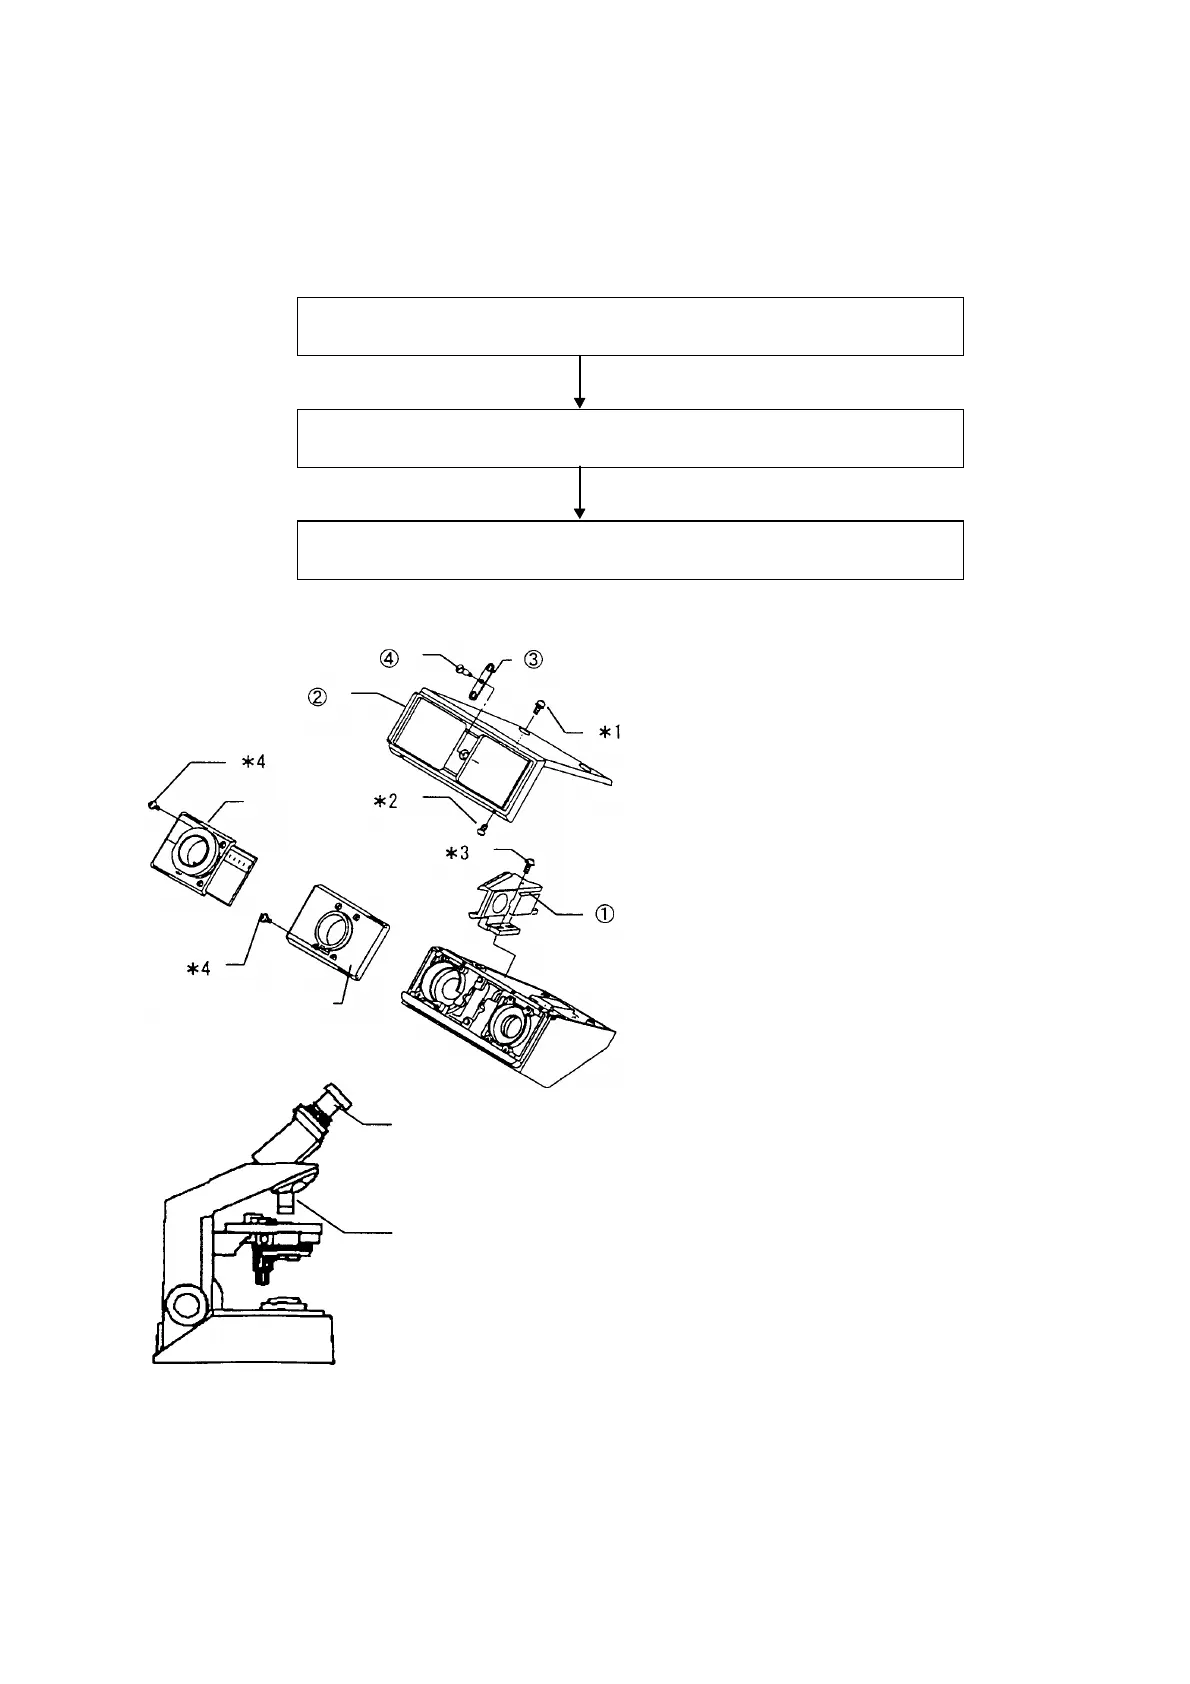
2. Observation Tube (C20-BI45) Adjustment
2-1 Adjustment procedure
1. Preparations
(See 2-2 Preparations, D-3.)
2. Left / right optical axis adjustment, parfocality adjustment
(See 2-3 Left / right optical axis, parfocality adjustment, D-4.)
3. Exit pupil center check
(See 2-4 Exit pupil center check, D-5.)
2-2 Preparations
See Disassembly and assembly procedures
(C-11).
ž Assemble the MIRROR FRAME • with the
two screws (CUKK3X6SA *3) temporarily.
ž Assemble the PARTS, ƒ-†, temporarily
without the COVER‚.
ž Fix the R-SLEEVE … and the HELICOID
ASS’Y † in the center.
ž Set them in the above-mentioned state on
the microscope frame.
(When microscope frame is not available,
use jig (B2KC0403).)
ž Left/right optical axis adjustment
As shown in Figure-A, set the
standard objective (KN0015) and
the standard eyepiece (KN0048;
with adapter-1).
ž Tube length adjustment
Set the standard objective (KN0016),
the standard eyepiece (KN0048;
with adapter-1), and the focusing
telescope (FT-36).
ž Exit pupil center check
Set NEA4X objective and the center-
ing telescope (KN0029).
†
…
Standard objective for optical axis (KN0015)
Standard objective for tube length (KN0016)
NEA4X objective
Standard eyepiece (KN0048; with adapter-1)
Centering telescope (KN0029)
Focusing telescope (FT-36)
Figure-A
 Loading...