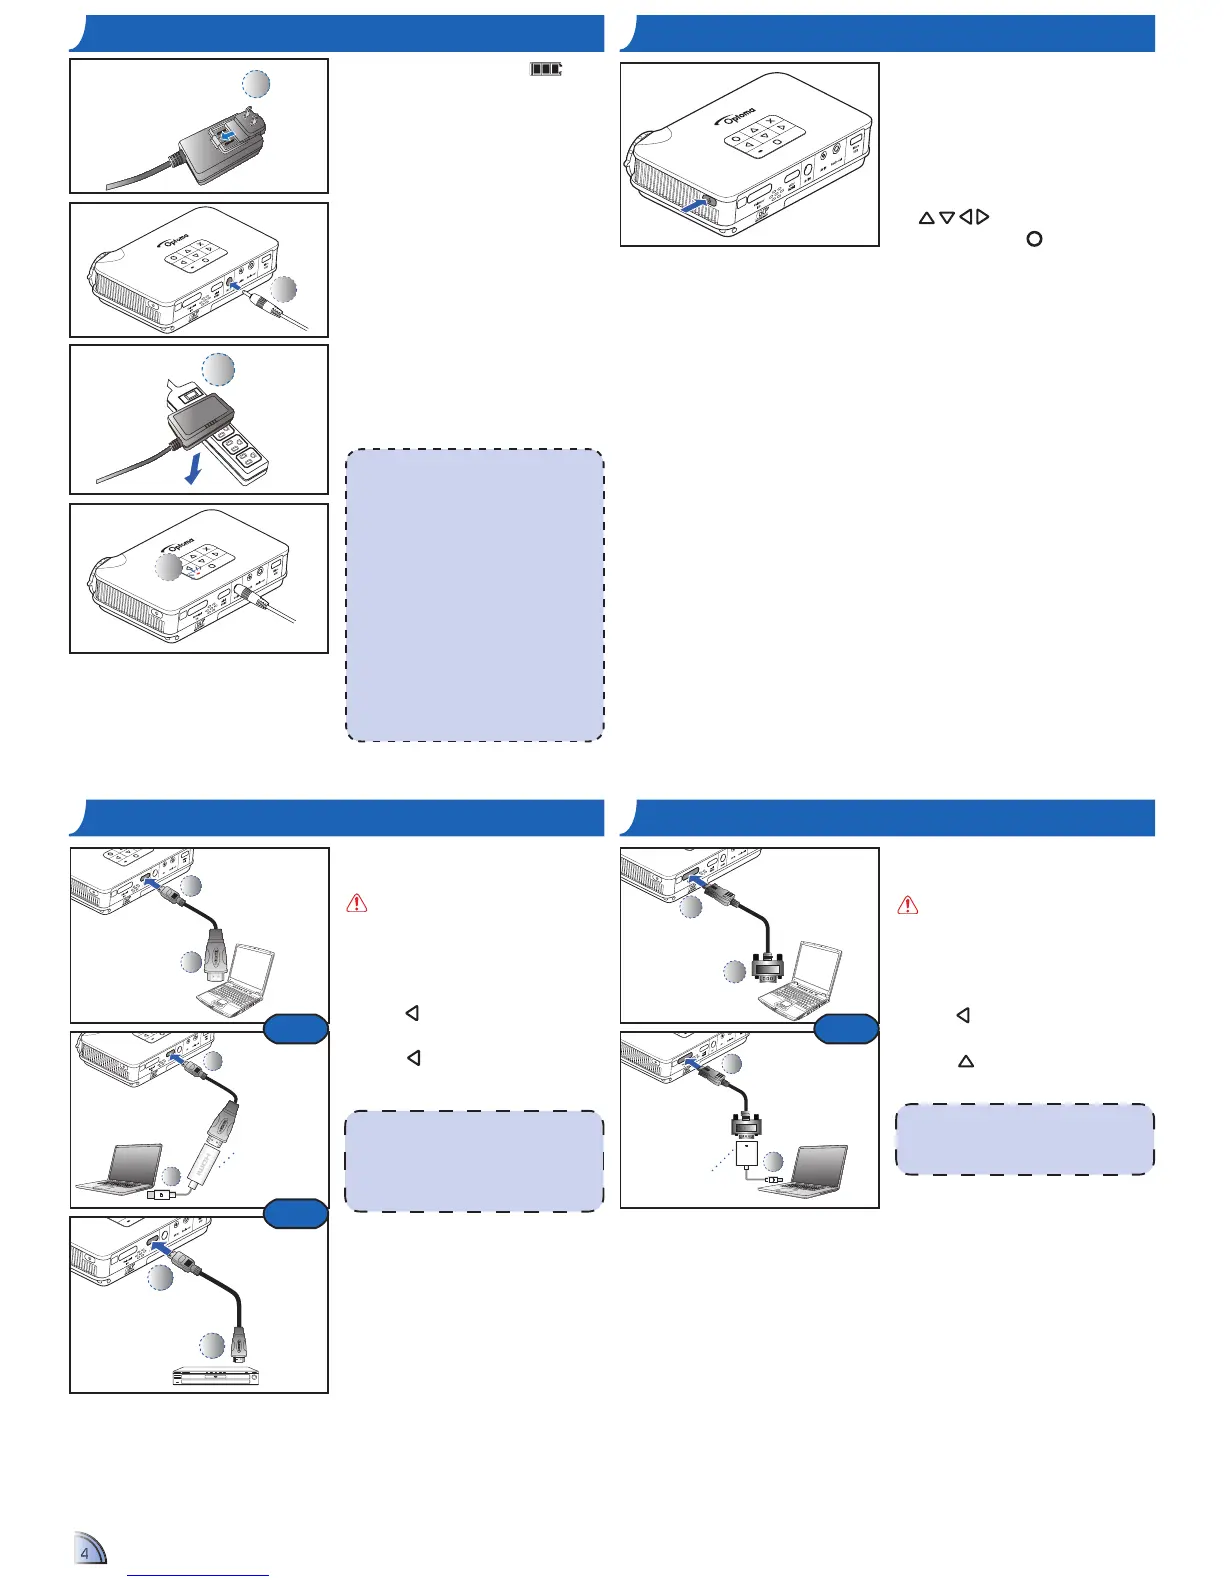
CHARGE THE BATTERY POWER ON / OFF
4
PUSH
1
1. Make sure the projector is turned
off.
2. Insert the plug. (
1
)
3. Connect the power adapter.
(
2
~
3
)
4. During charging, the LED indicator
lights red. (
4
)
5. The LED indicator turns green
when the battery is fully charged.
This process may take up to 2.5
hours.
3
Press the Power button to turn the
projector on or off.
For first time use, the Language
screen appears.
1. Highlight the desired language.
(
)
2. Select the item. (
)
<Note>
1. Bright mode is only available when the
power adapter is connected.
2. The battery will not charge while the
projector is operating.
3. For LED indicator information, see page
23.
4. After the projector is turned off, the
battery may not start charging right away
due to over temperature protection. The
projector will automatically start charging
once it cools off.
5. The battery has a lifespan and ages every
time it is charged and discharged. It will
gradually lose its charging capability as
it ages. Replace the battery at the end of
its lifespan.
When the low battery icon (
) is
displayed on the projected screen,
replace the battery immediately or
connect the power adapter to charge
the battery.
4
CONNECT INPUT SOURCE -
HDMI
1
2
1. Connect the HDMI device using
an appropriate cable. (
1
~
2
)
Insert the universal connector
with the arrow mark facing up.
2. After powering on the projector,
the projector automatically detects
the input source. Otherwise,
press
to open the Input menu.
(See page 19)
3. Press
to select HDMI.
1
2
1
2
or
or
<Note>
HDMI cable is not included in the •
package.
Mini DisplayPort to HDMI Adapter •
(optional) is sold at Apple stores.
Mini DisplayPort to
HDMI Adapter
CONNECT INPUT SOURCE - VGA
1
2
1
2
Mini DisplayPort to
VGA Adapter
1. Connect the VGA device using
the appropriate cable. (
1
~
2
)
Insert the universal connector
with the arrow mark facing up.
2. After powering on the projector,
the projector automatically detects
the input source. Otherwise,
press
to open the Input menu.
(See page 19)
3. Press
to select VGA.
<Note>
Mini DisplayPort to VGA Adapter (optional)
is sold at Apple stores.
or
Mac
Mac
 Loading...