29
11
124
6
8
SETTING UP ADDITIONAL BED SPACE
The furniture of the Camper with the inclusion of the table forms the base of the
additional bed; the table is reinforced to provide adequate support for sleeping.
The furniture of the Camper with the inclusion of the table forms the base of the
additional bed; the table is reinforced to provide adequate support for sleeping.
Step 1. Firstly, position the table top in the position shown above to form the base section
of the additional bed.
Step 2. Arrange the cushions as shown above. Cushions 5, 6 & 7 are not required for the
additional bed and can be removed.
Step 3. The two bolster cushions fit into cushion number 2 - where cushion number 6 would
usually sit. Then position cushion 4 to the far left, followed by cushions 1,3 & 8 to form the
bed.
SETTING UP THE ADDITIONAL BED
Seating moved to create additional bed
The seating area inside the OPUS
®
can be reconfigured to provide an additional bed.
••
•• ••••••••••••••
••
••
••
••
••
••
••
••
•••• •• ••
IMPORTANT! REFER TO CONDENSATION &
VENTILATION SECTION ON PAGE 24 & 25
Page 22
1
1
8
4
2
3
5
6
7
2
34
8
BOLSTERS
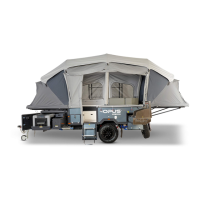
SEATING MOVED TO CREATE ADDITIONAL BED
The seang area inside the OPUS® can be recongured to provide an addional bed.
The furniture of the Camper with the inclusion of the table forms the base of the addional bed; the table is reinforced to
provide adequate support for sleeping.
STEP 1: Firstly, posion the table top in the posion shown above to form the base secon of the addional bed.
STEP 2: Arrange the cushions as shown above. Cushions 5, 6 & 7 are not required for the addional bed and can be removed.
STEP 3: The two bolster cushions t into cushion number 2 - where cushion number 6 would usually sit. Then posion
cushion 4 to the far le, followed.
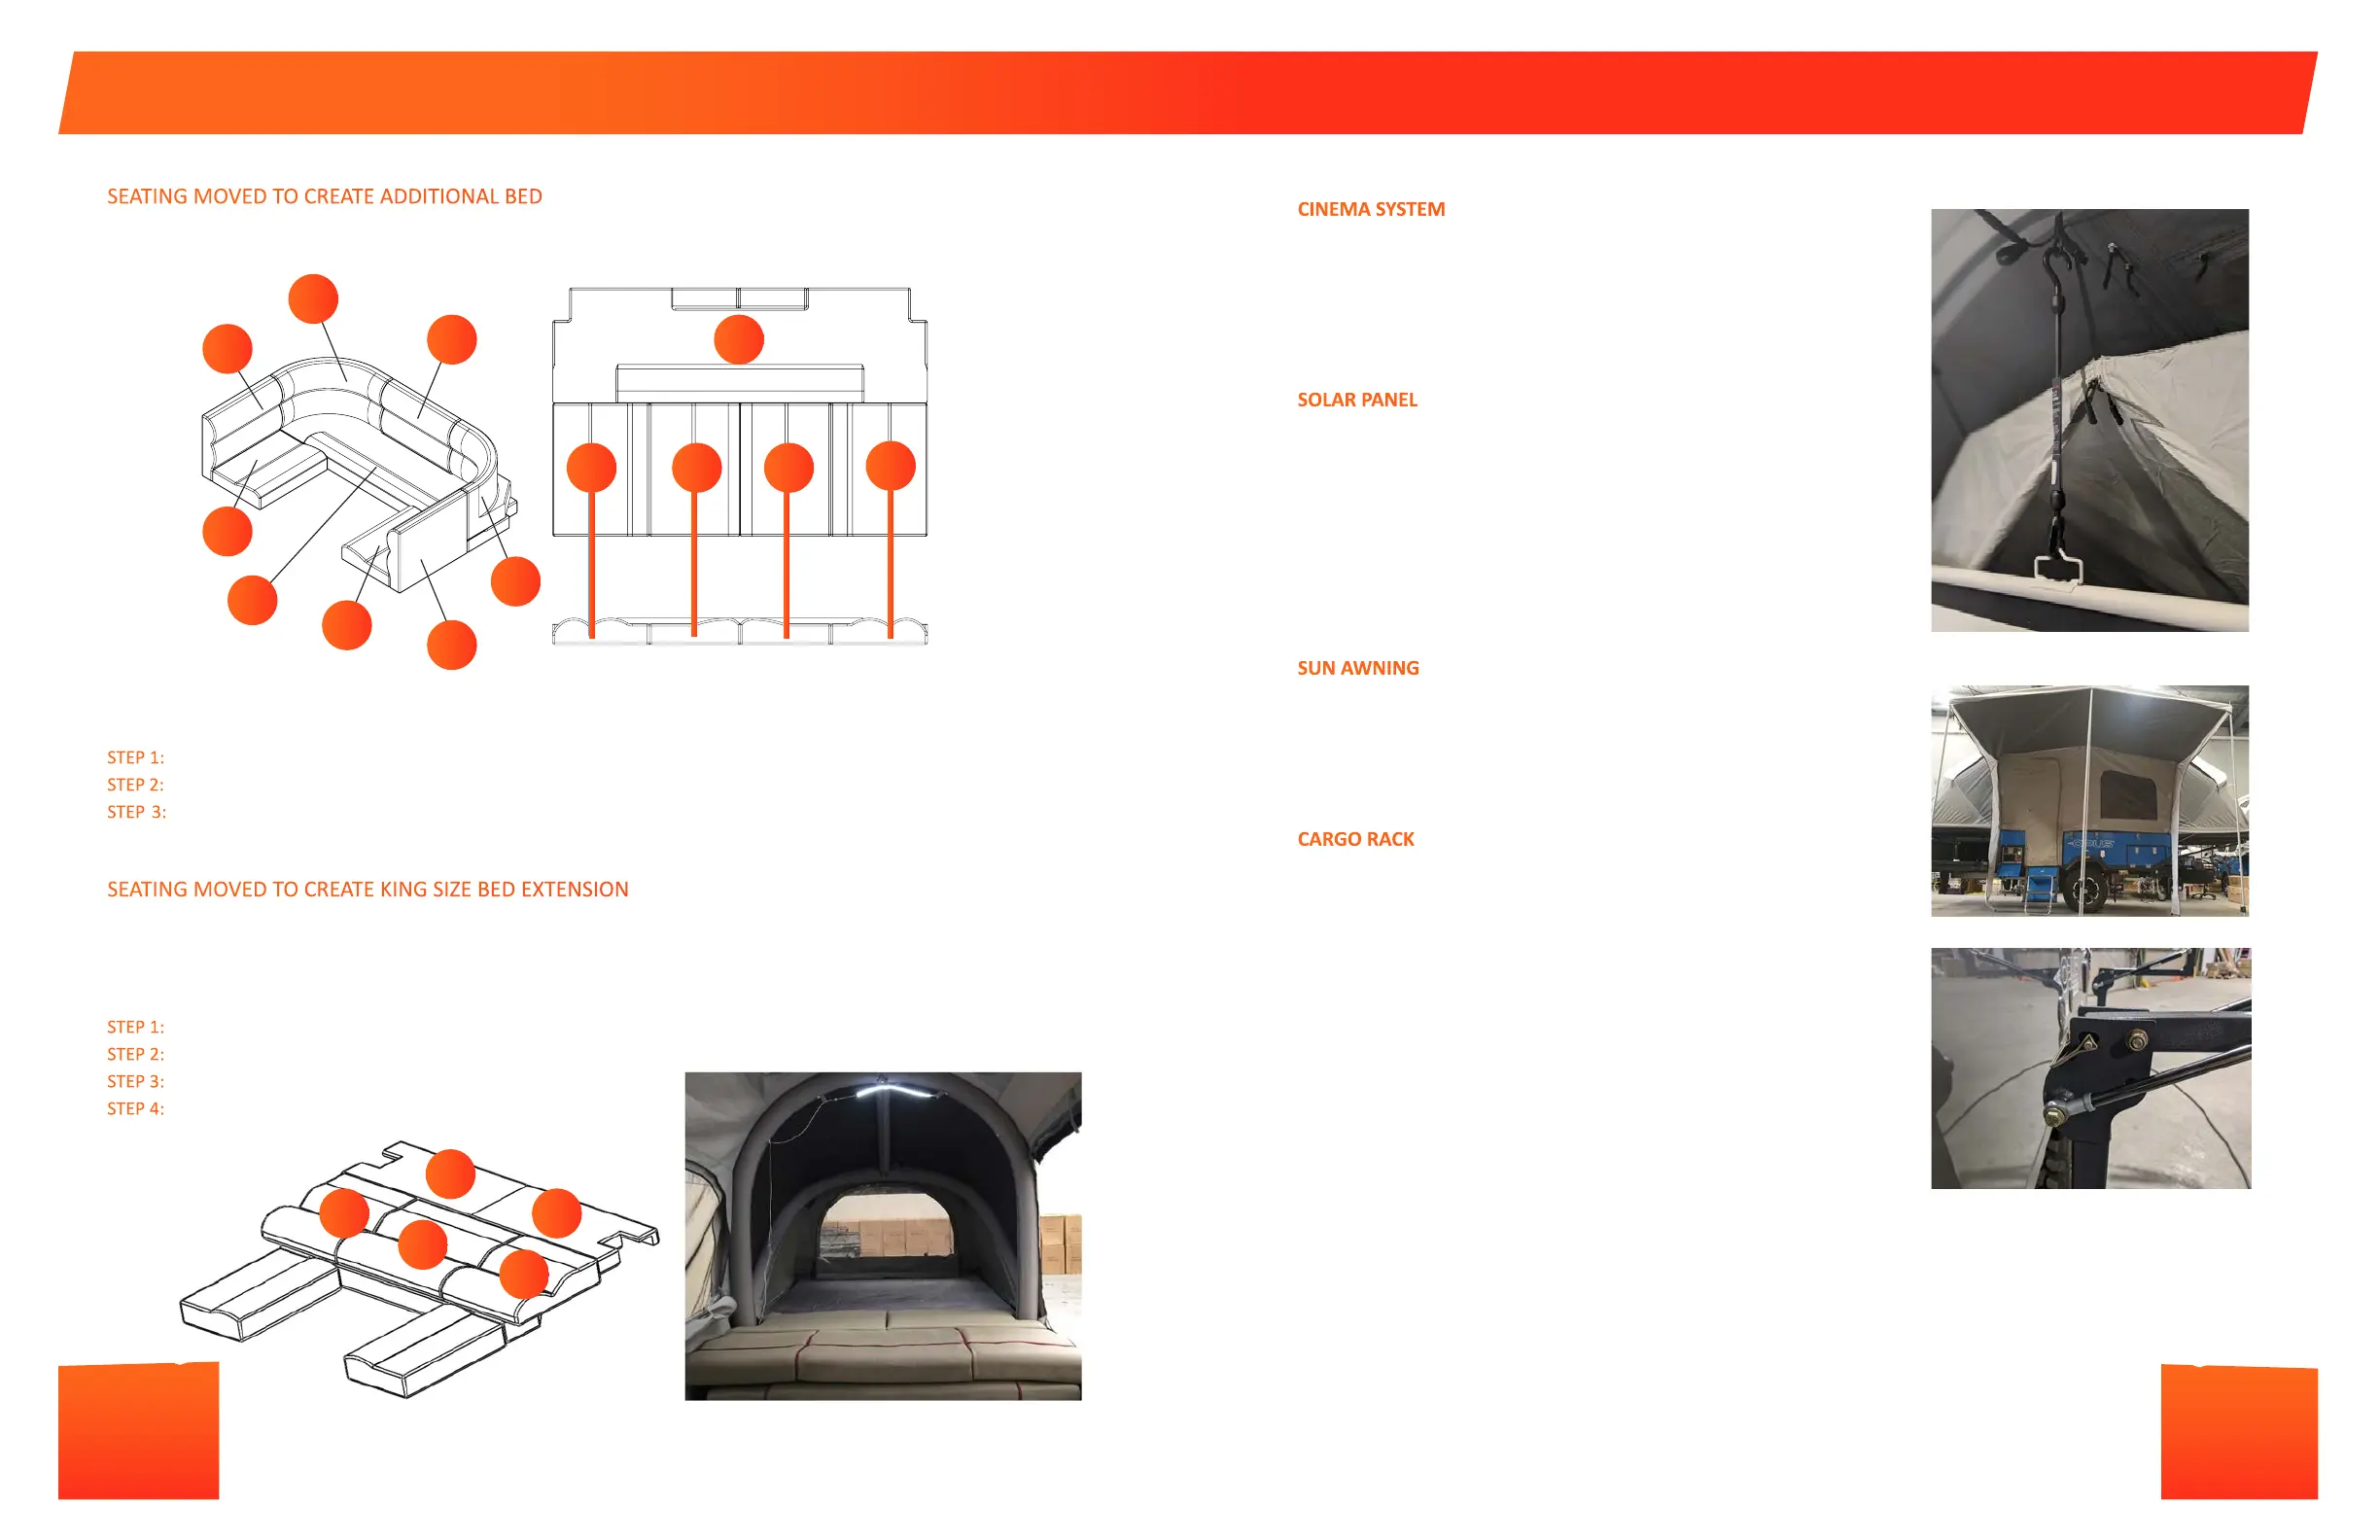
SEATING MOVED TO CREATE KING SIZE BED EXTENSION
The seang area inside the Air OPUS® can be recongured to convert one of the double beds into a larger king bed. The
furniture of the Air OPUS® Camper rearranges to form a larger king size sleeping area that allows a front of the camper to
back of the camper sleeping posion.
STEP 1: Firstly remove bolsters (9&1O) then remove 5, 6 &7 and place these on the oor.
STEP 2: Remove cushion 6 and place bolsters 9 & 10 in this empty space.
STEP 3: Arrange the cushions 4, 6 & 8 as shown below.
STEP 4: place the addional pieces 11 & 12 to create the bed.
CINEMA SYSTEM
The OPUS cinema system comes with a P5 HD LED Pico projector and
retractable cinema screen. The Cinema screen is located on the rear bed lid,
in front of the maress. To deploy the cinema screen, simply use the handle
to pull the screen up and use the supplied rubber bungee to aach the handle
to the plasc hoop on the roof of the tent. Please refer to the instrucons
included with your projector on how to use this product.
SOLAR PANEL
If you have selected the solar port opon, you will nd it on the back of your
trailer by the driver-side tail light. We ulize a Zamp solar port which is directly
compable with Zamp solar panels but Zamp also oer a range of adapters
to allow compability with other branded panels should you choose to use
another brand however you may require a Zamp reverse polarity adapter.
When selecng your solar panel please opt for one that ulizes a built-in
charge controller to help regulate the power to the baeries as the OPUS does
not have one built in. Please ensure you read the user guide for your selected
solar panels in full before connecng to the OPUS. For reference, you will need
to use the AGM seng for the baery type.
SUN AWNING
Your sun awning comes with the sun-y canvas and three poles. Aach the sun
awning via the zipper to the zip line located above the door beneath the Velcro
ap. Fold the Velcro ap over the zip line once aached. Extend the supplied
poles and install them in the receiving holes along the front line of the sun
awning. Use the supplied guy-ropes to tension and secure the awning.
CARGO RACK
To open your cargo rack, rst remove items that are lashed down to the rack.
Remove the securing pin from the latch clamp(S) then on the driver’s side of
the trailer there are two large securing pins on the hinge arms for the cargo
rack which you should remove to enable the rack to fold upwards. Li the
cargo rack upwards; the gas struts will assist with the weight of the cargo rack.
Once the cargo rack hinge is at a 90° angle, replace the securing pin through
the aligning holes to hold the cargo rack in the open posion.
To close the cargo rack, ensure the tent is deated and the bed lids are properly
closed and latched in place. Remove the securing pin from the hinge arms of
the cargo rack. The cargo rack will fall towards the roof of the OP4 however
the gas struts will carry the weight. On the other side of the trailer, help pull
the cargo rack down into the closed posion and latch it down. Load the cargo
rack with your cargo then re-check the latch clamps are ght. If the weigh of
the cargo has caused these latches to be loose then release the latch and turn
the triangle pin to shorten the length of the latch and re-close.
The maximum weight that the cargo rack can hold is 500lbs. Please ensure all
items are securely stowed and lashed down on the cargo rack before travel.
28
OP4 OPTIONAL EXTRAS
 Loading...