16
17
PACKING DOWN YOUR OPUS
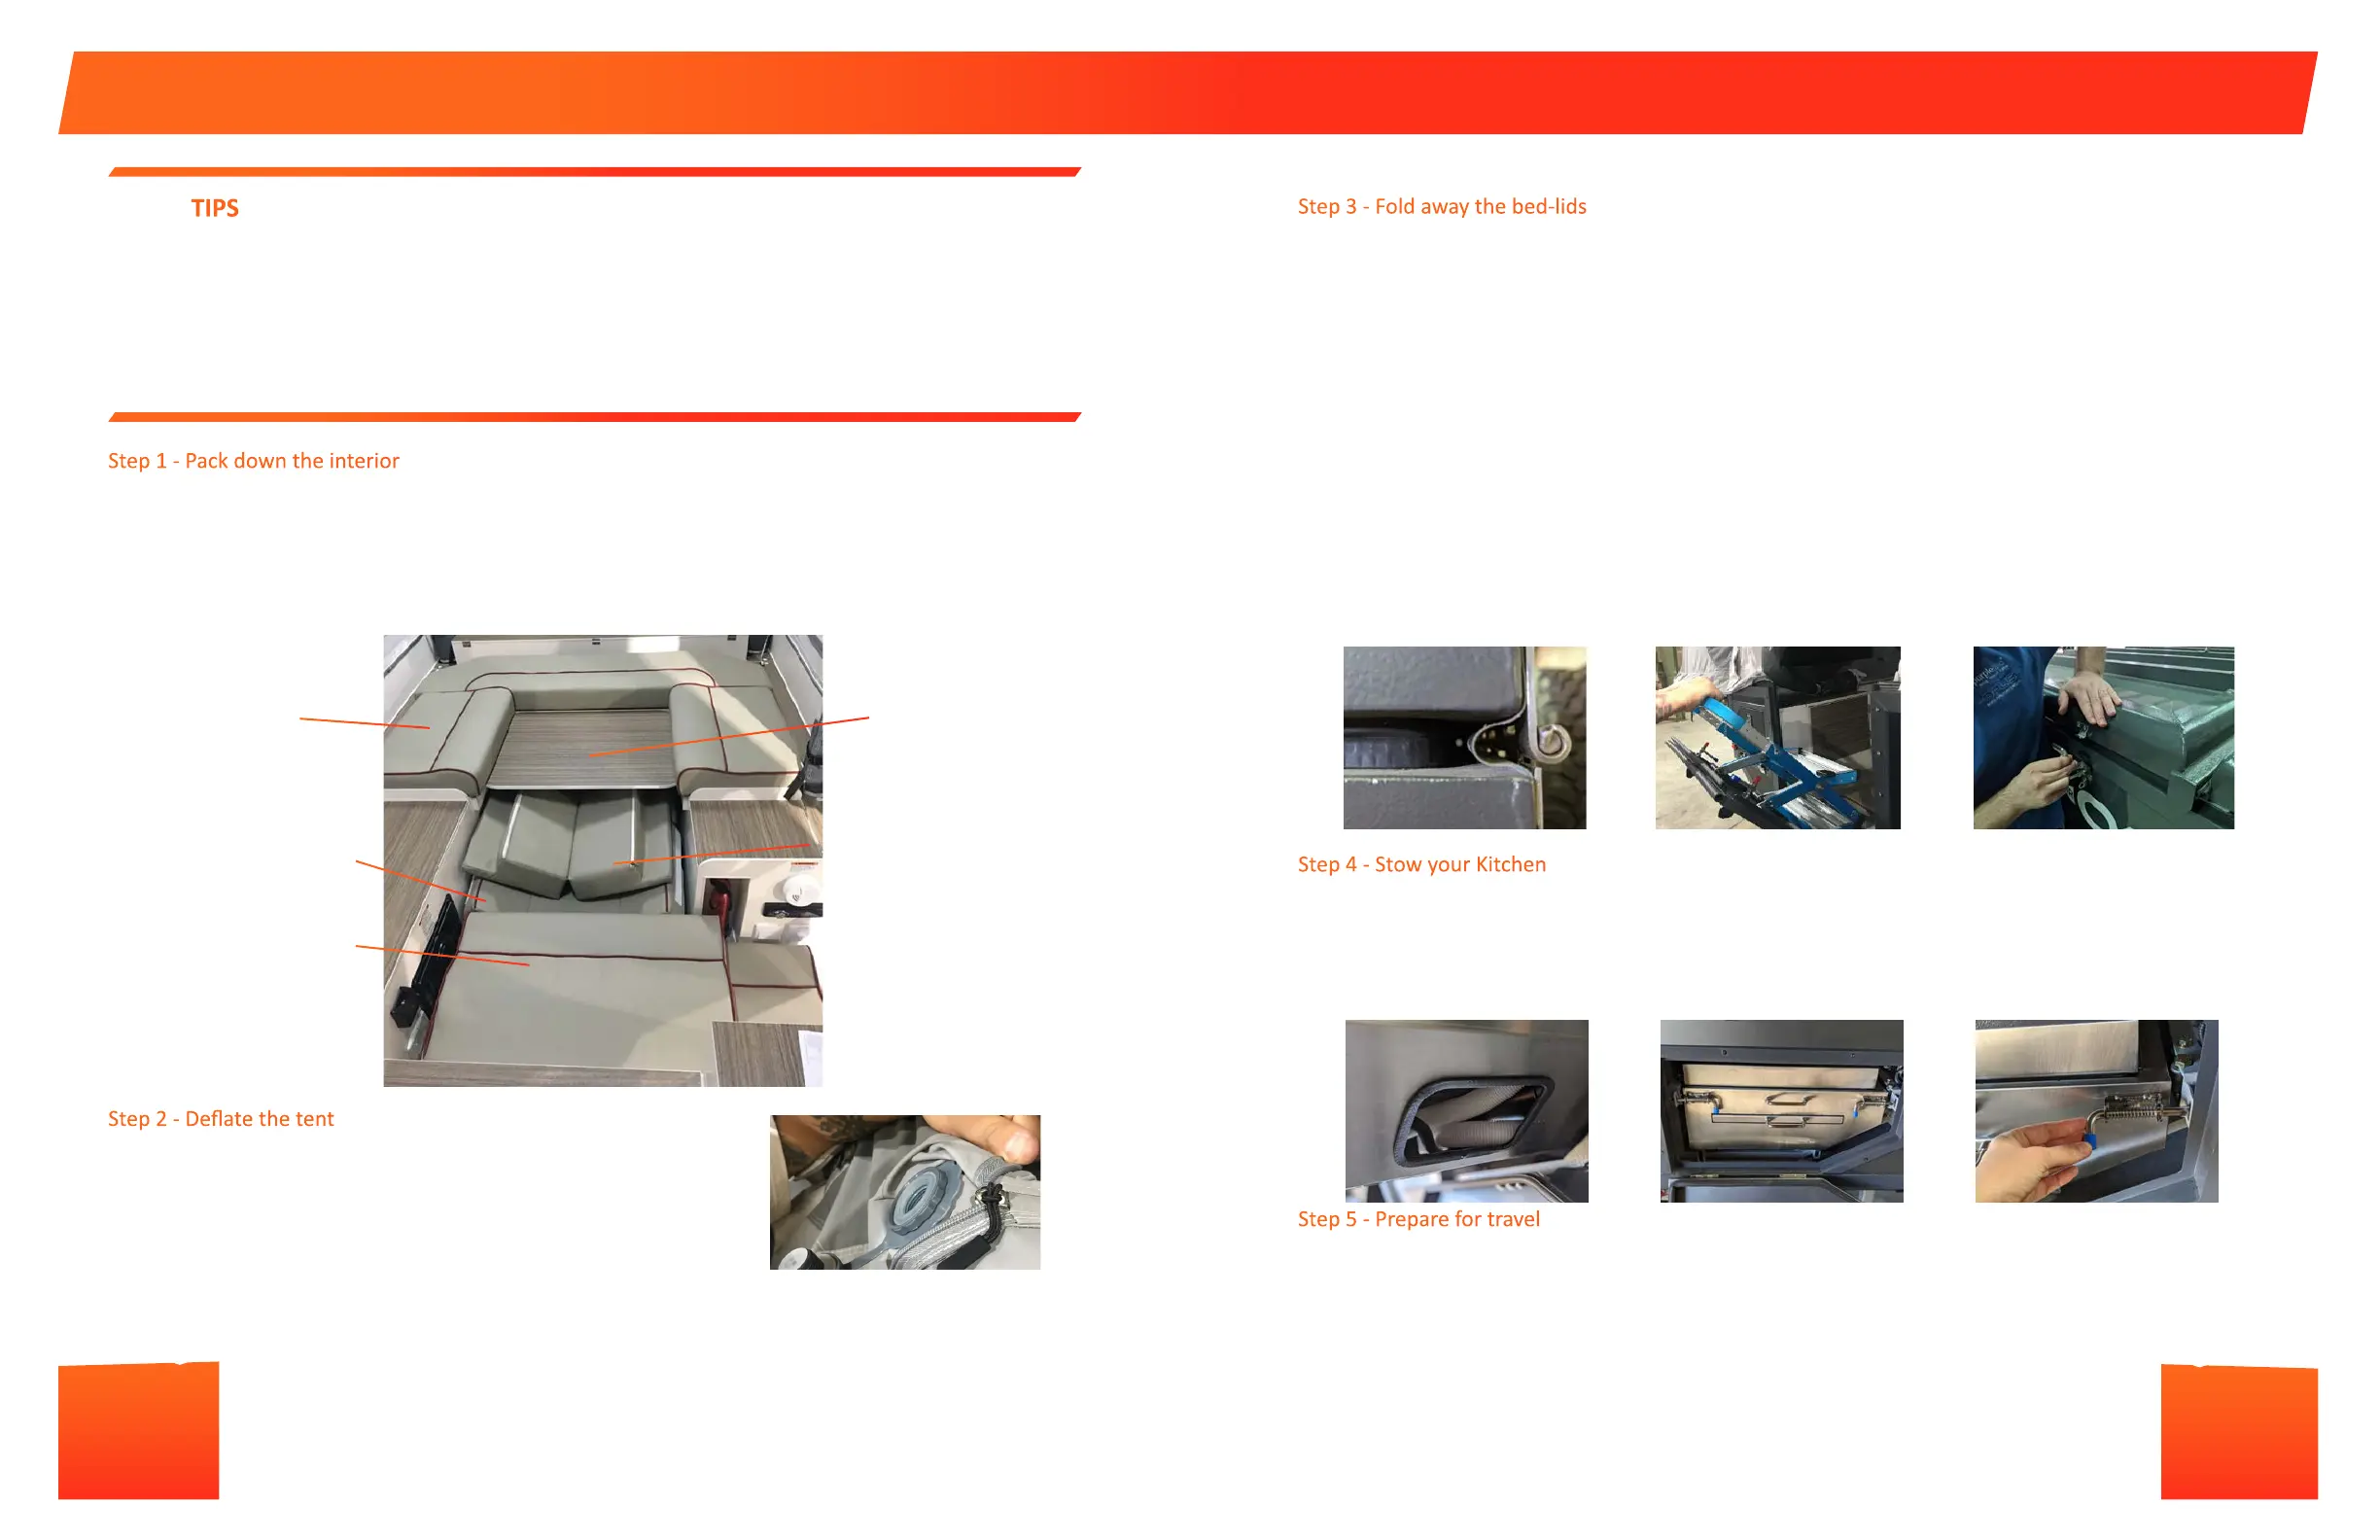
Step 1 - Pack down the interior
• Aer stowing your personal items, close all both layers of all windows, making sure no water, dirt or debris is trapped
between the layers.
• Ensure maresses are secure using the straps provided
• Remove LED lights from the 12v mini sockets
• Tear down the sofa and fold away the table; stow the back cushions and table as shown in the below picture to
opmize foot well storage space for other items and to ensure your table and cushions are stowed to prevent damage.
Step 2 - Deate the tent
• Ensure that all users are outside of the tent and zip the front door closed.
• Open all 5 quick release valves, located externally on the oside of the
camper on each of the vercal air poles. Make sure you release the valves
using the middle ring as shown in the image. Allow the tent to deate.
SET-UP TIPS
• Ensure all ve of your quick release valves are closed prior to inang your camper.
• While inang, check that the OPUS® is stable and level prior to opening the two lids.
• IMPORTANT: Do not place or load anything on top of the tent whilst it is inang.
• IMPORTANT: Ensure children or frail adults maintain a distance of 5 from the air poles whilst it is inang.
• Should you need to switch o the compressor for any reason whilst the tent is inang, this should be done using the
main power switch. Please note that the Air OPUS switch is not a 2-way on/o switch (meaning that pressing this twice
will not turn the compressor o).
Step 3 - Fold away the bed-lids
• Li the canvas o of the bed-end corners and fold the tent inside the seals of the trailer. Try to fold the tent into the
main body of camper as much as possible; this will help to make closing the camper easier.
• Retract the steps and fold up and latch the door.
• Disconnect the bed-end supports and latches and fold over rst the rear lid, then the front lid. Do not try to latch down
the bed lids yet
• Walk around the camper to make sure that all of the tent is folded away within the seals. Pull more of the tent away
from the bed-end hinges and into the main body of the camper. Make sure that no part of the tent is trapped outside
of the hinge seals.
• Push the bed lids down to allow air to escape. Twist open the triangle bolt latches to the maximum and push down on
the bed lid so that the latches are over the hook. Do not try to close the latches unl you have done this for each latch;
the easiest and most ecient way to close the bed lids is to do it gradually.
• Push down on the bed lids enough to allow you to close the latches closest to the hinges rst. IMPORTANT! Do not use
the latches as a lever to close the bed lid as this may cause damage to the camper and is not covered under warranty.
Once you have closed the latches at the maximum extension of the triangle bolts, move around the trailer and ghten
each latch. Each latch should be checked for a ght t several mes as ghtening one can loosen others. Make sure
that no tent is outside of the seal.
• Fold away your bed-leg supports, hot water shower arm (if required) and then fold up your spare re carrier. Ensure
bolt spring bolts are locked in place fully.
Step 4 - Stow your Kitchen
• Disconnect your water & gas quick connects from the kitchen as well as the 12v kitchen light.
• Ensure the water hoses are stowed in the drawer and that the drawers are closed on the catches properly. Stow the gas
and waste water hose up through the aperture in the kitchen.
• Stow your kitchen support leg using the push-buon retaining pin under the kitchen.
• Slide the kitchen back inside the camper and lock in place using both spring bolts. Close and Lock the kitchen storage
door. IMPORTANT! Do not stow your kitchen whilst hot.
Step 5 - Prepare for travel
• Fold over your cargo rack and secure with the latches. Twist down the triangle bolts to ensure a secure latch and secure
the closed latch with the safety pin.
• Retract and fold up your stabilizer legs.
• Ensure all compartments are properly latched and locked.
• Connect to your tow vehicle making sure you lock the lock’n’roll securing pin in place using the locking pin and ensure
the vehicle side of your hitch is properly secure and locked to your tow vehicle.
• Retract your tongue jack wheel and hold up. Connect your safety chains, breakaway cable and
7-pin to your vehicle and complete your pre-trip checks to make sure your connecon is sound.
Seat cushions can remain in
place
corner cushions stowed on the
boom, backs to the oor.
Back cushions stowed in
footwell
Table folded and stowed on
third bed lip.
King Bed Extension stowed on
top of corner cushions
 Loading...