12
QUICK SET-UP GUIDE CONTROL PANEL
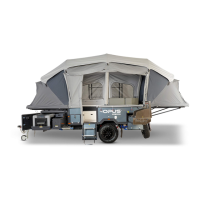
CONTROL PANEL FEATURES
1. Main Power Key Switch
2. Air Inaon Buon
3. Voltage/Amp Meter
4. Baery Level Indicator
5. Front Tank
6. 12V Socket
7. Rear Tank
8. Rear Pump
9. Front Pump
10. Lights
11. Indoor Plugs
12. Fridge
13. Heater (Oponal)
Each switch on the control panel has its
own breaker located directly above the
switch.
CONTROL PANEL QUICK TIPS
• The Volt Meter – Measures the current baery voltage output. Most appliances will require at least 12.2v from the
baeries otherwise they will not work.
• Amp Meter – This shows how many Amps you are currently using. The OPUS® has 2 x 100ah AGM baeries. This gives
you 100 usable amps for o-site power.
• Baery Indicator – This shows the total capacity remaining in your baeries. If you are showing 50% on your baery
meter then your baeries will not put out the 12.2v required for most accessories to operate.
• Ensuring you keep a close eye on all 3 gauges will help to make sure you are fully informed on the current performance
of your 12v baery powered electrical system.
VOLTAGE METER
• The Upper Number shows what Voltage (power level) the baeries are currently reading. It is the strength of the cur-
rent owing from the baeries.
• If this number were to drop beneath 12.0v with no load (i.e. no accessories running on the OPUS®) then it is highly like-
ly all the appliances inside your camper would stop working as the baeries are not able to put out enough voltage to
keep these appliances running.
• Do not take a reading when an appliance, such as a fridge, is running. It will give a false reading. Voltage may appear
below 12.0 if the baeries are under load (fridge is acvely running).
• The lower number shows the quanty of energy you are currently ulizing from the baeries.
• If you imagine a water tank holding 100gallons and you drain 4 gallons an hour (gallons would
represent amps), then you can tell how quickly under current usage condions your baeries will
be fully drained.
• Remember your appliances all cycle at dierent rates so this number becomes very important for
esmang baery life.
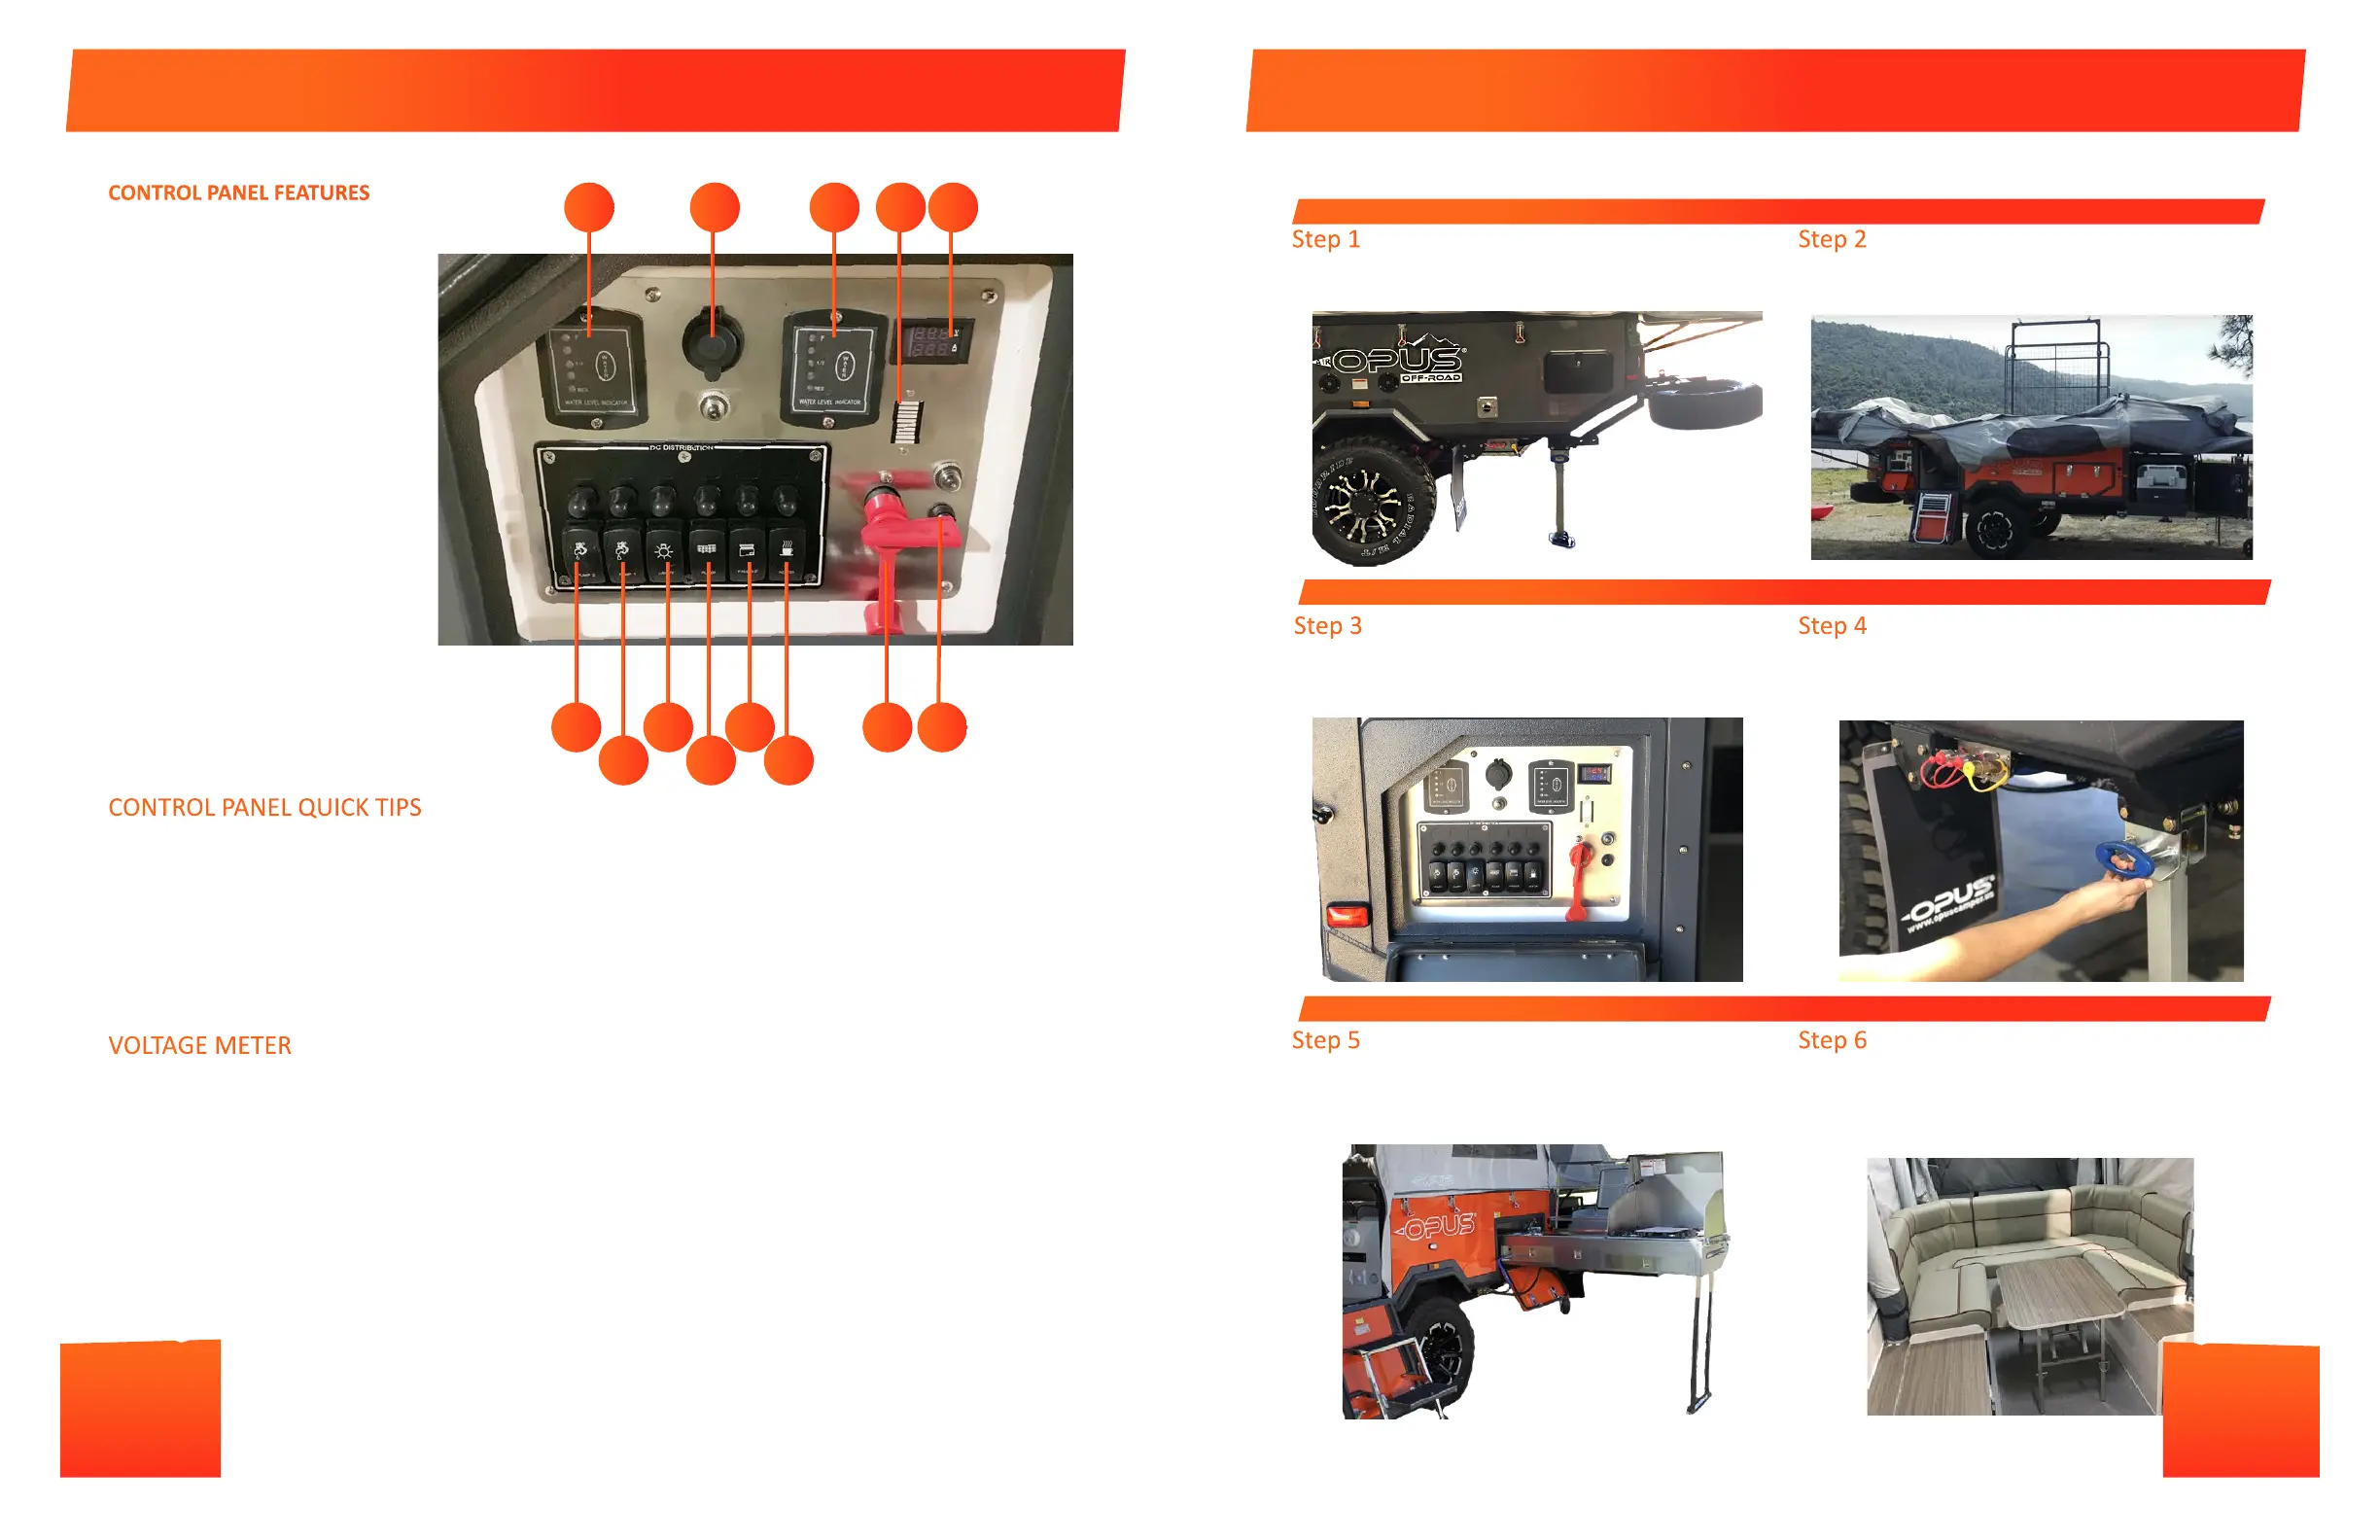
We strongly recommend you review the OPUS® O-Road User Manual thoroughly before seng up you OPUS® O-Road
Camper for the rst me.
Step 1
Lower the tongue jack. Release the spare wheel carrier to
the horizontal posion
Step 2
Unlatch and raise the cargo rack to the set-up posion.
Unlatch the bed lids & open them.
Step 3
Turn on the AIR compressor. Don’t forget to make sure your
quick release valves on the AIR tent are closed and that the
AIR compressor hose is in the AIR tent inlet valve!
Step 4
Whilst the tent is inang, fold down your corner steadies &
stabilize your trailer. Pull the tent over the bed end corners
& x the bed support arms in place.
Step 5
Slide open your kitchen & fridge. Connect your quick
connects and fold down your kitchen support leg. Set up
your sink drain and waste water carrier.
Step 6
Once your tent is inated, remember to cap your AIR inlet
valve! Set up your cushions and table inside. You can then
set up your addional accessories such as water heater,
solar panels or cinema system.
112
11
10
9
8
7 6 5 4 3
2
13
13
 Loading...