10
Days of the Week
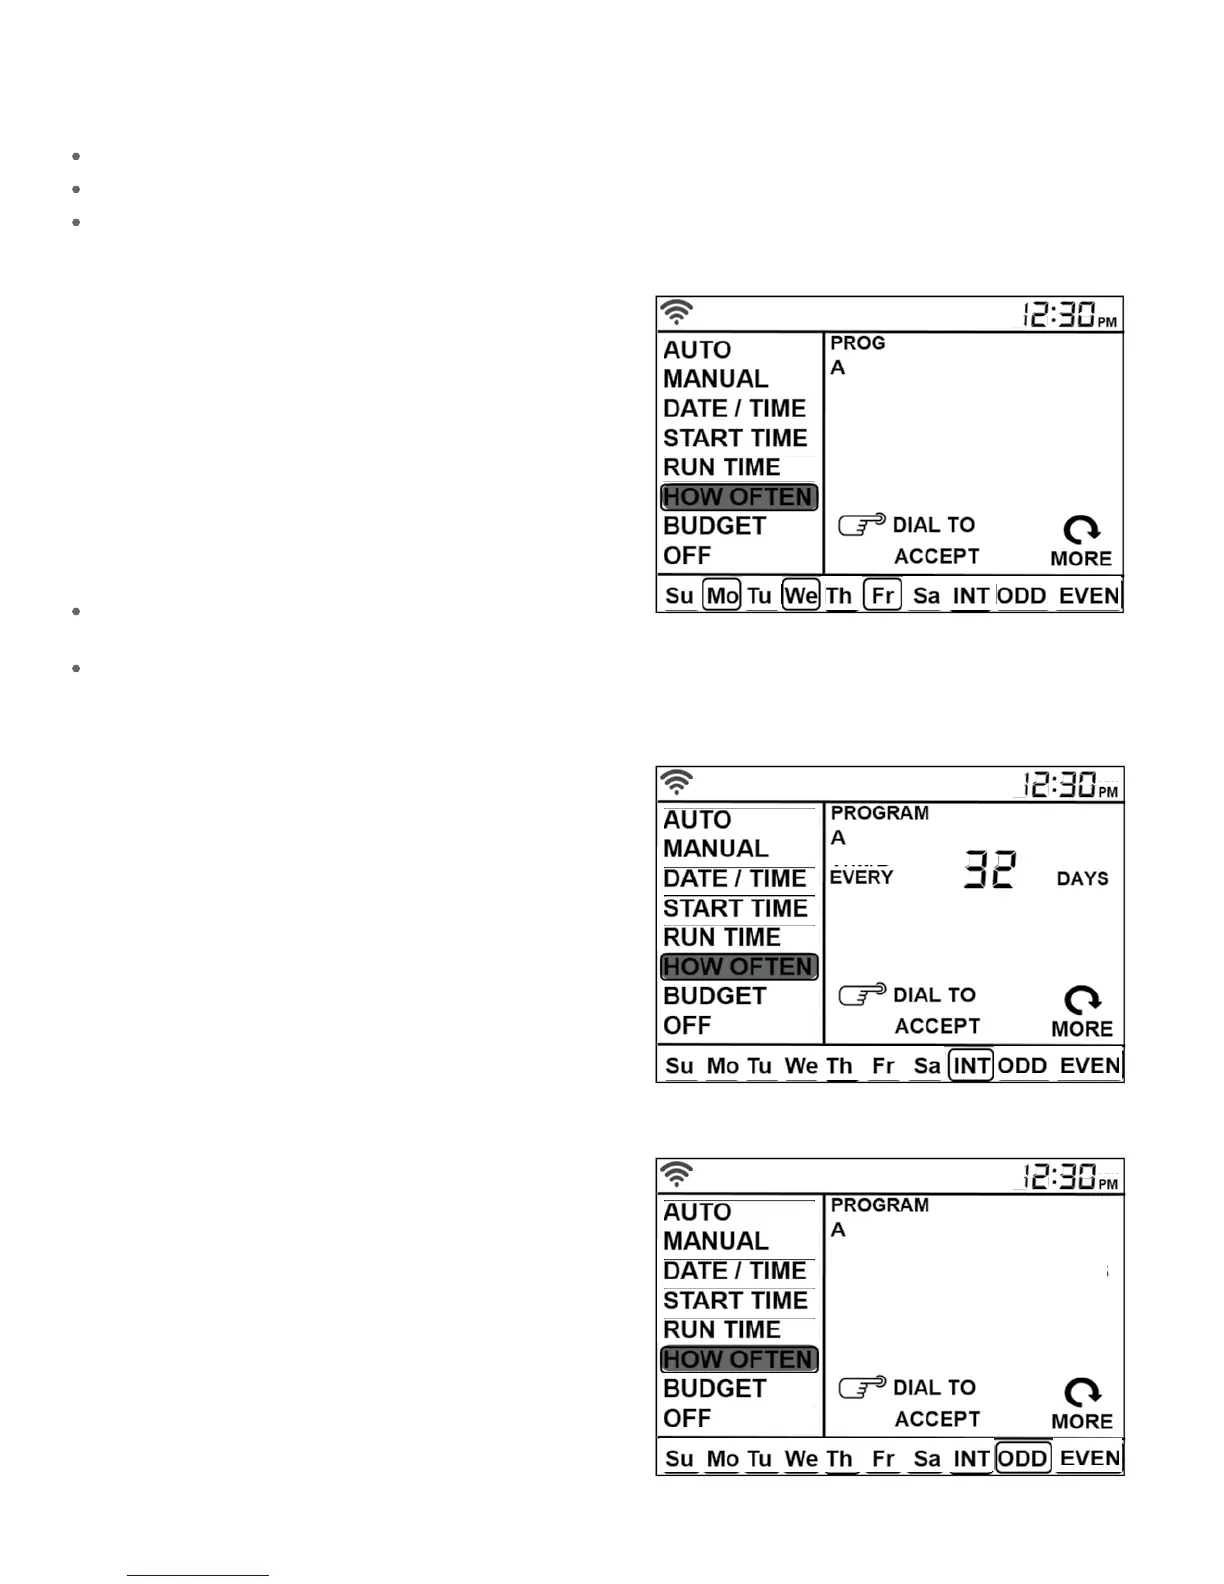
1. Turn dial until the selection box is on HOW OFTEN.
2. Press the dial. You will now see Su (Sunday) flashing.
3. Turn the dial until your desired day of the week is flashing.
4. Press the dial to confirm your selection and a
frame will appear around the selected day.
5. Repeat this process until all of the desired
watering days have a box around them.
6. Press BACK to return to the main menu.
7. Turn the dial to Auto and press the dial to select.
You have programmed your timer!
To remove a previously entered day, turn the dial to
the day and press the dial to de-select the day.
If you wish to erase all watering days,
press the CLEAR button.
How Often
There are three options when determining how oen (what days or intervals) the timer will water.
Days of the week (Mon, Tues, Wed, etc.)
Intervals (Every “X” number of days)
Odd or Even Days
Odd or Even Days
1. Turn dial until the selection box is on HOW OFTEN.
2. Press the dial. You will now see Su (Sunday) flashing.
3. Turn the dial to ODD or EVEN.
Press the dial to confirm. A frame will
appear around ODD or EVEN.
Example: Odd: st, rd, th, etc.
Example: Even: nd, th, th, etc.
4. Press BACK to return to the main menu.
5. Turn the dial to Auto and press the dial to select.
You have programmed your timer!
Intervals
1. Turn dial until the selection box is on HOW OFTEN.
2. Press the dial. You will now see Su (Sunday) flashing.
3. Turn the dial to INT.
4. Press the dial to confirm. A frame will appear around
INT and EVERY DAYS will appear in the display.
will be flashing and is the default interval.
5. Turn the dial to increase the number, press the dial when
your desired number of days between waterings is reached.
Example: An interval of will water every day; an
interval of will water every rd day, etc.
6. Press BACK to return to the main menu.
7. Turn the dial to Auto and press the dial to select.
You have programmed your timer!

 Loading...