10
VQT2J34
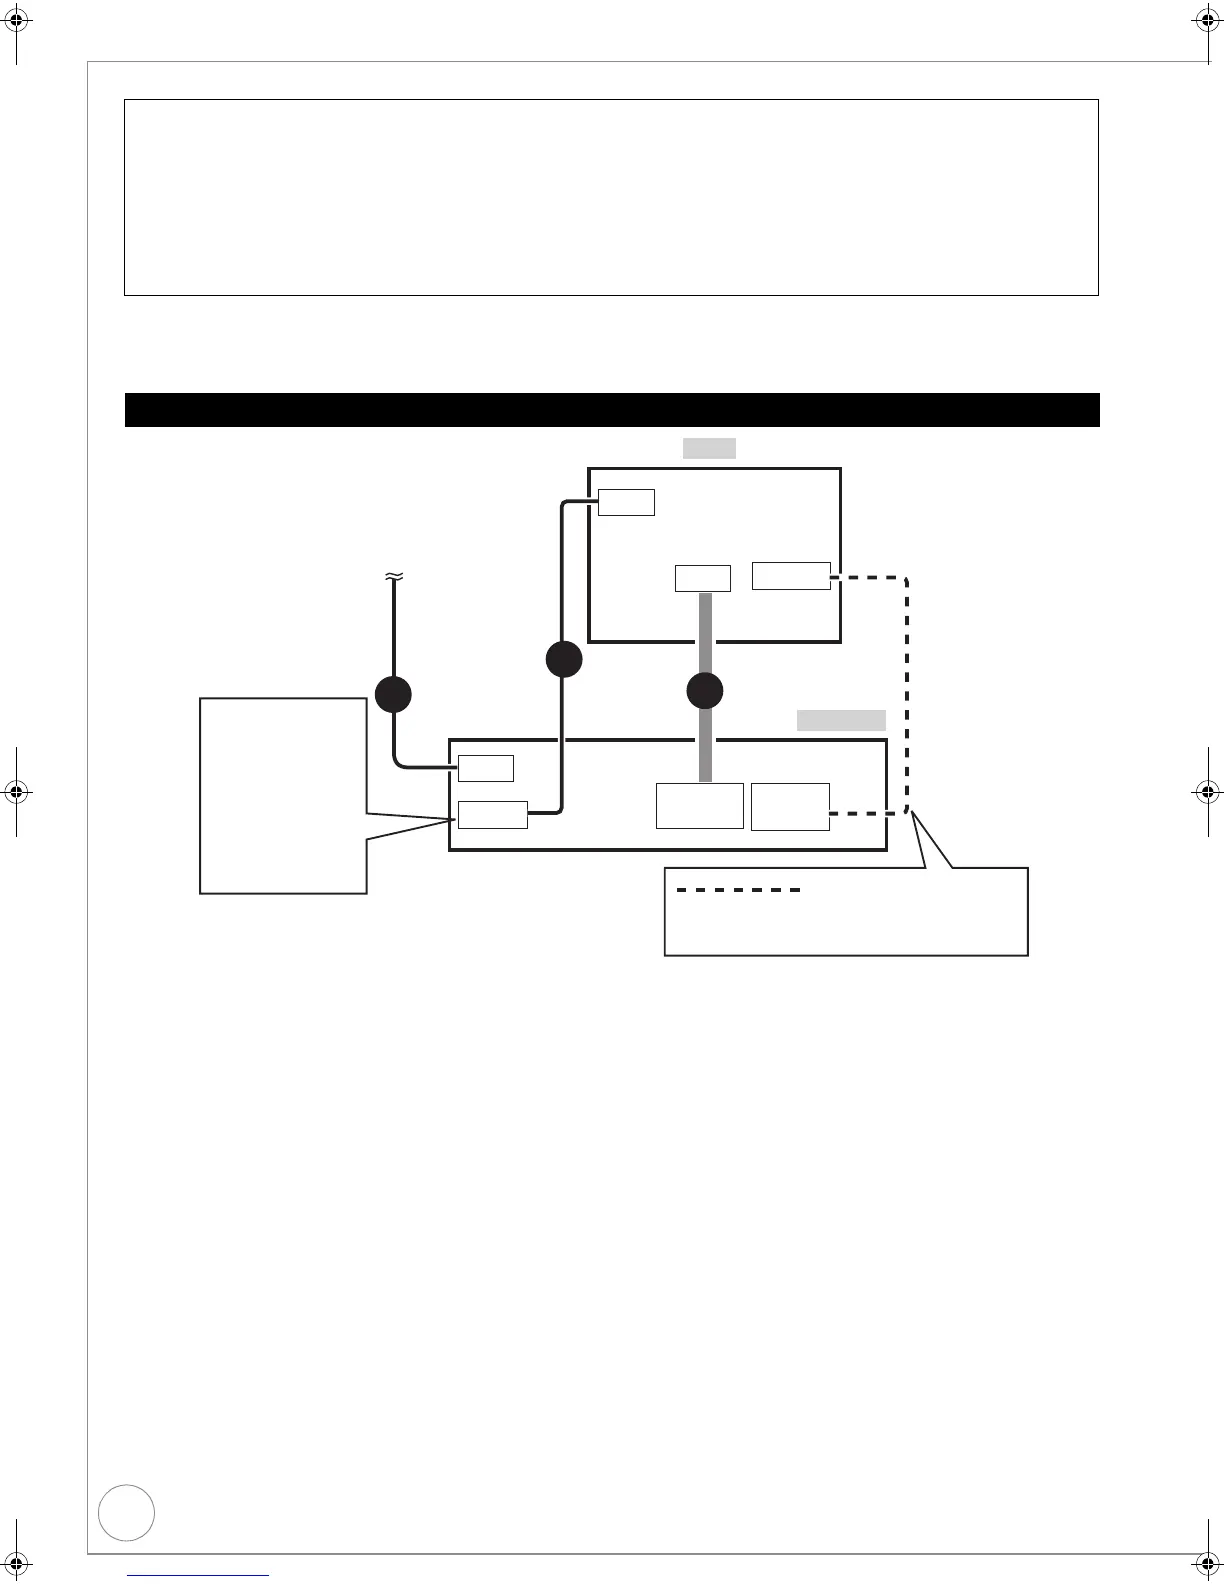
Basic Connection
≥ Before connection, turn off the mains for all connected equipment and read the appropriate operating
instructions.
BE SURE TO READ THE CAUTION FOR AC MAINS LEAD ON PAGE 3.
1 Aerial cable to the “RF IN” on the unit.
2 RF coaxial cable (included) from the “RF OUT” on the unit to the “RF IN” on the TV.
3 21-pin Scart cable from the “AV1 (TV)” on the unit to the “AV” on the TV.
Use of the RF coaxial cable
≥ Keep the RF coaxial cables as far away as possible from other cables.
≥ Do not roll up the RF coaxial cables.
Using a fully wired 21-pin Scart cable
– You can use a variety of Q Link functions by connecting the unit to a Q Link compatible television (> 42).
– You can enjoy high-quality viewing by connecting the unit to an RGB compatible television.
“AV1 Output” in the Setup menu is set to “RGB 1” or “RGB 2” (> 75)
Make “AV2 Input” settings in the Setup menu (> 75)
Connecting to a Television only
(TV)
RF IN
AV
RF IN
HDMI
AV OUT
HDMI IN
AV1
RF OUT
1
2
3
This unit
TV
HDMI cable
The RF coaxial cable
cannot be used for
showing pictures from
the unit. The unit must
be connected using
another method, e.g.
21-pin Scart cable
to show pictures
from the unit on the
television set.
To the aerial
You can enjoy high-quality picture by
adding the HDMI cable connection > 12
DMR-EX773EB_VQT2J34-B.book 10 ページ 2010年1月7日 木曜日 午後5時8分

 Loading...