VQT2J34
11
STEP 2
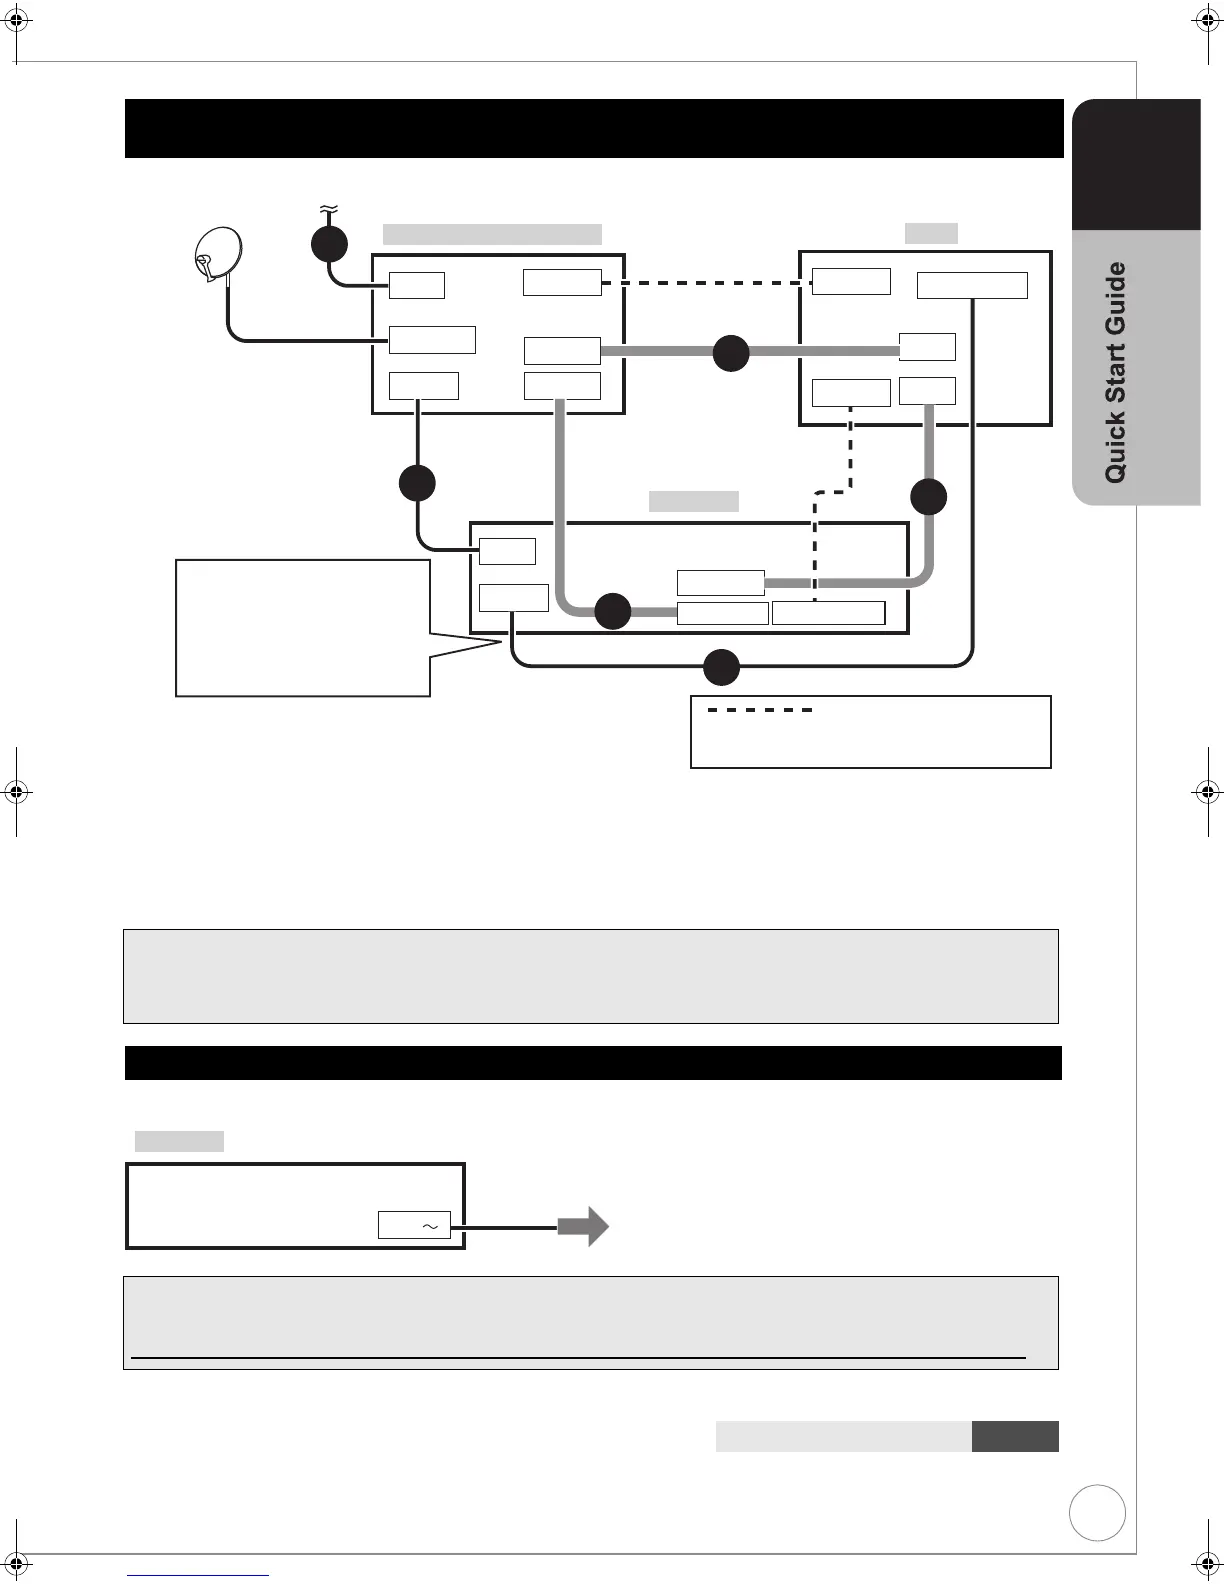
1 Aerial cable to the “RF IN” on the digital satellite receiver.
2 RF coaxial cable from the “RF OUT” on the digital satellite receiver to the “RF IN” on the unit.
3 RF coaxial cable (included) from the “RF OUT” on the unit to the “RF IN/AERIAL” on the TV.
4 21-pin Scart cable from the “AV/VCR” on the digital satellite receiver to the “AV2 (EXT)” on the unit.
5 21-pin Scart cable from the “AV1 (TV)” on the unit to the “AV” on the TV.
6 21-pin Scart cable from the “AV/TV” on the digital satellite receiver to the “AV” on the TV.
Connect only after all other connections are complete.
After completing the above connections, proceed to the TV Tuning (> 13).
Adding a Digital Satellite Receiver: Connecting to a Television and a Digital Satellite
Receiver
To view digital satellite programmes
Refer to “Watching Digital Satellite Programmes” (> 19)
To record digital satellite programmes
Refer to “Recording from a Digital Satellite Receiver or External equipment” (> 28)
Connecting AC mains lead (included)
When the unit is not to be used for a long time
To save power, unplug it from the household mains socket. This unit consumes a small amount of power, even
when it is turned off.
[approx. 0.3 W (“Power Save in Standby” is
activated and “RF OUT ( Aerial Signal )” is set to “Off”.)]
Additional Connections 110, 78
Digital satellite receiver
AV1(TV)
This unit
TV
RF IN/AERIAL
RF IN
AV2 (EXT)
RF OUT
RF IN
DISH INPUT
RF OUT
AV
AV/TV
AV/VCR
AV
HDMI IN
HDMI OUT
1
2
3
4
5
6
HDMI cable
HDMI AV OUT
HDMI IN
The RF coaxial cable cannot be
used for showing pictures from the
unit. The unit must be connected
using another method, e.g. 21-pin
Scart cable to show pictures from
the unit on the television set.
To the aerial
Digital satellite antenna
You can enjoy high-quality picture by adding
the HDMI cable connection > 12
This unit
AC IN
To household mains
socket
DMR-EX773EB_VQT2J34-B.book 11 ページ 2010年1月7日 木曜日 午後5時8分

 Loading...