22
VQT2J45
Recording Television Programmes
Refer to “Notes for Recording” (> 26) and “Advanced Recording” (> 27–
29) for detail information on recording.
[HDD] [ RAM ] [-R ] [-RW‹V›] [+R] [+R W] [VHS]
Preparation:
≥ Turn on the television and select the appropriate video input to suit the
connections to this unit.
≥ [RAM] If the disc is protected, release protection (> 76).
≥ [VHS] Ensure accidental erasure tab is intact.
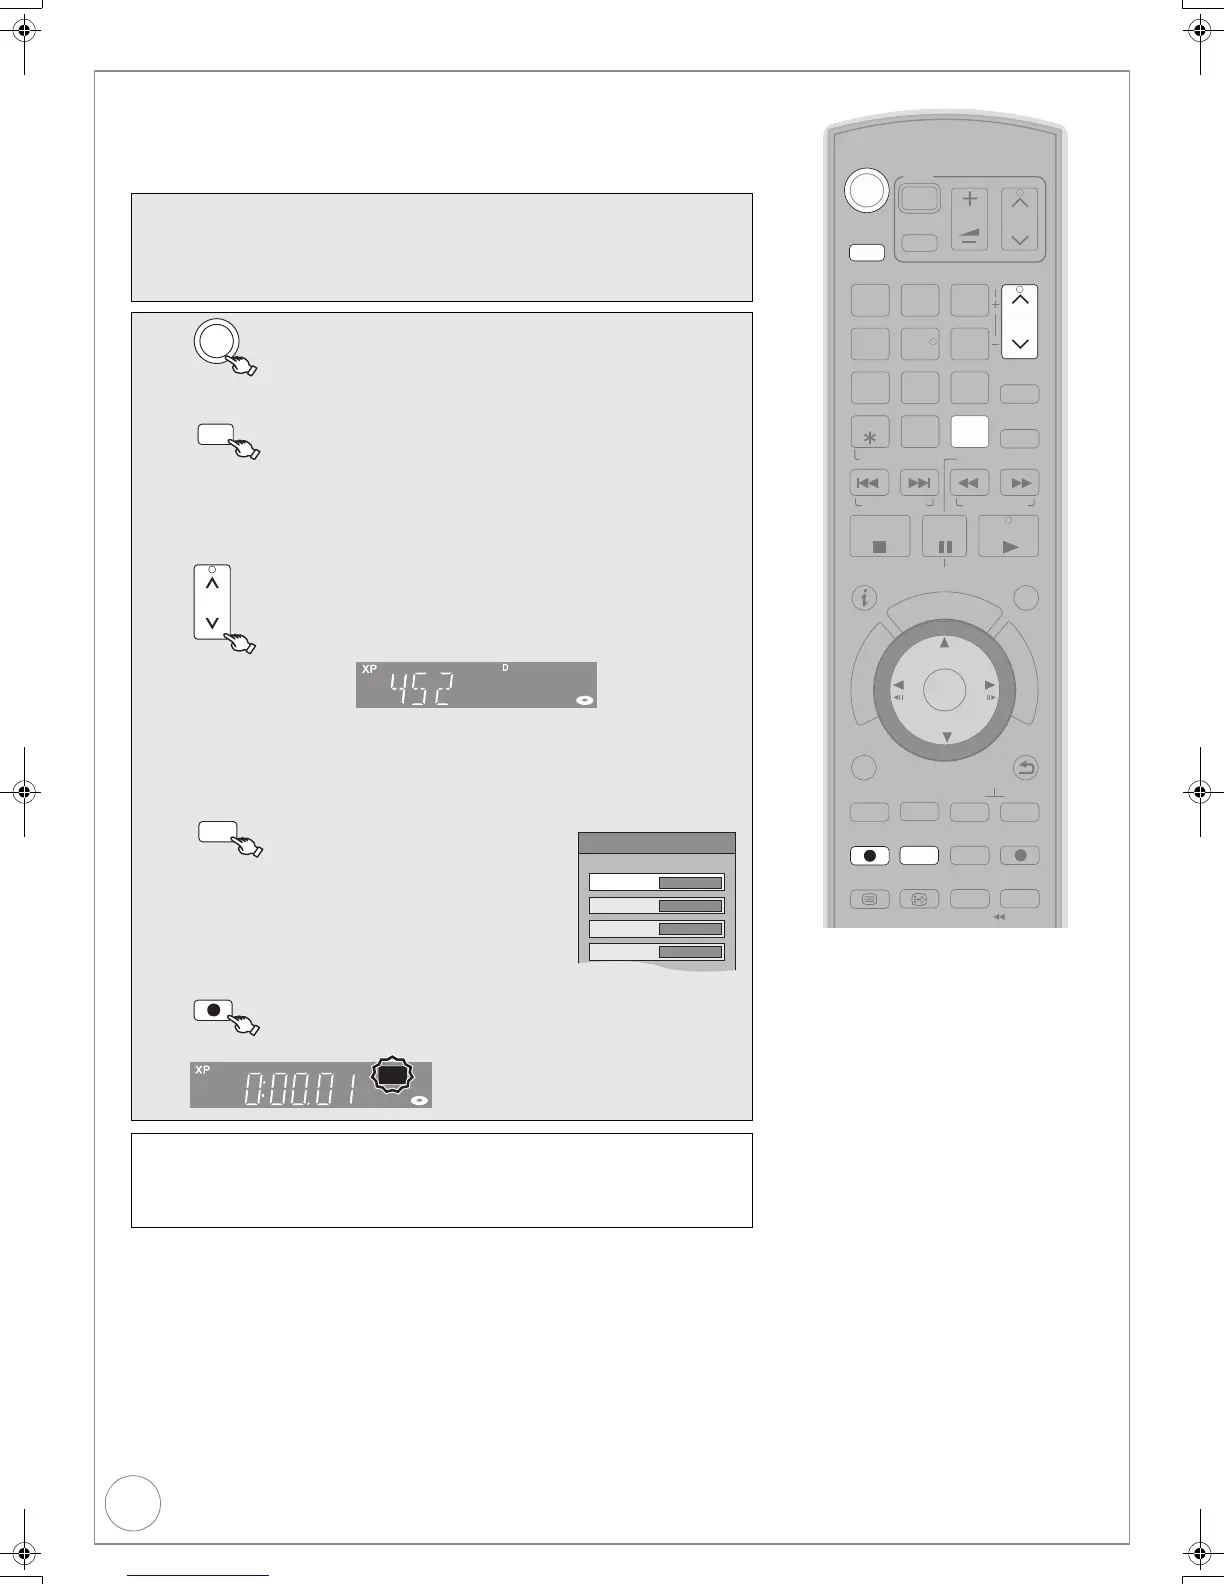
1
to turn the unit on.
2
to select the drive (HDD, DVD or VHS).
3
If you selected the DVD or VHS drive
Insert a disc or video cassette.
– Insert a disc or video cassette with enough remaining blank space (
>
89).
– When the format confirmation screen is displayed (> 28).
4
to select desired channel.
– To select with the numbered buttons (> 19).
– When no channel setting is performed on the unit and broadcast is
recorded directly from the digital satellite receiver, select a channel on
the connected equipment, then press [INPUT SELECT] to select “AV2”.
5
to select the recording
mode. (> 27)
6
to start recording.
Pausing Recording
Press [;].
– Press again to restart recording.
(The title is not divided.)
Stopping Recording
Press [∫].
Tips
≥If a programme to record has subtitles, Audio Description or multiple audio, you can record
with these items. They cannot be switched after recording.
– To record with subtitles
Before starting the recording, show the subtitles (> 50). If the programme has multiple
subtitle, select the desired language (> 79).
– To record with Audio Description
Before starting the recording, turn on the Audio Description and set the volume (> 50).
– To record with the selected audio
Before starting the recording, select the desired audio channel or language, if the
programme has multiple audio channel or language (> 75, 79).
≥(Except for [VHS] )To record sound using LPCM (XP mode only):
Set the “Audio Mode for XP Recording” to “LPCM” in the Setup menu (> 81)
TIME SLIP
STTL DISPLAY
DIRECT TV REC
EXT LINK
REC MODE
REC
-10s
MANUAL SKIP
+60s
STOP
PAUSE
PLAY
INPUT
SELECT
0
9
8
7
6
54
3
2
1
CH
CH
TRACKING/V-LOCK/PAGE
CHAPTER
PROG/CHECK
SKIP/INDEX REW
JET REW
FF
SLOW/SEARCH
PAUSE LIVE TV
RESET
VOL
AV
DRIVE
SELECT
STATUS
EXIT
OPTION
RETURN
DELETE
OK
D
I
R
E
C
T
N
A
V
I
G
A
T
O
R
F
U
N
C
T
I
O
N
M
E
N
U
G
U
I
D
E
TEXT
Notes
≥[RAM] [-RW‹V›] [+R] [+RW] To use a new disc,
formatting is necessary. (> 28, 76)
≥[-R] [-RW‹V›] [+R] [+RW] It takes about 30
seconds for the unit to complete recording
management information after recording
finishes.
≥You cannot change the channel or
recording mode during recording.
≥This unit cannot record NTSC signals to
discs that already have PAL signal
recordings. (However, both types of
programmes can be recorded onto the
HDD or VHS.)
≥[-R] Video cannot be recorded to DVD-R
discs with JPEG images already recorded
on them.
≥Depending on the type of disc used for
recording or the type of broadcast, there
may be restrictions on the title you are
trying to record. (> 26)
≥[VHS]
– Even if the video cassette is labelled “S-
VHS”, it is not possible to record in the
S-VHS system with this unit.
This unit records in the normal VHS
system.
– When recording is paused for 5 minutes
or more, the unit returns to stop.
DRIVE
SELECT
CH
RECREC
XP
0:37
SP
1:15
LP
2:30
EP
5:00
Recording Mode
Rec Mode Remain
SELECT
REC MODE
REC
REC
DMR-EX99VEB_VQT2J45.book 22 ページ 2010年1月7日 木曜日 午後1時41分

 Loading...