32
VQT2J45
Advanced Timer Recording
[HDD] [RAM] [- R] [-RW‹V›] [+R] [+RW] [VHS]
§1
If “AUTO” is selected, and if the programme includes the information
of subtitles or Audio Description, they are automatically recorded
with the programme.
§2
When there are multiple languages, select the subtitle language
(> 79, DVB Preferred Subtitles)
§3
You can switch the Audio Description and change its volume during
timer recording.
Notes
≥“F” on the unit’s display flashes when the unit cannot go to timer
recording standby.
≥
If two timer recording times overlap, the first recording always has priority.
The second recording will start only after the first recording has finished.
≥Recorded subtitles cannot be deleted later.
≥A timer recording will not start while a disc is being formatted, deleted
or finalised. The recording begins afterwards.
≥When “Channel” is set in “AV1”, “AV2” or “AV3”, “STTL” and “AD”
setting is unavailable.
≥Recording Audio Description cannot be deleted.
Tips
To exit the timer recording list
Press [PROG/CHECK].
≥“Date” Setting
Each press of [3] changes items in the order below.
(Each press of [4] changes items in the reverse order.)
Titles recorded using the same daily, weekly or series timer are
bundled and displayed as a “group” in the DIRECT NAVIGATOR
screen (> 38) except when using Auto Renewal Recording.
≥You can also use the numbered buttons to enter “Channel”, “Date”,
“Start” and “Stop”.
≥
You can also press [DRIVE SELECT] to switch the drive, [REC MODE] to
switch “Mode” and press [STTL ] to switch “STTL”.
In timer recording of broadcast with multi-audio or multi-subtitle,
audio and subtitle language to be recorded will follow the setting
of “DVB Preferred Multi Audio” and “DVB Preferred Subtitles” in
the Setup menu (> 79)
Notes
≥Recording stops and the timer programme is deleted. (Daily, weekly
and series timer programmes remain and timer recording will start
from the next time the timer recording is set.)
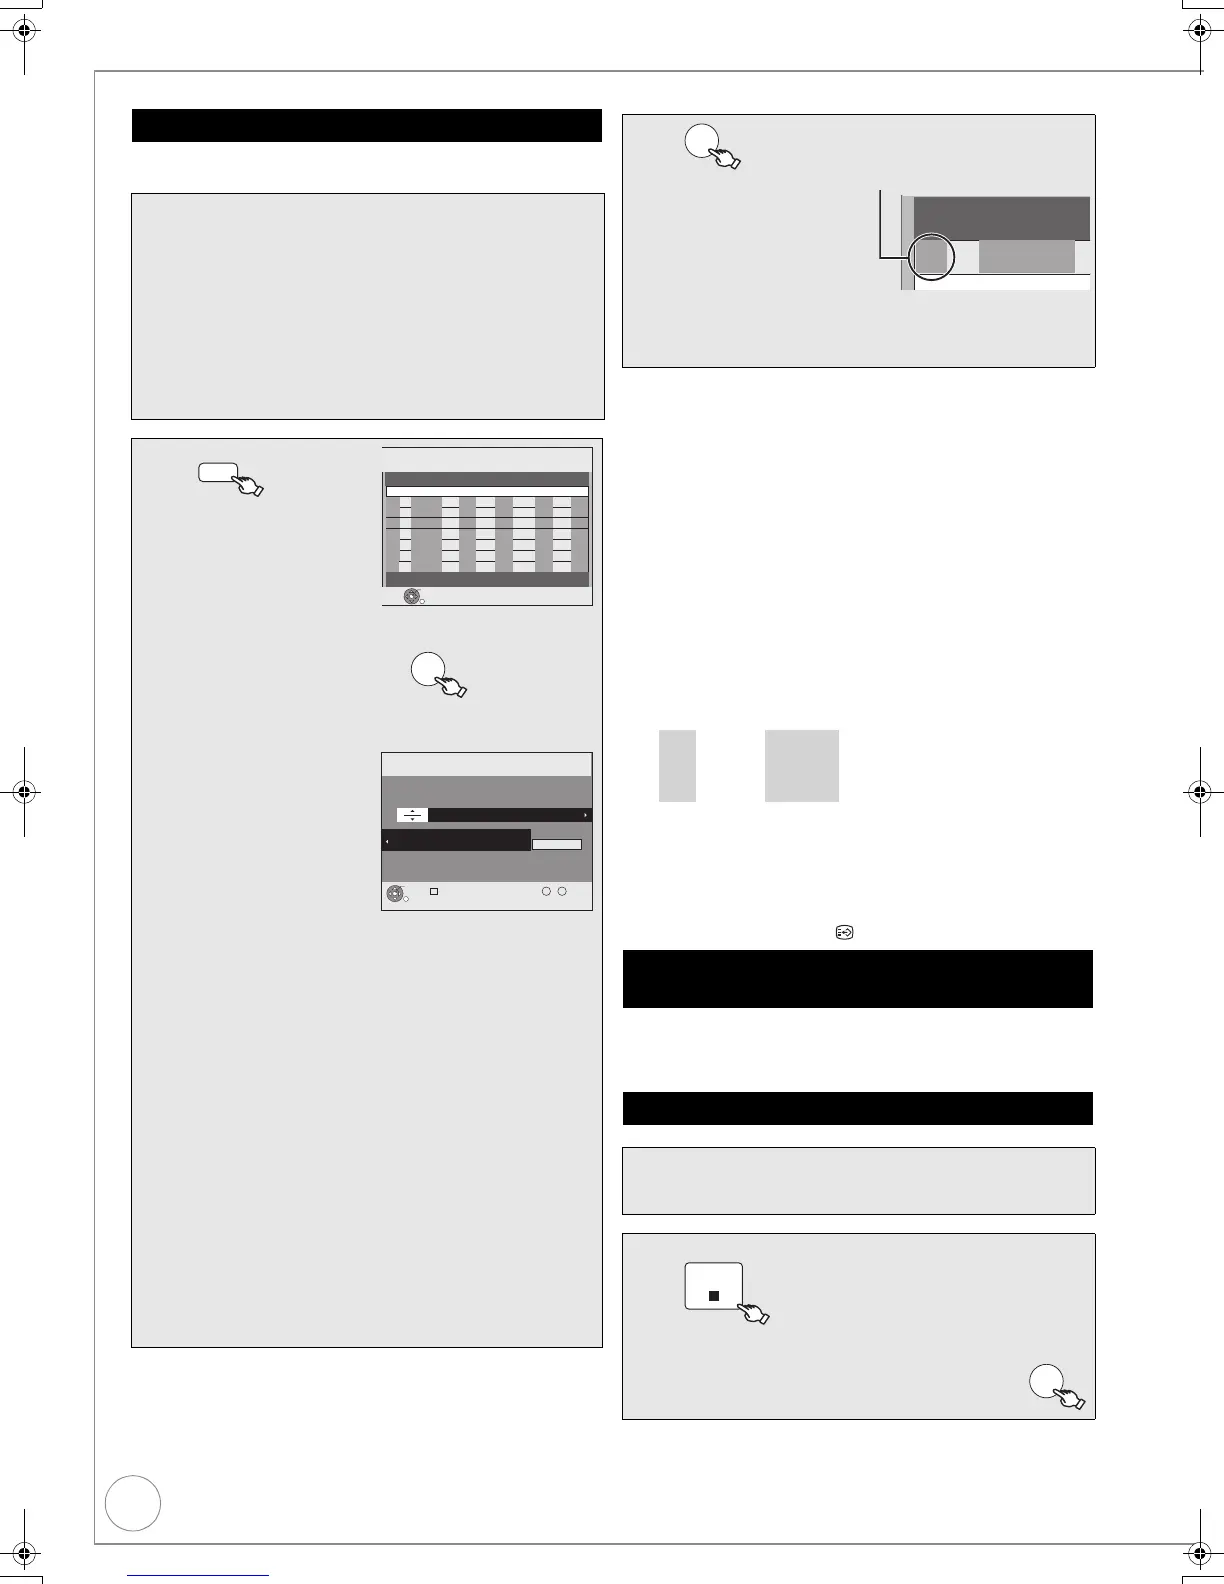
Manual timer recordings
Preparation:
≥ Turn on the television and select the appropriate video input
to suit the connections to this unit.
≥ [RAM] If the disc is protected, release protection (> 76).
≥ [VHS] Ensure accidental erasure tab is intact.
≥ When recording to a disc or a video cassette, insert the
media with enough remaining blank space.
≥ Confirm that the clock on the unit’s display is set to the
correct time.
≥ If connected via a digital satellite receiver, please ensure
before a timer recording starts the required channel is set
on the digital satellite receiver.
1
2
3, 4 to select “New Timer
Programme”, then
≥ If “New Timer Programme” is already selected,
press [OK].
3
2, 1 to move
through the
items and
3, 4 to set
the items.
Channel:
– TV Station Name/External Input
≥When recording digital satellite programmes, select “AV2”.
≥You can press the “Blue” button to change the category. [e.g.,
Free Channels, Radio, Registered Favourites (> 78, Favourites
Edit)]
Date:
– You can set a daily or weekly programme (> right, Tips).
Start (start time)/Stop (end time):
– Hold button to change in 30-minute increments or decrements.
Drive:
– HDD, DVD or VHS
When the recording drive is “DVD” and there is not enough remaining
space, recording automatically switches to the “HDD” (
>
34).
Mode:
– Recording mode (> 27)
STTL [Subtitles (> 50)]
§1
,
§2
:
– AUTO/OFF
AD [Audio Description (> 50)]
§1
,
§3
:
– AUTO/OFF
RENEW ([HDD]):
– Auto Renewal Recording (> 34) ON/OFF
Programme Name:
Press [OK] (> 51, Entering Text).
30:24 SP
Timer
Recording
1:58 SP
DVD
30:24 SP
HDDRemain
TUE 12/10/10 12:53:00
RETURN
OK
Press OK to store new programme.
Mode STTLStopStartNo. Date
Drive
Channel
Drive
space
New Timer Programme
AD
VHS
2:59 SP
PROG/CHECK
OK
Timer
Recording
1:58 SP
DVD
30:24 SP
HDDRemain
TUE 12/10/10 12:54:00
RETURN
OK
Number
--
0 9
Programme Name
Please set Channel.
All Channels : -----
Change
Category
-- : --
Start
-- / -- ---
Date
SP
Mode
---
STTL
---
Drive
VHS
2:59 SP
Channel
-- : --
Stop AD
---
4
– The timer icon is displayed in the left column.
–“F” lights on the unit’s display to indicate timer
recording standby has been activated.
– Repeat steps 2–4 to programme other recordings.
–Press [Í] to turn the unit off.
Language for broadcast with multi-audio
or multi-subtitle
To cancel a timer recording in progress
Preparation:
≥ Turn on the television and select the appropriate video input
to suit the connections to this unit.
1
While the unit is on
– Confirmation screen appears.
2
2
to select “Stop Recording”, then
OK
Current date One month later
minus one day
Weekly timer Daily timer
SUN-SAT
MON-SAT
MON-FRI
SAT
SUN
---
STOP
OK
DMR-EX99VEB_VQT2J45.book 32 ページ 2010年1月7日 木曜日 午後1時41分

 Loading...