MC012C-AS00 TRANSAXLE: HYDRAULIC AND PARK BRAKE SYSTEMS Brake Cluster Assembly Replacement
Page 6-18 2003 Pioneer 1200/1200SE Gasoline Vehicle Maintenance and Service Manual
6
Front Brake Cluster Assembly Installation, Continued:
∆
CAUTION
• Do not substitute hex-head bolts for Torx-head bolts. Hex-head bolts can interfere with the
proper operation of the brake shoe adjusters.
2. Install a new banjo bolt (16) and new copper washers (17) to the wheel cylinder (7). Position the elbow
of the brake hose toward the rear of the vehicle. Tighten bolt to 13 ft-lb (17.6 N·m).
3. Install front wheel brake drum. See Front Wheel Brake Drum Installation on page 6-14.
4. Bleed the front wheel brakes. See Bleeding the Hydraulic Brake System on page 6-31.
5. Perform all of the brake system inspections. See Brake System Inspection on page 6-1.
REAR BRAKE CLUSTER ASSEMBLY REMOVAL
1. Remove rear brake drum. See Rear Wheel Brake Drum Removal on page 6-8.
2. Remove rear brake shoes. See Rear Brake Shoe Removal on page 6-9.
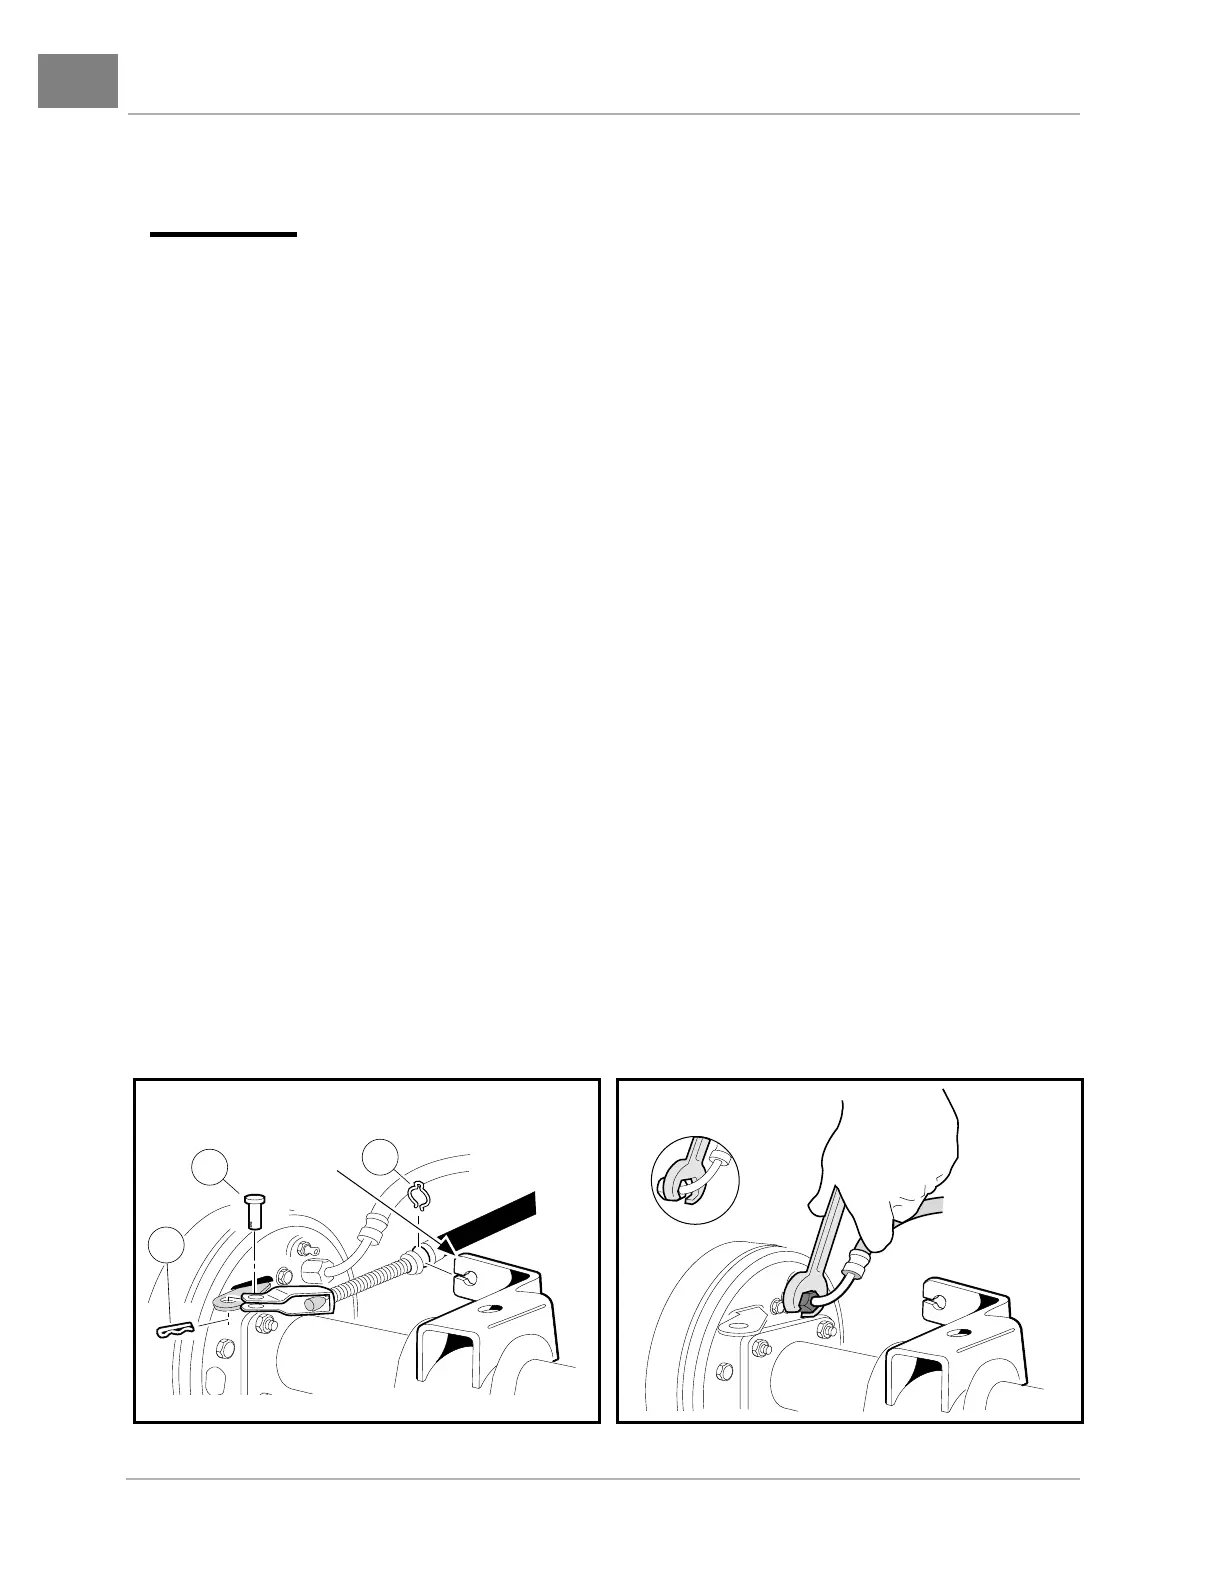
3. Remove park brake cable clip (1), hair spring cotter pin (2) and clevis pin (3) (Figure 6-16, Page 6-18).
4. Remove the cable from the cable support bracket.
5. Slide the cable so that the coiled spring wire, covering the cable wire, can be fed through the slot in the
support bracket, and then remove.
6. Use a 3/8-inch flare nut wrench and remove the brake hose fitting from the rear wheel cylinder
(Figure 6-17, Page 6-18).
7. Lift the hose above the brake cluster assembly and place a plastic bag over the hose fitting to keep dirt
and debris from entering the hydraulic braking system (Figure 6-18, Page 6-19).
8. Use a Torx #T-40 driver and remove the four Torx-head bolts (16), washers (17), and lock nuts (18) that
secure the brake cluster back plate to the axle tube flange (Figure 6-19, Page 6-21).
9. Repeat steps 1 through 8 for the opposite rear wheel if necessary.
Figure 6-16 Park Brake Cable Figure 6-17 Rear Brake Hose Flare Nut
CABLE
SUPPORT
BRACKET
1
3
2
 Loading...