EasyManuals Logo
Home>Pioneer>Cassette Player>CT-W205R

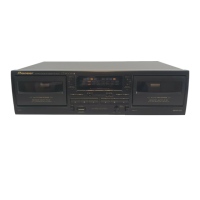
Pioneer CT-W205R Operating Instructions

Pioneer CT-W205R
24 pages
To Next Page IconTo Next Page
To Previous Page IconTo Previous Page
Page #16 background imageLoading...
Page #16 background image
RECORDING
RECORDING
(Deck
II
only)
Load
a
tape
for
recording
in
Deck
II.
Set
the
DOLBY
NR
switch.
Set
the
REV
MODE
switch.
e
To
record
on
one
side
only,
set
the
switch
to
the
=
position.
To
record
on
both
sides,
set
the
switch
to
either
the
=>
position.
Press
the
recording
(e)
button.
Prepare
the
audio
source
from
which
you
wish
to
record.
Turn
on
the
stereo
amplifier
and
prepare
it
for
playback
of
the
desired
audio
source.
Adjust
the
recording
level.
For
details,
see
“ADJUSTING
THE
RECORDING
LEVEL”
below.
Press
the
playback
or
<)
button
or
the
pause
(i!)
button
to
begin
recording.
e@
When
recording
on
both
sides,
press
the
»
button.
If
the
<
button
is
pressed
,
recording
will
stop
after
only
one
side
is
recorded.
ONS
oP
id
~
To
stop
recording
temporarily
Press
the
pause
(I)
button.
e@
To
resume
recording,
either
press
the
pause
(I)
button
again,
or
press
the
playback
(i
or
<4)
button.
To
Stop
Recording
Press
the
stop
(im)
button.
Erasure
prevention
tabs
The
recording
(e)
button
does
not
work
when
the
erasure
prevention
tabs
of
the
loaded
cassette
tape
have
been
broken
off
(See
page
4).
Do
not
press
the
recording
(e)
button
with
unreasonable
force.
When
recording
on
both
sides,
make
sure
that
both
tabs
are
intact.
ADJUSTING
THE
RECORDING
LEVEL
The
adjustment
of
the
recording
level
is
the
most
important
factor
in
achieving
good
recording
results.
A
high
level
provides
a
good
signal-to-noise
ratio
and
dynamic
range,
but
an
excessively
high
level
distorts
the
sound.
If
the
level
is
set
too
low
for
fear
of
sound
distortion,
irritating
tape
hiss
will
mar
the
recording.
The
characteristics
of
tapes
differ
depending
on
the
manufacturer
and
the
type
of
tape.
Set
the
REC
LEVEL
control
so
that
the
level
meter's
“~3
dB”
indicator
lights
steadily
most
of
the
time.
No
harm
will
be
done
if
the
“0
dB”
indicator
lights
ocasionally
at
peaks.
NOTES:
@
The
optimal
recording
level
may
differ
somewhat
depending
on
the
audio
source
and
type
of
tape
used.
In
order
to
obtain
the
best
possible
results,
set
the
recording
level after
actual
testing.
Listen
to
your
recordings,
and
adjust
the
level
as
necessary.
The
level
meter
may
react
differently
during
recording
and
playback
of
the
same
tape.
This
is
due
to
differences
in
tape
sensitivity,
and
creates
no
problem.
16
<RRE1132>
En/Ge
AUFNAHME
(Nur
DECK
Il)
.
Die
zu
bespielende
Cassette
in
DECK
Il
einlegen.
Den
DOLBY
NR-Schalter
einstellen.
Den
REV
MODE-Schalter
einstellen.
e
Wenn
lediglich
eine
Seite
der
Cassette
bespielt
werden
soll,
den
Schalter
auf
“==”
stellen.
Zum
Bespielen
beider
Seiten
der
Cassette
mu
der
Schalter
auf
"=>"
gestellt
werden.
Die
Aufnahmetaste
(e)
driicken.
Die
aufzunehmende
Programmqauelle
vorbereiten.
Den
Stereo-Verstarker
einschalten
und
den
betreffenden
Eingang
wahien.
Den
Aufnahmepegel
aussteuern.
Einzelheiten
hierzu
siehe
"AUSSTEUERUNG"
weiter
unten.
Die
Wiedergabetaste
bzw.
<)
oder
die
Pausentaste
(i)
driicken,
um
mit
der
Aufnahme
zu
beginnen.
who
o>
bad
~
Voriibergehendes
Unterbrechen
der
Aufnahme
Die
Pausentaste
(8)
driicken.
e
Zum
Fortsetzen
der
Aufnahme
danach
erneut
die
Pausentaste
(Il)
oder
die
Wiedergabetaste
(m
bzw.
<4)
driicken.
Stoppen
der
Aufnahme
Die
Stopptaste
(m)
driicken.
Léschschutzzungen
Die
Aufnahmetaste
(e)
arbeitet
nicht,
wenn
eine
Cassette
ohne
Léschschutzzungen
eingelegt
ist
(siehe
Seite
4).
Es
darf
auf
keinen
Fall
versucht
werden,
die
Aufnahmetaste
(e)
mit
Gewalt
zu
drikken.
Wenn
beide
Seiten
der
Cassette
bespielt
werden
sollen,
miissen
beide
Léschschutzzungen
intakt
sein.
AUSSTEVERUNG
Eine
optimale
Aussteuerung
ist
der
wichtigste
Faktor
fiir
gute
Aufnahmeergebnisse.
Ein
hoher
Aufnahmepegel
optimiert
Rauschabstand
und
Dynamikumfang,
kann
im
Extremfall
jedoch
auch
Klangverzerrungen
zur
Folge
haben.
Wenn
der
Pegel
zur
Vermeidung
von
Klangverzerrungen
zu
niedrig
ausgesteuert
wird,
macht
sich
stérendes
Bandrauschen
bemerkbar.
Auch
die
Bandeigenschaften
sind
je
nach
Hersteller
und
Bandsorte
verschieden.
Der
REC
LEVEL-Regler
sollte
so
eingestellt
werden,
da
die
Anzeige
"-3
dB"
des
Pegelmessers
die
meiste
Zeit
kontinuierlich
leuchtet.
Die
Anzeige
‘0
dB"
kann
gelegentlich
bei
Pegelspitzen
kurz
aufleuchten.
ANMERKUNGEN
e
Der
optimale
Aufnahmepegel
ist
je
nach
Programmaquelle
und
Bandsorte
etwas
verschieden.
Fir
beste
Aufnahmeergebnisse
sollte
die
optimale
Aussteuerung
durch
Hérproben
ermitelt
werden.
Der
Pegelmesser
kann
bei
Aufnahme
und
Wiedergabe
derselben
Cassette
verschiedene
Pegel
anzeigen.
Dies
ist
auf
Unterschiede
der
Bandempfindlichkeit
zuruckzuftihren
und
stellt
kein
Problem
dar.

Other manuals for Pioneer CT-W205R

Questions and Answers:

Question and Answer IconNeed help?

Do you have a question about the Pioneer CT-W205R and is the answer not in the manual?

Pioneer CT-W205R Specifications

Power IconPower
power requirements for U.K. and Australian modelsAC 220 - 230 volts, 50/60 Hz
power requirements for U.S. and Canadian modelsAC 120 volts, 60 Hz
power consumption16W
Audio Specifications IconAudio Specifications
wow and flutter0.09% (WRMS)
frequency response for TYPE IV (Metal) tape20 to 16, 500 Hz
frequency response for TYPE II (High/CrOz) tape20 to 16, 000 Hz
frequency response for TYPE I (Normal) tape20 to 16, 000 Hz
Signal and Noise IconSignal and Noise
signal-to-noise ratio with Dolby NR OFFMore than 57 dB
noise reduction effect with Dolby B-type NR ONMore than 10 dB (at 5 kHz)
noise reduction effect with Dolby C-type NR ONMore than 19 dB (at 5 kHz)
Input and Output IconInput and Output
input sensitivity for LINE (INPUT)100 mV (Input impedance 68 kΩ)
output reference level for LINE (OUTPUT)0.5 V (Output impedance 1.9 kΩ)
harmonic distortionNo more than 0.8% (at -4 dB: 160 nwb/m)
Weight and Dimensions IconWeight and Dimensions
dimensions420 (W) x 125 (H) x 250 (D) mm
weight for U.K. and Australian models3.9 kg
weight for U.S. and Canadian models3.8 kg

Related product manuals