EasyManuals Logo
Home>Pioneer>Cassette Player>CT-W205R

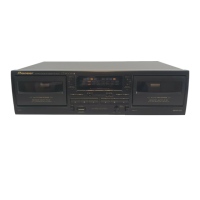
Pioneer CT-W205R Operating Instructions

Pioneer CT-W205R
24 pages
To Next Page IconTo Next Page
To Previous Page IconTo Previous Page
Page #7 background imageLoading...
Page #7 background image
CONNECTIONS
CONNECTING
THE
RECORDING
AND
PLAYBACK
CORDS
(©,
®)
Left
channel
White
plug
¢
-
Right
channel
oo
Red
plug
Connect
the
TAPE
jacks
of
your
amplifier
to
the
LINE
jacks
of
the
cassette
deck.
Be
sure
to
connect
the
REC
(INPUT)
jacks
of
the
deck
to
the
recording
(output)
jacks
of
the
amplifier,
and
the
PLAY
(OUTPUT)
jacks
of
the
deck
to
the
play
(input)
jacks
of
the
amplifier.
@
Connect
the
plugs
properly:
Left
channel
-
White
plug
Right
channel
-
Red
plug
CONNECTING
THE
POWER
CORD
(@)
Insert
the
power
cord
of
the
cassette
deck
into
the
accessory
AC
outlet
of
your
amplifier,
or
into
a
normal-household
outlet.
PIONEER
SYSTEM
REMOTE
CONTROL
(2)
CONTROL
IN
jack
Use
the
enclosed
Remote
Control
Cord
to
connect
this
jack
to
the
CONTROL
OUT
jack
of
another
component
which
bears
the
mark
(indicating
that
it
is
equipped
with
PIONEER
System
Remote
Control).
You
will
then
be
able
to
operate
this
unit
using
the
Pioneer
system
remote
control
unit.
If
the
remote
control
unit
does
not
have
separate
buttons
for
deck
|
and
deck
Il,
or
a
selection
button
to
choose
deck
|
or
deck
II,
the
buttons
unit
which
was
not
designed
for
double
deck
cassette
players,
see
page
10.
CONTROL
OUT
jack
intermediary
jack
outputs
signals
from
the
CONTROL
IN
jack
of
this
unit
to
the
input
jack
of
another
unit.
Connect
this
jack
to
the
CONTROL
IN
jack
of
another
component
compatible
with
Pioneer
System
Remote
Control.
NOTE:
.
Be
sure
to
connect
both
of
the
contro!
cord’s
plugs
securely
to
the
CONTROL
IN
and
CONTROL
OUT
jacks.
Do
not
connect
only
one
end
of
the
cable.
:
ANSCHLUSSE
ANSCHLUSS
DER
VERBINDUNGSKABEL
FUR
AUFNAHME
UND
WIEDERGABE
(@,
@)
Linker
Kanal
Weifer
Stecker
A~
Rechter
Kanal
Roter
Stecker
Die
TAPE-Buchsen
des
Verstarkers
mit
den
Cinchbuchsen
des
Cassettendecks
verbinden.
Hierbei
die
REC-Buchsen
(Eingang)
mit
den
Verstarker-Ausgangsbuchsen
(flr
Aufnahme)
und
die
PLAY-
Buchsen
(Ausgang)
des
Verstarker-Eingangsbuchsen
(fur
Wiedergabe)
verbinden.
e
Die
Stecker
seitenrichtig
anschlieRen:
Linker
Kanal:
wei®er
Stecker
Rechter
Kanal:
roter
Stecker
ANSCHLUSS
DES
NATZKABELS
(©)
Das
Netzkabel
des
Cassettendecks
an
der
Zusatz-Steckdose
des
Verstarkers
oder
an
einer
normalen
Wandsteckdose
anschlieRen.
PIONEER-SYSTEMFERNBEDIENUNG
(@)
Steuersignal-Eingangsbuchse
(CONTROL
IN)
Diese
Buchse
kann
Uber
das
Steuersignalkabel
mit der
Steuersignal-
Ausgangsbuchse
(CONTROL
OUT)
eines
Anlagenbausteins
verbunden
werden,
der mit
dem
Symbol
(PIONEER-
Systemfernbedienung)
gekennzeichnet
ist.
Die
Systemfernbedienung
erlaubt
ddnach
die
Steuerung
der
wichtigsten
Laufwerkfunktionen.
Wenn
die
fernbedienung
nicht
mit
separaten
Tasten
fir
DECK
|
und
DECK
II
bzw.
eine
Wahltaste
zum
Umschalten
zwischen
den
beiden
Decks
ausgestattet
ist,
sind
die
Laufwerk-Bedientasten
nur
fir
DECK
1!
wirksam.
Hinweise
fur
die
Steuerung
von
DECK
|
mit
einer
Fernbedienung,
die
nicht
fur
Doppelcassettendecks
vorgesehen
ist,
sind
auf
Seite
10
zu
finden.
Steuersignal-Ausgangsbuchse
(CONTROL
OUT)
Uber
diese
Buchse
kénnen
die
Uber
CONTROL
IN
eingegebenen
Steuersignale
an
einen
anderen
Anlagenbaustein
weitergeleitet
werden.
Die
Buchse
wird
hierflr
mit
der
Steuersignal-
Eingangsbuchse
(CONTROL
IN)
des
anderen
Gerats
verbunden,
das
natirlich
auch
mit
der
PIONEER-Systemfernbedienung
kompatibel
sein
muf.
ANMERKUNG:
Die
beiden
Stecker
des
Steuersignalkabels
fest
an
den
Buchsen
CONTROL
IN
und
CONTROL
OUT
anschlieBen.
Nicht
‘nur
ein
Ende
des
Kabels
anschlieBen.
7
<RRE1132>
En/Ge

Other manuals for Pioneer CT-W205R

Questions and Answers:

Question and Answer IconNeed help?

Do you have a question about the Pioneer CT-W205R and is the answer not in the manual?

Pioneer CT-W205R Specifications

Power IconPower
power requirements for U.K. and Australian modelsAC 220 - 230 volts, 50/60 Hz
power requirements for U.S. and Canadian modelsAC 120 volts, 60 Hz
power consumption16W
Audio Specifications IconAudio Specifications
wow and flutter0.09% (WRMS)
frequency response for TYPE IV (Metal) tape20 to 16, 500 Hz
frequency response for TYPE II (High/CrOz) tape20 to 16, 000 Hz
frequency response for TYPE I (Normal) tape20 to 16, 000 Hz
Signal and Noise IconSignal and Noise
signal-to-noise ratio with Dolby NR OFFMore than 57 dB
noise reduction effect with Dolby B-type NR ONMore than 10 dB (at 5 kHz)
noise reduction effect with Dolby C-type NR ONMore than 19 dB (at 5 kHz)
Input and Output IconInput and Output
input sensitivity for LINE (INPUT)100 mV (Input impedance 68 kΩ)
output reference level for LINE (OUTPUT)0.5 V (Output impedance 1.9 kΩ)
harmonic distortionNo more than 0.8% (at -4 dB: 160 nwb/m)
Weight and Dimensions IconWeight and Dimensions
dimensions420 (W) x 125 (H) x 250 (D) mm
weight for U.K. and Australian models3.9 kg
weight for U.S. and Canadian models3.8 kg

Related product manuals