7.27
FINAL DRIVE
7
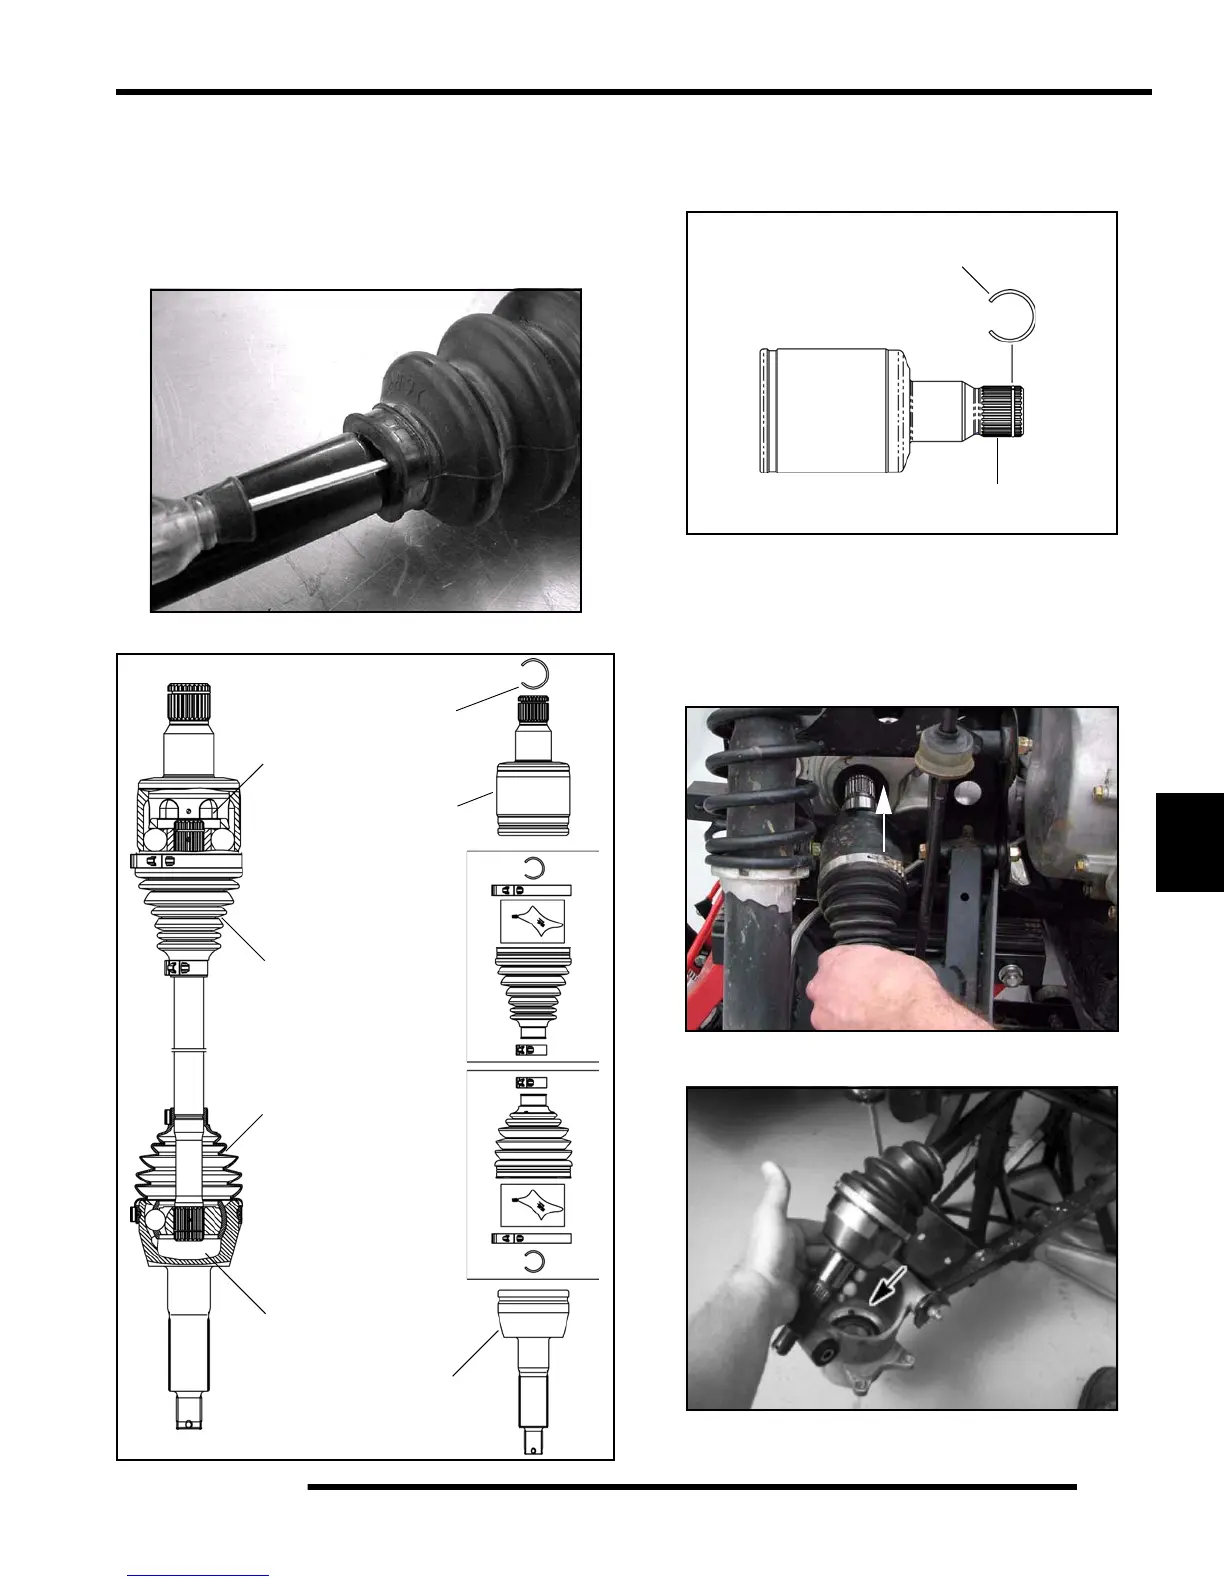
11. While pulling out on the CV shaft, fully extend the CV joint
and slide a straight O-ring pick or a small slotted screw
driver between the small end of the boot and the shaft. This
will allow the air pressure to equalize in the CV boot in the
position that the joint will spend most of its life. Before you
remove your instrument, be sure the small end of the boot
is in its correct location on the axle.
12. Install the small clamp on the boot.
Installation
1. Install new spring ring on drive shaft. Apply anti-seize
compound to splines.
2. Align splines of drive shaft with rear gearcase and reinstall
the drive shaft. Use a rubber mallet to tap on the outboard
end of the drive shaft if necessary.
NOTE: Take care when installing the drive shaft to
prevent damaging the seal.
3. Slide the rear drive shaft into the rear bearing carrier.
REAR SHAFT
Joint Capacity
40 Grams
Boot Capacity
30 Grams
Boot Capacity
40 Grams
Joint Capacity
30 Grams
CV Joint
Figure 7-28
Plunging
Spring Ring
Gear Side
Boot Kit
Wheel Side
Boot Kit
Joint
Apply
Anti-Seize
NEW
Spring Ring

 Loading...