MAINTENANCE
Flushing Procedure
Use Flush Kit PN 2871193.
1. Remove seat.
2. Locate water manifold plug
without wire (blind plug).
Remove and discard plug.
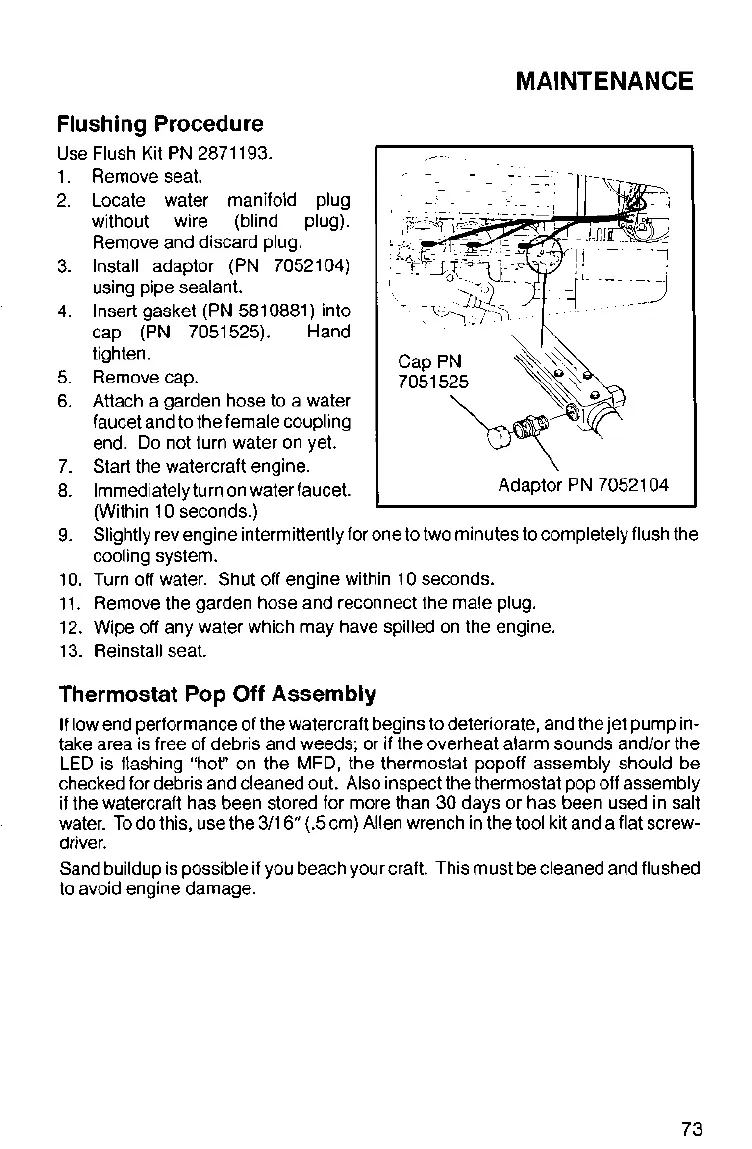
3. Install adaptor (PN 7052104)
using pipe sealant.
4.
Insert gasket (PN 581 0881) into
cap (PN 7051525). Hand
tighten.
5. Remove cap.
6.
Attach a garden hose to a water
faucet and to the female coupling
end. Do not turn water on yet.
7.
Start the watercraft engine.
8.
Immediately turn on water faucet.
(Within 10 seconds.)
9.
Slightly rev engine intermittently for one to two minutes to completely flush the
cooling system.
10. Turn off water. Shut off engine within 10 seconds.
11. Remove the garden hose and reconnect the male plug.
12. Wipe off any water which may have spilled on the engine.
13.
Reinstall seat.
<
-
/-
-
--
Adaptor PN 70521 04
Thermostat Pop
Off
Assembly
If low end performance of the watercraft begins to deteriorate, and the jet pump in-
take area is free of debris and weeds; or if the overheat alarm sounds
and/or the
LED is flashing
"hol' on the MFD, the thermostat popoff assembly should be
checked for debris and cleaned out. Also inspect the thermostat pop off assembly
if the watercraft has been stored for more than 30 days or has been used in salt
water. To do this, use the
311
6"
(.5 cm) Allen wrench in the tool kit and a flat screw-
driver.
Sand buildup is possible if you beach your craft. This must be cleaned and flushed
to avoid engine damage.
 Loading...