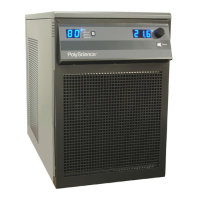
110-240 11
WARNING: Do not use the following fluids:
• Automotive antifreeze with additives**
• Hard tap water**
• Deionized water with a specific resistance > 1 meg ohm (except units with the DI water compatible
plumbing
• Any flammable fluids
• Concentrations of acids or bases
• Solutions with halides: chlorides, fluorides, bromides, iodides or sulfur
• Bleach (Sodium Hypochlorite)
• Solutions with chromates or chromium salts
• Glycerin
• Syltherm fluids
• ** At temperatures above 40°C, additives or mineral deposits can adhere to the heater. If deposits are allowed to
build up, the heater may overheat and fail. Higher temperatures and higher concentrations of additives can hasten
deposit build up.
Filling the Reservoir
Remove the filler cap from the reservoir and, using a funnel, add fluid until it reaches the MAX line on the
reservoir’s fluid level gauge. Once the reservoir is full, remove the funnel but do not replace the cap at this time.
Electrical Power
Plug the Chiller’s power cord into an appropriate electrical outlet.
Place the Circuit Breaker/Power Switch on the rear of the instrument enclosure in the “On” position. Three
decimal points will appear on the Temperature display; two decimal points will appear on the pressure/flow rate
display.
. .
. . .
Starting Process Fluid Flow
Press the Power Button on the front panel. The system startup sequence will begin and proceed as follows:
1. The pump will turn on and fluid will begin circulating through the system. The set point temperature will
appear briefly on the Temperature display; after a few seconds, it will be replaced by the actual fluid
temperature. Fifteen to twenty seconds after power up, the compressor will begin operating.
2. Check for leaks.
3. With the pump running, the reservoir’s fluid level will drop as the process and/or process cooling lines fill
with fluid. Add fluid as follows:
4. Closed Systems
: Slowly add fluid to the reservoir until the liquid level remains stable.
4. Open Bath Systems:
A. Set the flow alarm to at least 4 LPM (see “Minimum Flow Rate”)
B. Open the inlet and outlet valves on the Chiller; the suction created by the pump should begin
drawing fluid through the inlet tubing into the Chiller reservoir.
C. Once flow is established (no air bubbles in inlet tubing), close the inlet and outlet valves and
turn the Chiller ‘off’.
D. Remove the reservoir cap and check the level of the fluid in the reservoir. Add coolant until it is
level with the top of the filler neck.
CAUTION: Always close the inlet and outlet valves before turning power to the Chiller ‘off’ or
removing the reservoir cap to prevent the external reservoir from flooding the Chiller.

 Loading...