English
© 2012 Proceq SA
6.3.1 Main necessary settings
The following 2 settings must always be checked and ad-
justed if necessary before recording the measured value.
These are:
1. Impact device type
2. Impact direction
On the ready for measurement screen the necessary set-
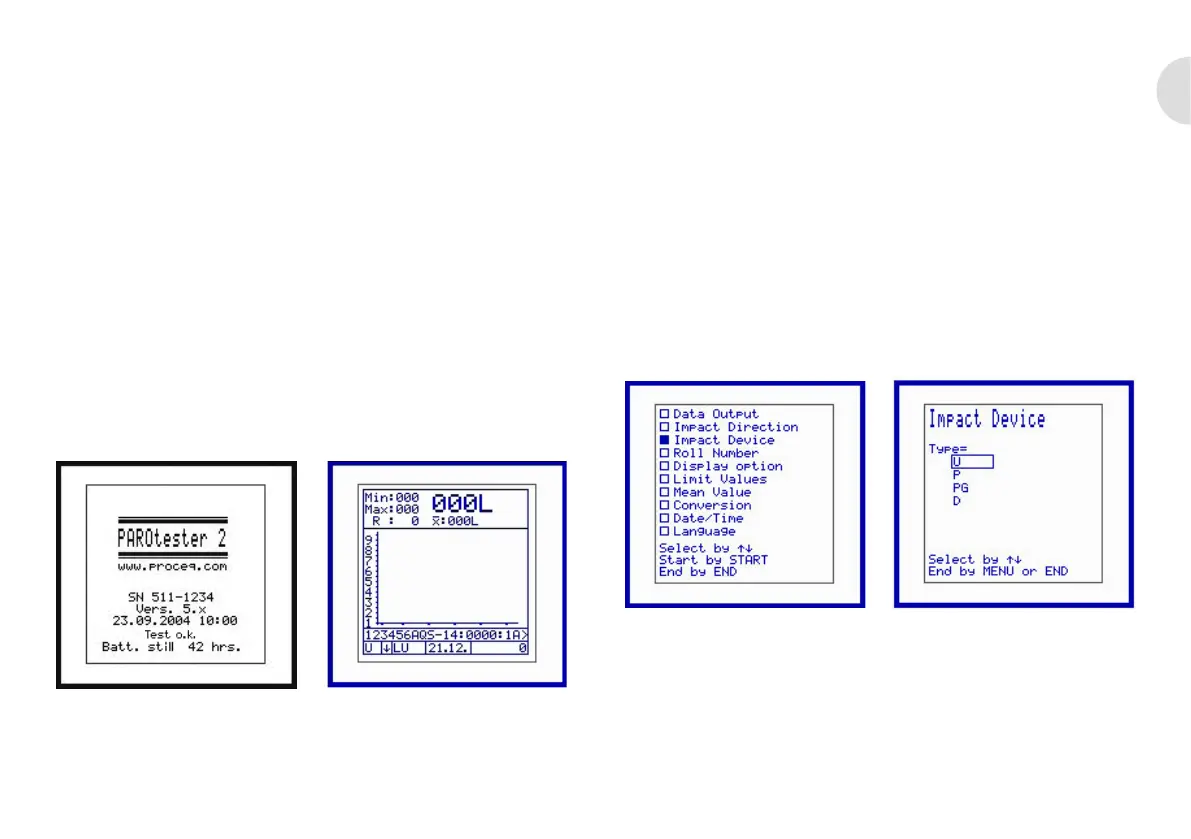
tings can be entered by pressing the «MENU» key. Move
the cursor to the «impact device» menu item ( Fig. 11 ).
Select the respective impact device with the arrow keys
and then confirm with the «MENU» key (Fig.12).
Press the «START» key a Select the impact device
Fig. 11 Fig. 12
After the «MENU» key is pressed for confirmation, the
main menu opens where the «Impact direction» menu
item can be selected with the cursor
1. Connection for external batteries or mains power sup-
plies 9 V DC 0.2 A
2. Connection RS232 9p, for external data output on PC,
printer or data input, barcode
3. Connection socket 2-pin
4. Connection socket BNC
6.3 Starting the devices
After pressing the «ON» key, the serial number of the
display device, the installed software version, date/time,
test Ok (Fig. 9) and the battery status in hours (approxi-
mate measurement duration) appears briefly on the dis-
play. The "ready for measurement" screen then appears
(Fig. 10).
After pressing the «ON» key a 4 – 5 s ready for measurement
Fig. 9 Fig. 10
Operation of the devices 9
 Loading...