. . © 2012 Proceq SA16 Data output
7.1 Transferring the memory
The following items are required for uploading the
memory contents to a personal computer:
- IBM - PC or compatible PC with a RS 232C connection
- PAROLINK3 cable with software protection
(Proceq cable)
- PAROLINK3 - Software Vers. 1.8X, Windows version
aW98 / Me / NT40 / Window 2000 / XP.
Memory capacity: approx. 150 rolls, each with 20 values.
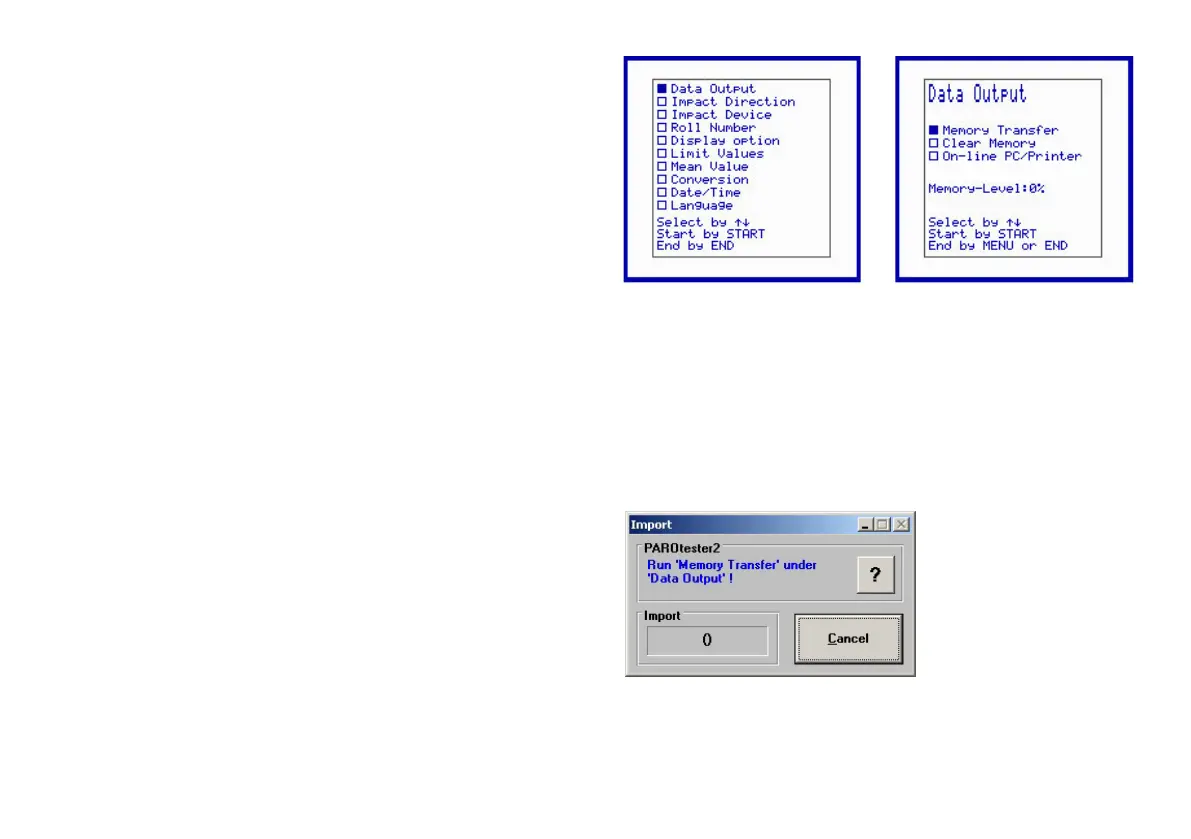
Press the «MENU» key to return to the main menu
where the «Data output» menu item can be selected
with the arrow keys ( h / i ) ( Fig. 38 ).
Press the «START» key to enter the data output menu
( Fig.39 ).
Select the «Memory transfer» menu item with the arrow
keys
( h / i ).
Fig.38 Fig.39
Before starting the memory transfer (Memory transfer),
connect the PAROTESTER2 display device to the PC.
The red cable connector must be connected to the side of
the display device.
First start the PAROLINK3 and answer the necessary
PAROLINK3 questions
When the PAROLINK3
( Fig. 40 ) is ready,
press the «START» key.
Fig. 40
 Loading...