English
© 2012 Proceq SA
Press the «START» key
a Day month, a year, month,
day setting year setting
Fig.33 Fig.34 Fig.35
The settings for the menu item «Date/time» can be easily
made with the arrow keys ( g / f ). The parameters can
be selected with the arrow keys ( h / i ) at the selected
position.
Language
Press the «MENU» key to return to the main menu
where the «Language» menu item can be selected with
the arrow keys ( h / i ) ( Fig. 36 ).
Press the «START» key a Language «English» selected
Fig.36 Fig.37
The required language can be selected with the arrow
keys ( h / i ).
7. Data output
Importantinformation on data storage or online data
upload
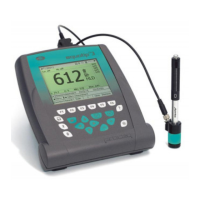
Data upload via the RS232C interface of the
PAROTESTER2 display device is only permitted with the
original PAROLINK3 cable or with the PC cable and is
also only possible when using such a cable.
If the PAROTESTER2 display device is connected to the
computer with any other commercially available cable,
faulty function, higher power consumption or permanent
damage of the PAROTESTER2 and the serial interface
of the computer can result.
Data output 15
 Loading...