3.UsingtheT
runnionbracketasatemplate,markanddrillthe5xpilot
holesonthemountingsurface.
4.Securethetrunnionbrackettothemountingsurfaceusingyourself
tappingscrewsandanappropriatescrewdriver.
5.Insertthetrunnionknobsintothesidesofthedisplayandtighten3to
4turns.
6.Slidethedisplayintothetrunnionbracketsothatthetrunnionknob
threadsareslottedintotherecessesinthetrunnionbracket.
7.Securethedisplaybyfullytighteningthetrunnionknobs,ensuringthat
theratchetteetharecorrectlyengaged.
Theknobsshouldbetightenedbyhand,sufficientlytopreventthe
displayfrommovingwhilstyourvesselisunderway.
8.Routeandconnectnecessarycables.
8.4Trunnionmounting—Axiom®2Pro16
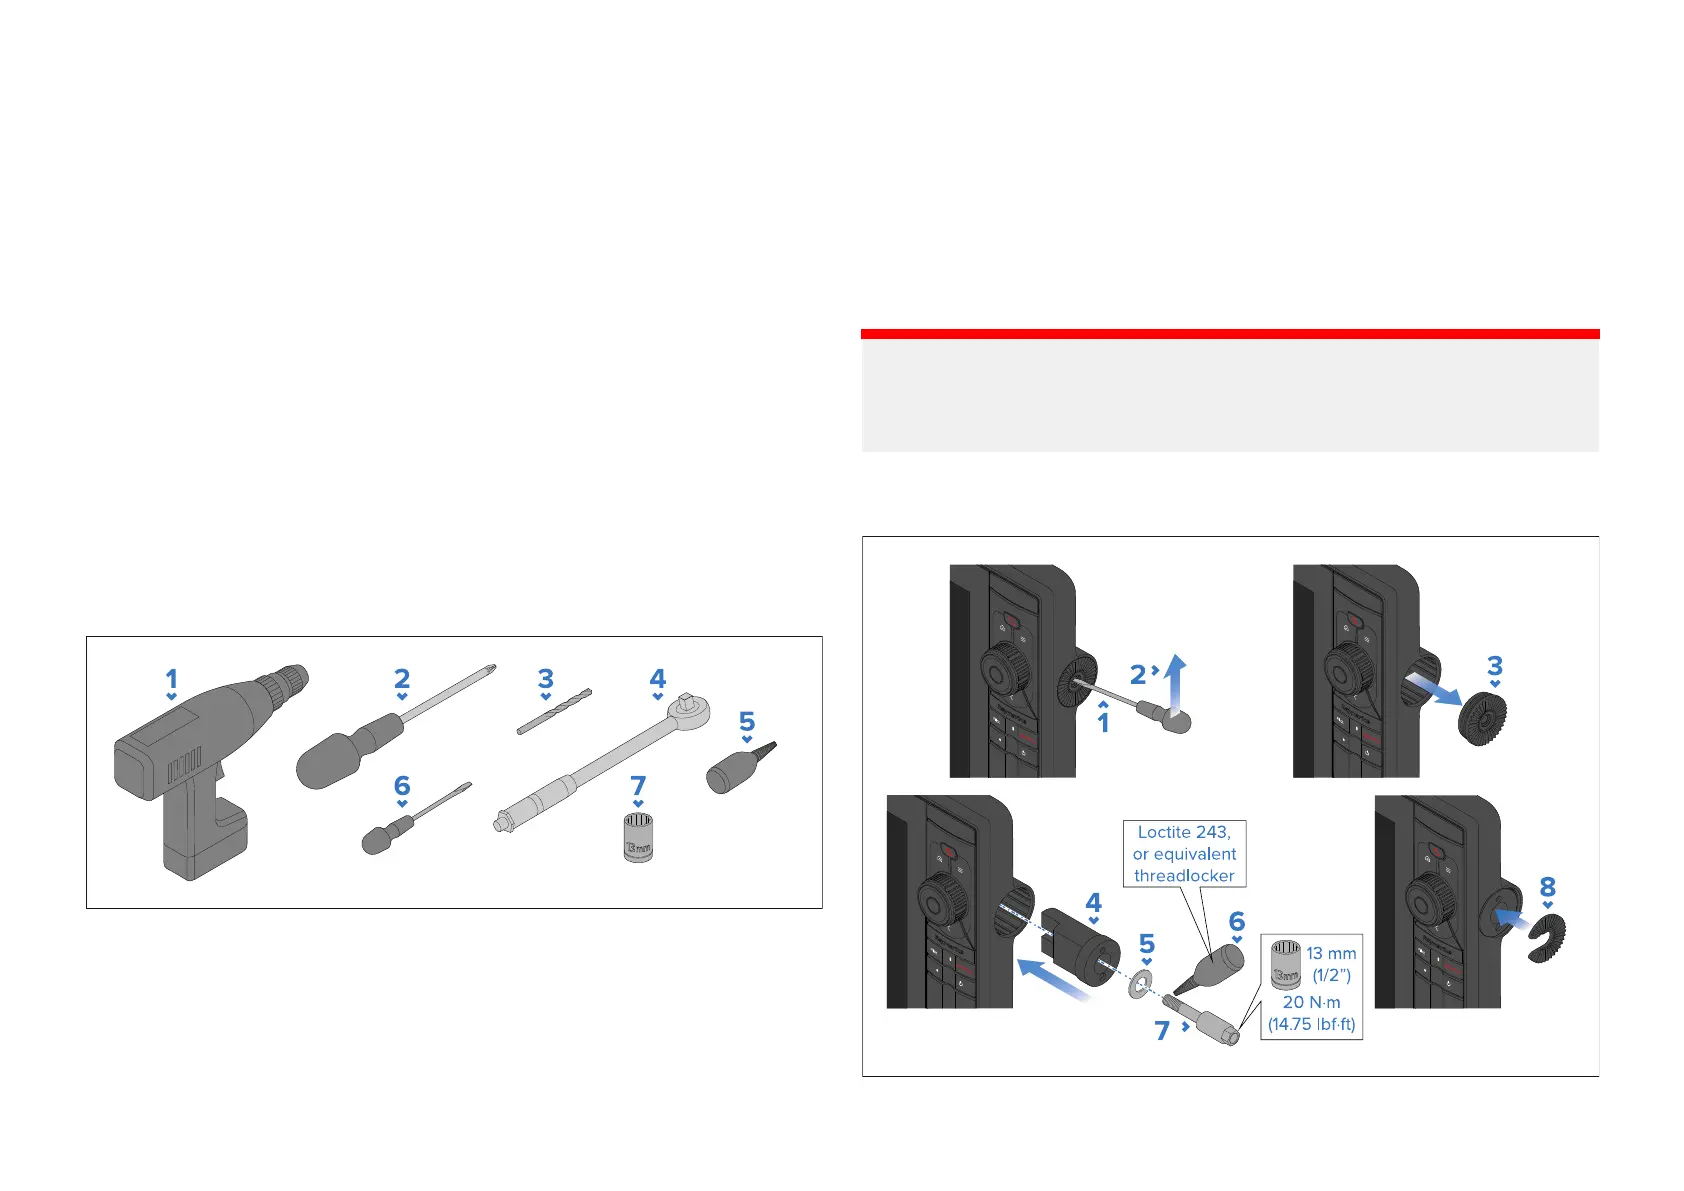
Toolsrequired(trunnionmountinstallations)
Thefollowingtoolsarerecommendedformountingusingatrunnionbracket:
1.P owerdrill.
2.Screwdriver(appropriateforyourfixings).
3.Drillbit(suitableforthematerialofthemountingsurfaceandthe5.75mm
(0.23in)diametermountingholesinthetrunnionbracket).
4.Torquewrench.
5.Loctite®243,orequivalentthreadlocker.
6.Smallflatbladescrewdriver(orplasticprytool).
7.13mm(1/2”)socket.
Displaytrunnionmountingpreparation
Axiom®2Pro16displaysareintendedtobeeithersurfaceorflushmounted.
AnoptionalTrunnionbracketkit(partnumber:A80722)isavailableif
trunnionmountingisdesired.Fortrunnionmounting,thedisplayneedstobe
preparedusingthepartssuppliedintheA80722kit.
Important:
Thedisplayissuppliedwithrubbertrunnionbungsfitted,whichmustbe
removedbeforethedisplayistrunnionmounted.DoNOTattemptto
trunnionmountthedisplayusingthetrunnionbungs.
Topreparethedisplayfortrunnionmounting,followthestepsbelow,for
bothsidesofthedisplay:
42

 Loading...