Caution
lf
the
recording
level is
too low, the reproduce level will
also be
low.
resulting
in
a
low signal-to-noise ratio and
consequently
tape
noise will by audible
during
playback.
As
soon as the
recording
level has
been
properly
adjusted, re-
wind
the tape to
the beginning. lf a radio
broadcast
is to
be re-
corded,
the
recording
level
should be temporarily adjusted with
a
similar
program
before
the
actual recording
takes
place.
Thus.
only
minor
adjustments will
be necessary during the actual
pro-
gram.
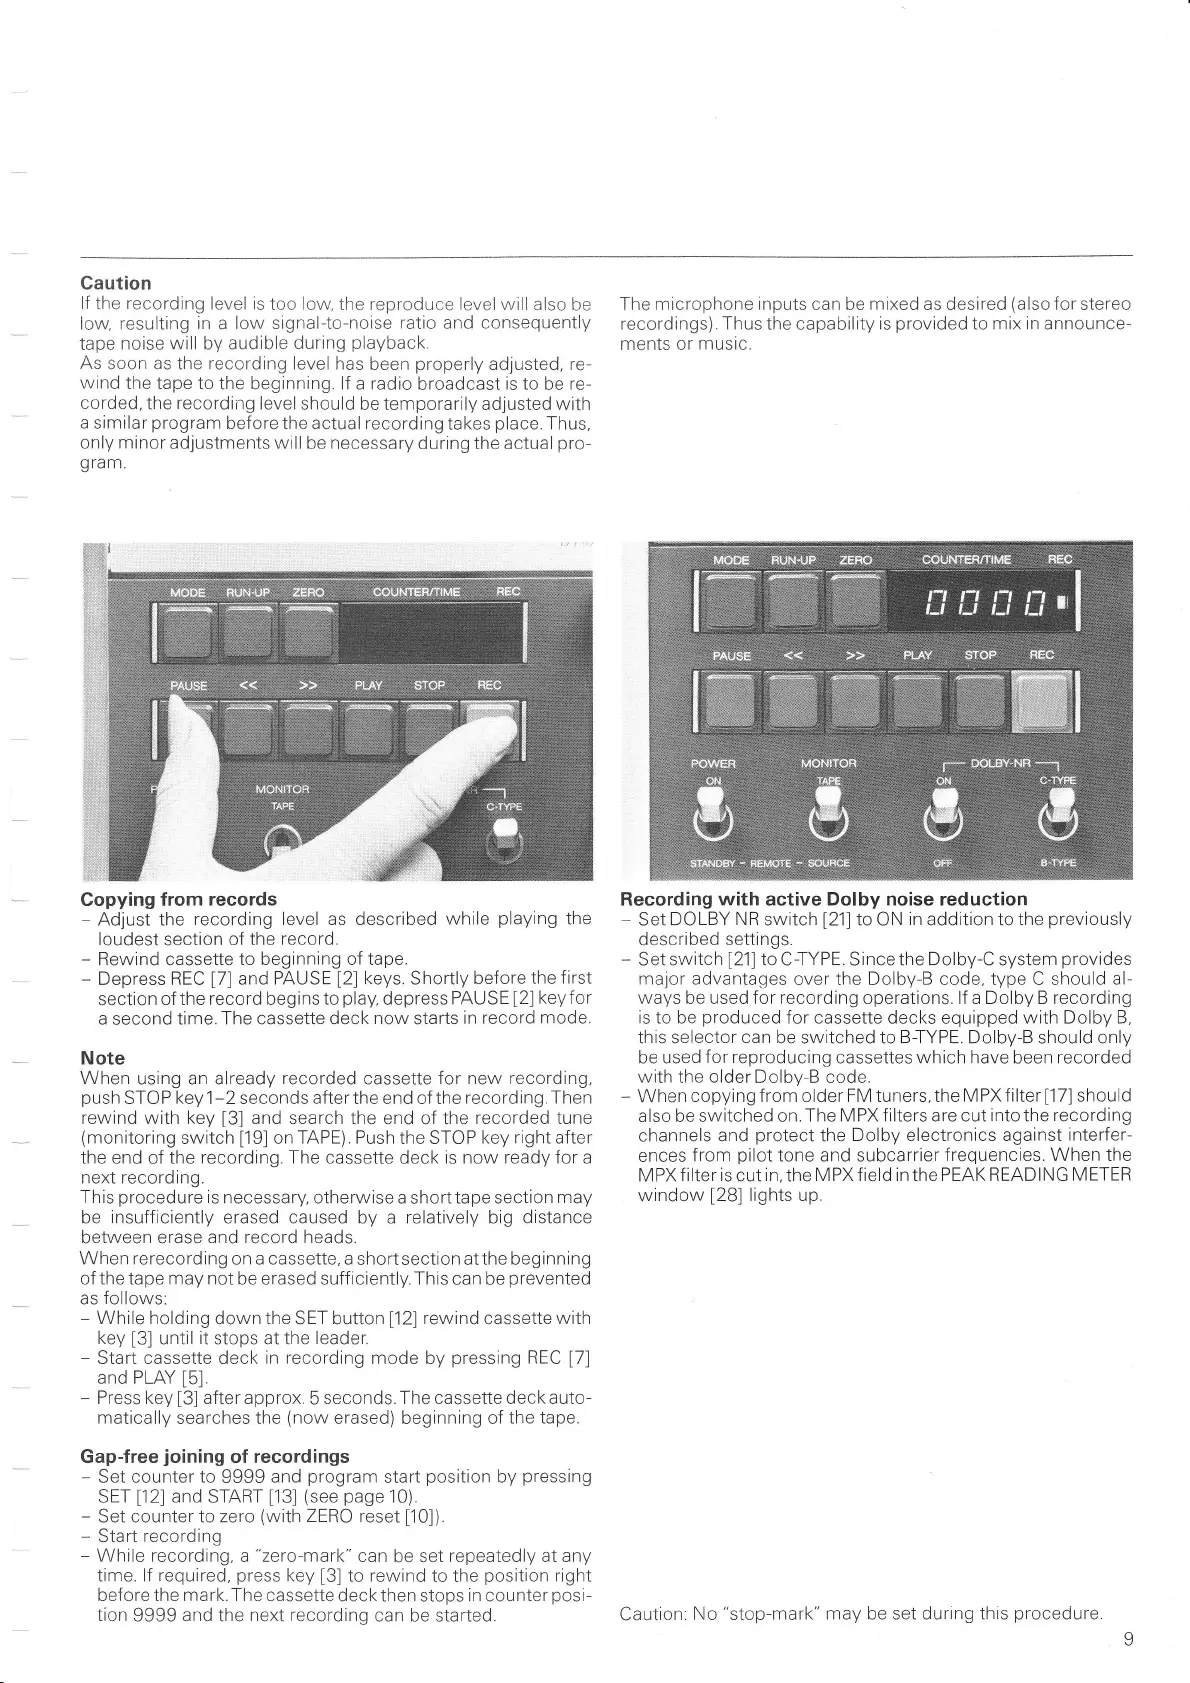
Copying from
records
-
Adjust the recording
level as described
while
playing
the
loudest section
of the
record.
-
Rewind cassette
to beginning of tape.
-
Depress REC
[7]
and
PAUSE
[2]
keys.
Shortly before
the
first
section of
the record beginsto
play.
depress
PAUSE
[2]
keyfor
a
second
time. The cassette deck
now
starts
in
record mode.
Note
When
using an already
recorded
cassette for
new recording,
push
STOP
keyl-2
seconds afterthe end of the
recording.Then
rewlnd with key
[3]
and
search the end of the
recorded tune
(monitoring
switch
[19]
on
TAPE).
Push the STOP
key right after
the end of the recording. The cassette deck is now
ready for
a
next recording.
This
procedure
is
necessary, otherwise a
shorttape
section
may
be insufficiently erased caused
by a
relatively big distance
between erase and
record heads.
When rerecording on a cassette,
a short section atthe
beginning
of
the
tape
may not
be erased suff
iciently.
This can be
prevented
as
follows:
-
While holding
down the SET button
[12]
rewind
cassette
with
key
[3]
until
it
stops at the
leader.
-
Start cassette deck in
recording
mode by
pressing
REC
[7]
and PLAY
[5].
-
Press key
[3]
afterapprox.
5
seconds.The cassette deckauto-
matically
searches the
(now
erased) beginning of
the tape.
Gap-free
joining
of recordings
-
Set counter
to
9999
and
program
start
position
by
pressing
SET
[12]
and START
[13]
(see
pase
10).
-
Set counter to zero
(with
ZERO reset
['10]).
-
Start
recording
-
While
recording, a
"zero-mark"
can
be set
repeatedly at any
time. lf required.
press
key
[3]
to
rewind
to the
position
right
before the mark. The
cassette deck then stops
in
counter
posi-
tion
9999 and the
next recording
can be started.
The
microphone inputs can be mixed as desired
(also
for stereo
recordings).
Thus the
capability
is
provided
to mix in announce-
ments or music.
Recording with active Dolby noise reduction
-
Set DOLBY
NR
switch
[21]
to ON
in
addition to the
previously
described
settings.
-
Set switch
[21]
to C-TYPE. Since the Dolby-C system
provides
major advantages
over the Dolby-B code, type C should
al-
ways be used for recording
operations.
lf a Dolby B recording
is to be
produced
for cassette
decks equipped
with Dolby B.
this selector
can
be switched to B-TYPE. Dolby-B should only
be used
for reproducing
cassettes which have been recorded
with
the
older
Dolby-B code.
-
When
copying f rom older FM tuners, the M
PX filter
[17]
should
also be switched on.The
MPXfilters are cut
intothe recording
channels and
protect
the
Dolby electronics against
interfer-
ences
from
pilot
tone and subcarrier
frequencies. When the
MPX filter
is
cut
in,
the
MPXfield inthe PEAK READING
METER
window
[28]
lights up.
Caution:
No
"stop-mark"
may be set durtng this
proceciure
 Loading...