Home
Ricoh
All in One Printer
MP 3055 Series
Ricoh MP 3055 Series User Manual
4
of 1
of 1 rating
736 pages
Give review
Manual
Specs
To Next Page
To Next Page
To Previous Page
To Previous Page
Loading...
10.
Close the initial settings screen.
•
When using the standard operation panel
Press the [User Tools/Counter] key.
•
When using the Smart Operation Panel
Press [User Tools/Counter] (
) on the top right of the screen.
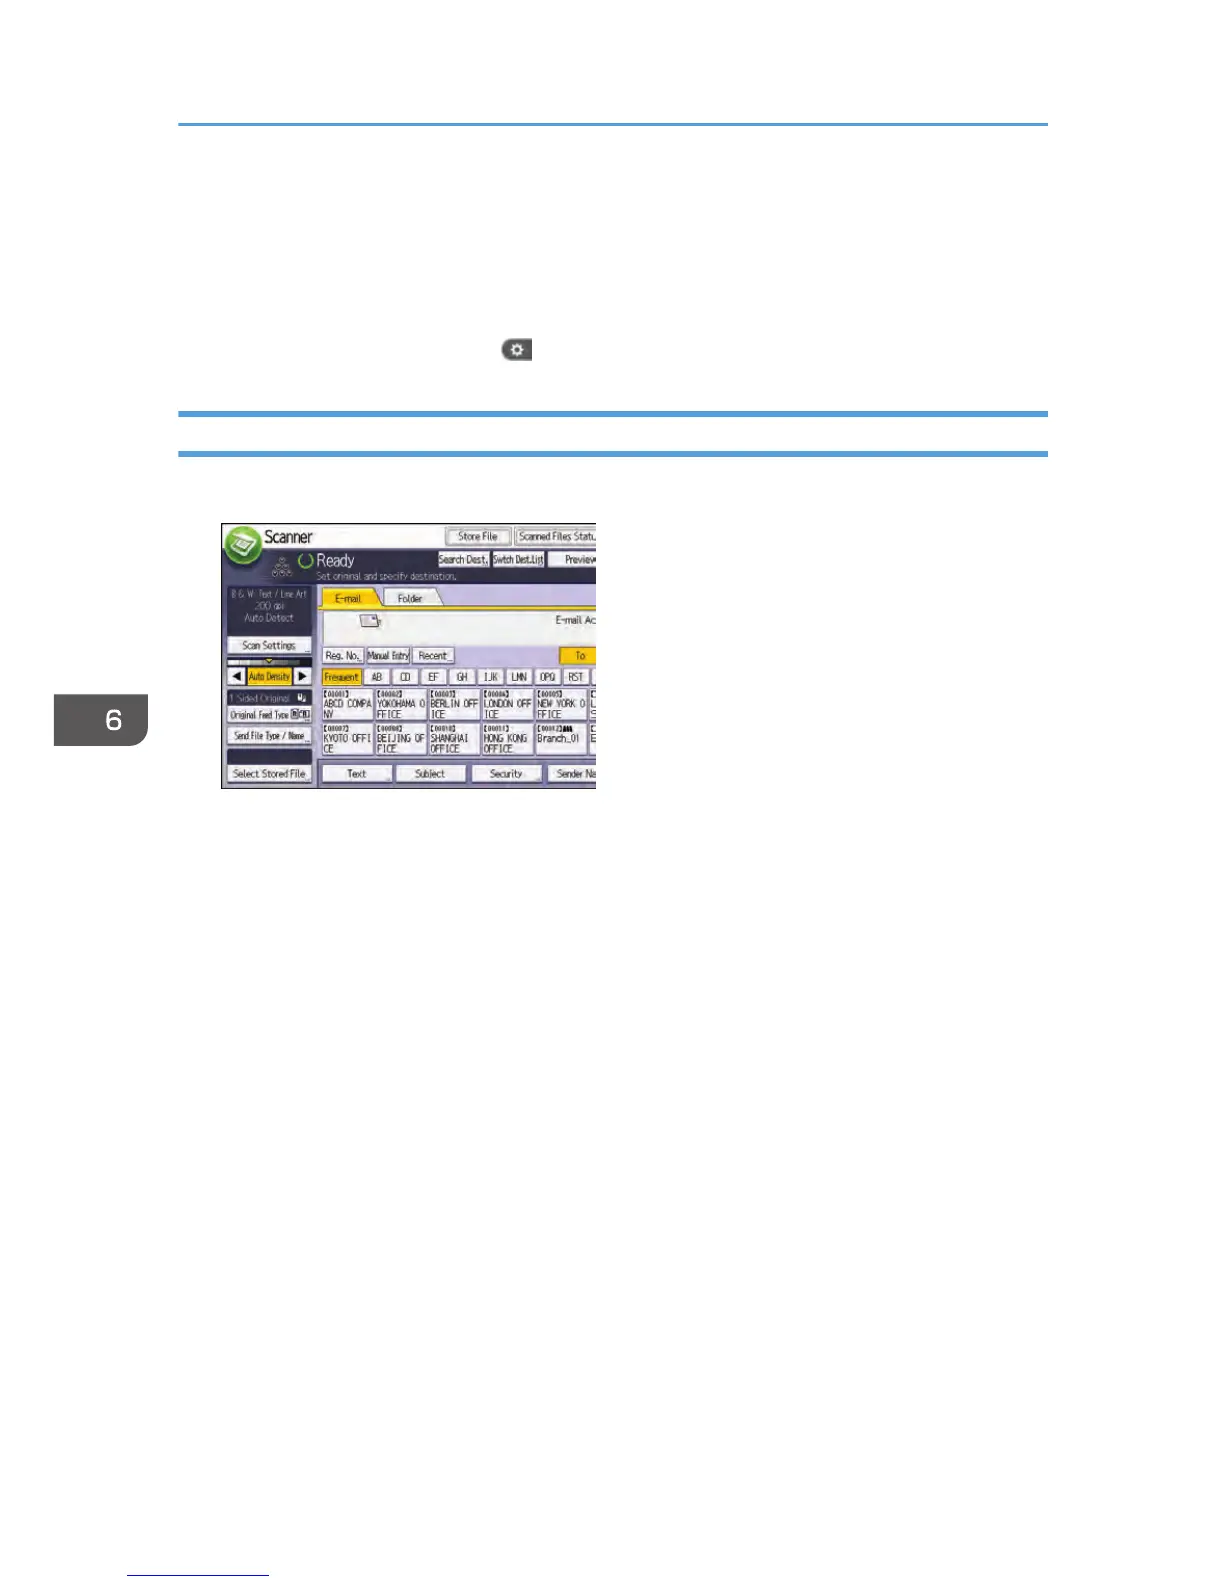
Entering an E-mail Address Manually
1.
Press [Manual Entry].
2.
Enter the e-mail address.
3.
Press [OK].
6. Scan
128
173
175
Table of Contents
Table of Contents
3
Default Chapter
1
Read this First
1
How to Read the Manuals
5
Symbols Used in the Manuals
5
Disclaimer
5
Notes
6
Machine Types
6
1 Manuals Provided with this Machine
7
Manuals for this Machine
7
Manuals List
9
How to Use the Operating Instructions
11
Formats of the Operating Instructions
11
Reading the HTML Manuals on the CD-ROM
11
Installing and Opening the HTML Manuals
12
Reading the PDF Manuals on the CD-ROM
12
2 Safety Information for this Machine
15
Safety Information
15
Safety During Operation
15
Safety Precautions to be Followed
15
Handling Power Cords and Power Cord Plugs
16
Handling the Main Machine
18
Safety Labels of this Machine
24
Positions of WARNING and CAUTION Labels
24
Paper Trays
25
Bridge Unit
27
Power Switch Symbols
28
3 Other Information for this Machine
29
Laws and Regulations
29
Duplication and Printing Prohibited
29
Laser Safety
29
Notes to USA Users of FCC Requirements
29
Important Safety Instructions for Facsimile Unit
32
Notes to Canadian Users of Facsimile Unit
33
Other Information
34
ENERGY STAR Program
34
Energy Saving Functions
34
Notes to Users in the State of California (Notes to Users in USA)
35
4 Appendix
37
Specifications
37
User Guide
45
Table of Contents
47
Default Chapter
52
How to Read the Manuals
52
Symbols Used in the Manuals
52
Model-Specific Information
53
Names of Major Features
54
1 Easy Search
55
Searching by What You Want to Do
55
Reducing My Costs
55
Using Scanned Files on the Computer
56
Registering Destinations
57
Operating the Machine more Effectively
58
What You Can Do with this Machine
59
Customizing the [Home] Screen
59
Making Copies Using Various Functions
60
Printing Data Using Various Functions
61
Utilizing Stored Document
61
Sending and Receiving Faxes Without Paper
62
Sending and Receiving Faxes Via the Internet
64
Sending and Receiving Faxes by Using the Machine Without Fax Unit Installed
65
Using the Facsimile and the Scanner in a Network Environment
66
Embedding Text Information in Scanned Files
66
Preventing Information Leakage (Security Functions)
67
Centrally Controlling Scan Conditions and Distribution
68
Monitoring and Setting the Machine Using a Computer
68
Preventing Unauthorized Copying
69
2 Getting Started
71
Guide to Names and Functions of Components
71
Guide to Components (Mainly Europe and Asia)
71
Guide to Components (Mainly North America)
74
Guide to Functions of the Machine's Options
78
Guide to Functions of the Machine's External Options
78
Guide to the Names and Functions of the Machine's Control Panel (When Using the Standard Operation Panel)
84
Guide to the Names and Functions of the Machine's Control Panel (When Using the Smart Operation Panel)
87
Changing the Display Language
89
Changing the Display Language (When Using the Smart Operation Panel)
89
How to Use the [Home] Screen (When Using the Standard Operation Panel)
90
Adding Icons to the [Home] Screen (When Using the Standard Operation Panel)
91
Operation Panel
92
How to Use the [Home] Screen (When Using the Smart Operation Panel)
95
Adding Icons to the [Home] Screen (When Using the Smart Operation Panel)
96
Registering Frequently Used Functions
100
Registering Functions in a Program
100
Example of Programs
103
Turning On/Off the Power
106
Turning on the Main Power
106
Turning off the Main Power
106
Logging in the Machine
107
When the Authentication Screen Is Displayed
107
User Code Authentication Using the Control Panel
107
Logging in Using the Control Panel
107
Logging in Using the Control Panel (When Using the Smart Operation Panel)
108
Logging out Using the Control Panel (When Using the Standard Operation Panel)
109
Logging out Using the Control Panel (When Using the Smart Operation Panel)
109
Placing Originals
110
Placing Originals on the Exposure Glass (Mainly Europe and Asia)
110
Placing Originals on the Exposure Glass (Mainly North America)
110
Placing Originals in the Auto Document Feeder
111
3 Copy
113
Basic Procedure
113
Auto Reduce / Enlarge
115
Duplex Copying
117
Specifying the Original and Copy Orientation
119
Combined Copying
121
One-Sided Combine
122
Two-Sided Combine
123
Copying Onto Custom Size Paper from Tray 1 or the Bypass Tray
127
Copying Onto Envelopes
128
Sort
130
Changing the Number of Sets
131
Storing Data in the Document Server
133
4 Fax
135
Basic Procedure for Transmissions (Memory Transmission)
135
Sending Originals Using the Exposure Glass (Memory Transmission)
137
Registering a Fax Destination
138
Deleting a Fax Destination
139
Transmitting While Checking Connection to Destination (Immediate Transmission)
141
Sending Originals Using the Exposure Glass (Immediate Transmission)
142
Canceling a Transmission
144
Canceling a Transmission before the Original Is Scanned
144
Canceling a Transmission While the Original Is Being Scanned
144
Canceling a Transmission after the Original Is Scanned
145
Storing a Document
147
Sending Stored Documents
148
Printing the Journal Manually
150
5 Print
151
Quick Install
151
Displaying the Printer Driver Properties
152
Standard Printing
153
When Using the PCL 6 Printer Driver
153
Printing on both Sides of Sheets
154
When Using the PCL 6 Printer Driver
154
Types of 2 Sided Printing
154
Combining Multiple Pages into Single Page
155
When Using the PCL 6 Printer Driver
155
Types of Combine Printing
155
Printing on Envelopes
157
Configuring Envelope Settings Using the Control Panel
157
Printing on Envelopes Using the Printer Driver
158
Saving and Printing Using the Document Server
159
Storing Documents in Document Server
159
Managing Documents Stored in Document Server
160
6 Scan
161
Basic Procedure When Using Scan to Folder
161
Creating a Shared Folder on a Computer Running Windows/Confirming a Computer's Information
162
Registering an SMB Folder
164
Deleting an SMB Registered Folder
168
Entering the Path to the Destination Manually
169
Basic Procedure for Sending Scan Files by E-Mail
170
Registering an E-Mail Destination
171
Deleting an E-Mail Destination
173
Entering an E-Mail Address Manually
174
Basic Procedure for Storing Scan Files
175
Checking a Stored File Selected from the List
176
Specifying the File Type
178
Specifying Scan Settings
179
7 Document Server
181
Storing Data
181
Printing Stored Documents
183
8 Web Image Monitor
185
Displaying Top Page
185
9 Adding Paper and Toner
187
Loading Paper
187
Precautions for Loading Paper
187
Loading Paper into Paper Trays
187
Loading Paper into the Bypass Tray
188
Printing from the Bypass Tray Using the Printer Function
190
Loading Paper into Large Capacity Tray (LCT)
194
Loading Orientation-Fixed Paper or Two-Sided Paper
196
Recommended Paper
199
Recommended Paper Sizes and Types
199
Thick Paper
207
Adding Toner
213
Sending Faxes or Scanned Documents When Toner Has Run out
215
Disposing of Used Toner
215
10 Troubleshooting
217
When a Status Icon Is Displayed
217
When the Indicator Lamp for the [Check Status] Key Is Lit or Flashing
218
When the Machine Makes a Beeping Sound
220
When You Have Problems Operating the Machine
221
When Multiple Functions Cannot be Executed Simultaneously
226
Messages Displayed When Using the Copy/Document Server Function
227
Messages Displayed When Using the Facsimile Function
231
When There Is a Problem Specifying the Network Settings
232
When the Remote Fax Function Cannot be Used
238
Messages Displayed When Using the Printer Function
241
Messages Displayed on the Control Panel When Using the Printer Function
241
Messages Printed on the Error Logs or Reports When Using the Printer Function
244
Messages Displayed When Using the Scanner Function
254
Messages Displayed on the Control Panel When Using the Scanner Function
254
Messages Displayed on the Client Computer
264
When Other Messages Appear
270
When There Is a Problem Scanning or Storing Originals
271
When the Home Screen Cannot be Edited (When Using the Standard Operation Panel)
272
When the Address Book Is Updated
273
When Data Cannot be Sent Due to a Problem with the Destination
274
When the Machine Cannot be Operated Due to a Problem with the User Certificate
274
When Problems Occur While Logging in
276
When the User Lacks Privileges to Perform an Operation
276
When the LDAP Server Cannot be Used
276
Index
279
Operating Instructions
285
Table of Contents
287
1 Introduction
289
Start Installer
289
Software and Utilities Included on the CD-ROM
291
Printer Drivers
291
TWAIN Driver
293
LAN-Fax Driver
294
Font Manager
294
For Mac os X Users
296
2 Installing the Printer Driver
297
Confirming the Connection Method
297
Network Connection
297
Local Connection
299
Quick Install
300
Installing the Printer Driver for a Network Connection
302
Installing the Printer Driver for the Selected Port
302
Using as a Network Printer
312
Installing the Printer Driver for a Local Connection
316
USB Connection
316
Parallel Connection
320
Bluetooth Connection
321
Configuring Option Settings for the Printer
325
Conditions for Bidirectional Communication
325
If Bidirectional Communication Is Disabled
326
Installing Font Manager
328
3 Installing the Scanner Driver
329
Installing the TWAIN Driver
329
Installing a TWAIN-Compliant Application on the same Client Computer
330
4 Installing the Facsimile Driver
331
Installing the LAN-Fax Driver
331
Specifying the same Port as the Printer Driver
331
Specifying the Port When Installing the LAN-Fax Driver
332
Setting LAN-Fax Driver Properties
334
Setting Print Properties
334
Configuring Option Settings for the Facsimile
335
5 Troubleshooting
337
Messages Displayed When Installing the Printer Driver
337
If USB Connection Fails
339
6 Installing the Printer Driver under Mac os
341
Installing the PPD Files
341
Registering the Printer
342
USB Connection
342
Network Connection
343
7 Appendix
345
Updating or Deleting the Driver
345
Updating the Driver
345
Deleting the Driver
346
Trademarks
349
Index
351
Table of Contents
359
Default Chapter
367
Functions that Require Options
367
Main Software Names
368
1 Getting Started
369
Before Configuring the Security Function Settings
369
Before Using this Machine
370
Administrators and Users
372
Administrators
373
Configuring Administrator Authentication
374
Specifying Administrator Privileges
375
Registering and Changing Administrators
377
Using Web Image Monitor to Configure Administrator Authentication
380
Administrator Login Method
381
Logging in Using the Control Panel
381
Logging in Using Web Image Monitor
382
Administrator Logout Method
383
Logging out Using the Control Panel
383
Logging out Using Web Image Monitor
383
Supervisor
384
Resetting the Administrator's Password
384
Changing the Supervisor
385
2 Configuring User Authentication
387
Users
387
About User Authentication
388
Configuring User Authentication
389
User Code Authentication
392
Basic Authentication
395
Specifying Basic Authentication
395
Authentication Information Stored in the Address Book
397
Specifying Login User Names and Passwords
398
Specifying Login Details
399
Windows Authentication
401
Specifying Windows Authentication
403
Installing Internet Information Services (IIS) and Certificate Services
407
Creating the Server Certificate
409
If the Fax Number Cannot be Obtained
409
LDAP Authentication
411
Integration Server Authentication
416
Printer Job Authentication
421
Printer Job Authentication Levels
421
Printer Job Types
421
Authfree" Command
424
Auto Registration to the Address Book
425
Automatically Registered Address Book Items
425
Data Carry-Over Setting for Address Book Auto-Program
425
User Lockout Function
427
Specifying the User Lockout Function
428
Canceling Password Lockout
428
Auto Logout
429
Authentication Using an External Device
431
3 Restricting Machine Usage
433
Restricting Usage of the Destination List
433
Preventing Changes to Administrator Settings
435
Limiting the Settings that Can be Changed by each Administrator
435
Prohibiting Users from Making Changes to Settings
435
Specifying Menu Protect
436
Copy Function
436
Fax Function
436
Printer Function
436
Scanner Function
437
Limiting Available Functions
438
Restricting Media Slot Access
440
Managing Print Volume Per User
441
Specifying Limitations for Print Volume
442
Specifying the Default Maximum Use Count
444
Specifying the Maximum Use Count Per User
444
Checking Print Volume Per User
446
Printing a List of Print Volume Use Counters
447
Clearing Print Volume Use Counters
448
Configuring the Auto-Reset Function
449
4 Preventing Leakage of Information from Machines
451
Protecting the Address Book
451
Specifying Address Book Access Permissions
451
Encrypting Data in the Address Book
453
Encrypting Data on the Hard Disk
455
Enabling the Encryption Settings
457
Backing up the Encryption Key
459
Updating the Encryption Key
460
Canceling Data Encryption
461
Deleting Data on the Hard Disk
462
Conditions for Use
462
Instructions for Use
462
Auto Erase Memory
462
Erase All Memory
467
5 Enhanced Network Security
471
Access Control
471
Enabling and Disabling Protocols
472
Enabling and Disabling Protocols Using the Control Panel
479
Enabling and Disabling Protocols Using Web Image Monitor
479
Specifying Network Security Level
481
Specifying Network Security Level Using the Control Panel
481
Specifying Network Security Level Using Web Image Monitor
482
Status of Functions under each Network Security Level
482
Protecting the Communication Path Via a Device Certificate
486
Creating and Installing a Device Certificate from the Control Panel (Self-Signed Certificate)
486
Creating and Installing a Device Certificate from Web Image Monitor (Self-Signed Certificate)
487
Creating the Device Certificate (Issued by a Certificate Authority)
488
Installing the Device Certificate (Issued by a Certificate Authority)
489
Installing an Intermediate Certificate (Issued by a Certificate Authority)
490
Configuring SSL/TLS
491
Enabling SSL/TLS
492
User Setting for SSL/TLS
493
Setting the SSL/TLS Encryption Mode
494
Enabling SSL for SMTP Connections
495
Configuring S/MIME
497
E-Mail Encryption
497
Attaching an Electronic Signature
499
Specifying Checking of the Certificate Valid Period
501
Configuring Pdfs with Electronic Signatures
503
Configuring Ipsec
504
Encryption and Authentication by Ipsec
504
Encryption Key Auto Exchange Settings
505
Ipsec Settings
506
Encryption Key Auto Exchange Settings Configuration Flow
512
Telnet Setting Commands
516
Configuring IEEE 802.1X Authentication
522
Installing a Site Certificate
522
Selecting the Device Certificate
523
Setting Items of IEEE 802.1X for Ethernet
523
Setting Items of IEEE 802.1X for Wireless LAN
525
Snmpv3 Encryption
527
Encrypting Transmitted Passwords
528
Specifying a Driver Encryption Key
528
Specifying an IPP Authentication Password
529
Kerberos Authentication Encryption Setting
531
6 Preventing the Leaking of Documents
533
Managing Folders
533
Deleting Folders
533
Changing the Password of a Folder
534
Unlocking Folders
535
Managing Stored Files
537
Configuring Access Permission for each Stored File
538
Changing the Owner of a Document
541
Configuring Access Permission for each User for Stored Files
541
Specifying Passwords for Stored Files
543
Unlocking Stored Files
544
Managing Locked Print Files
546
Deleting Locked Print Files
546
Changing the Password of a Locked Print File
548
Unlocking a Locked Print File
549
Unauthorized Copy Prevention / Data Security for Copying
551
Enabling Pattern Printing
552
Enabling Detect Data Security for Copying
553
Printing User Information on Paper
555
Enforced Storage of Documents to be Printed on a Printer
557
7 Managing the Machine
559
Managing Log Files
559
Using Web Image Monitor to Manage Log Files
560
Logs that Can be Managed Using Web Image Monitor
560
Attributes of Logs You Can Download
566
Specifying Log Collect Settings
589
Specifying Log Encryption
590
Downloading Logs
591
Number of Logs that Can be Kept on the Machine
592
Notes on Operation When the Number of Log Entries Reaches Maximum
593
Printer Job Logs
595
Deleting All Logs
596
Disabling Log Transfer to the Log Collection Server
596
Managing Logs from the Machine
597
Disabling Log Transfer to the Log Collection Server
597
Specifying Delete All Logs
597
Managing Logs from the Log Collection Server
598
Configuring the Home Screen for Individual Users
599
Warnings about Using User's Own Home Screens
599
Configuring the Browser Functions
601
Precautions for Using the Browser Function
601
Troubleshooting
601
Managing Device Information
603
Exporting Device Information
604
Importing Device Information
605
Troubleshooting
607
Managing Eco-Friendly Counter
609
Configuring the Display of Eco-Friendly Counters
609
Clearing a Machine's Eco-Friendly Counter
610
Clearing Users' Eco-Friendly Counters
610
Managing the Address Book
611
Specifying Auto Deletion of Address Book Data
611
Deleting All Data in the Address Book
611
Specifying the Extended Security Functions
612
Other Security Functions
620
Fax Function
620
Scanner Function
621
System Status
621
Confirming Firmware Validity
621
Restricting a Customer Engineer Operation
622
Additional Information for Enhanced Security
623
Settings You Can Configure Using the Control Panel
623
Settings You Can Configure Using Web Image Monitor
625
Settings You Can Configure When Ipsec Is Available/Unavailable
627
8 Troubleshooting
631
If a Message Is Displayed
631
If an Error Code Is Displayed
633
Basic Authentication
633
Windows Authentication
634
LDAP Authentication
639
Integration Server Authentication
642
If the Machine Cannot be Operated
645
9 List of Operation Privileges for Settings
651
How to Read
651
System Settings
652
Edit Home
662
Copier / Document Server Features
663
Facsimile Features
668
Printer Functions
671
Printer Features
672
Scanner Features
676
Browser Features
678
Extended Feature Settings
679
Maintenance
680
Web Image Monitor: Display Eco-Friendly Counter
681
Web Image Monitor: Job
682
Web Image Monitor: Device Settings
684
Web Image Monitor: Printer
693
Web Image Monitor: Fax
697
Web Image Monitor: Scanner
699
Web Image Monitor: Interface
702
Web Image Monitor: Network
704
Web Image Monitor: Security
708
Web Image Monitor: @Remote
709
Web Image Monitor: Webpage
710
Web Image Monitor: Extended Feature Settings
711
Web Image Monitor: Address Book
712
Web Image Monitor: Reset Printer Job
713
Web Image Monitor: Reset the Machine
714
Web Image Monitor: Device Home Management (When Using the Standard Operation Panel)
715
Web Image Monitor: User's Own Customization (When Using the Smart Operation Panel)
716
Web Image Monitor: Screen Monitoring
717
Web Image Monitor: Customize Screen Per User
718
Web Image Monitor: Document Server
719
Web Image Monitor: Fax Received File
720
Web Image Monitor: Printer: Print Jobs
721
List of Operation Privileges for Stored Files
722
List of Operation Privileges for Address Books
724
4
Based on 1 rating
Ask a question
Give review
Questions and Answers:
Need help?
Do you have a question about the Ricoh MP 3055 Series and is the answer not in the manual?
Ask a question
Ricoh MP 3055 Series Specifications
General
Brand
Ricoh
Model
MP 3055 Series
Category
All in One Printer
Language
English
Related product manuals
Ricoh MP 305+ series
28 pages
Ricoh MP 3054 Series
424 pages
Ricoh Aficio MP 3010
290 pages
Ricoh Aficio MP 301SPF
212 pages
Ricoh MP 3554G
264 pages
Ricoh Aficio MP 3351
140 pages
Ricoh Aficio MP 3500
294 pages
Ricoh Aficio MP 3352
236 pages
Ricoh Aficio MP 3350
324 pages
Ricoh MP 3554 Series
424 pages
Ricoh Aficio MP 3500SP
312 pages
Ricoh Aficio MP 3352SP
92 pages
 Loading...