RICOH SP C250SF/SP C252SF Color Multifunction Printers
Getting Started Guide
31
STEP 4
Scan a Document
The RICOH SP C252SF supports local and network scanning. This enables you to
capture hardcopy documents, e.g., invoices, contracts and photos, in digital form – making file
archival and sharing easy.
Local scanning, also called “pull scanning,” is used when the printer and computer are connected
via a USB cable. A document placed on the printer ADF or platen glass is “pulled” using the
supplied Presto! PageManager software or TWAIN-compliant software, such as Windows Fax and
Scan.
Network scanning, also called “push scanning,” is used when the printer and computer are
connected to the network, either using a network (Ethernet) cable or wireless LAN. The
document is “pushed” from the printer control panel, via the [Scanner] key, and routed to a pre-
set shared network folder.
4.1 Local Scanning
Again, local scanning is supported when the printer is directly connected to your computer via a USB
cable. The TWAIN driver and Presto! PageManager software must be installed first. Documents can then
be “pulled” from the printer’s ADF or platen glass to a target folder on your computer.
Important: Scanning is initiated from the Presto! PageManager software, not the printer control panel,
i.e., you cannot press the [Scanner] and [Start] buttons on the printer. That operation is reserved for
network scanning only. For assistance with network scanning, please contact your corporate Help Desk.
After you have connected the printer, installed the TWAIN drivers and Presto! PageManager
software,
you’re ready to scan…
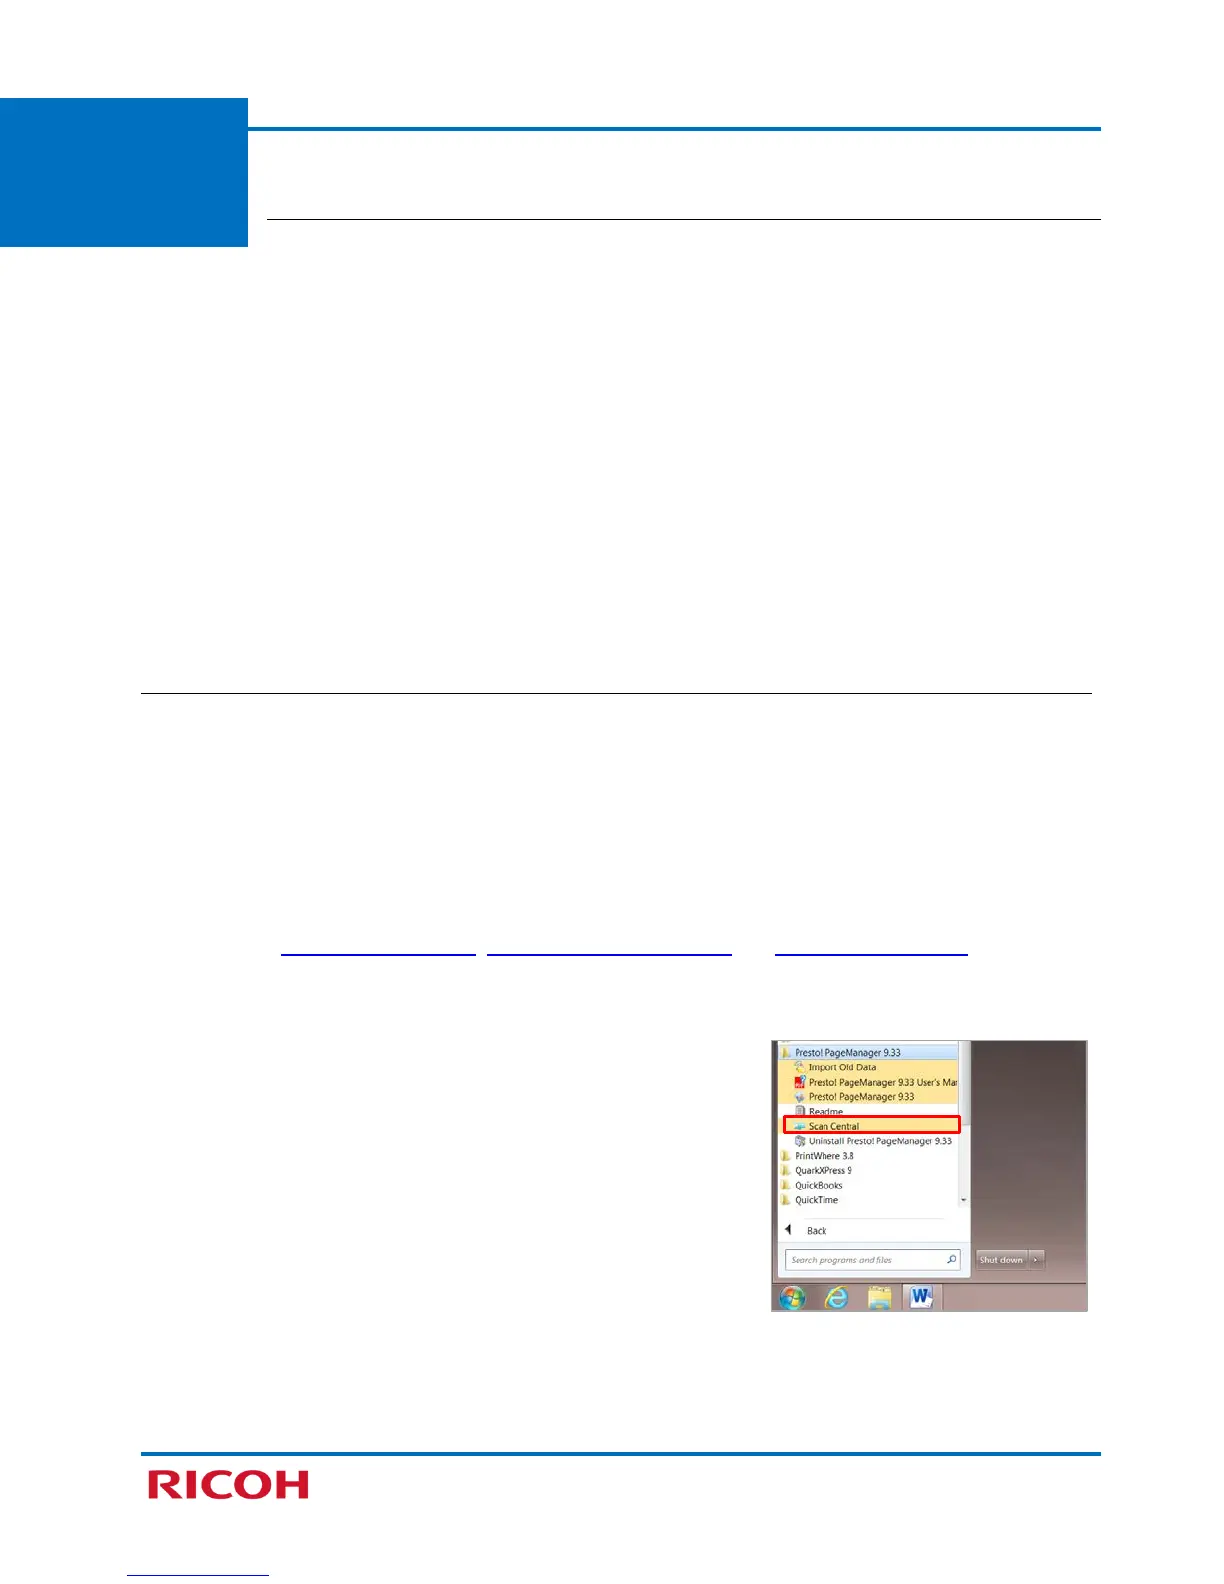
1. Launch Presto! PageManager. Click [Start]
[All
Programs]
[Scan Central].
Note: You can also access the Presto! PageManager User’s
Manual, which was automatically installed along with the
software. Adobe Acrobat or Adobe Reader is required to
view this document.
 Loading...