9
Getting Ready
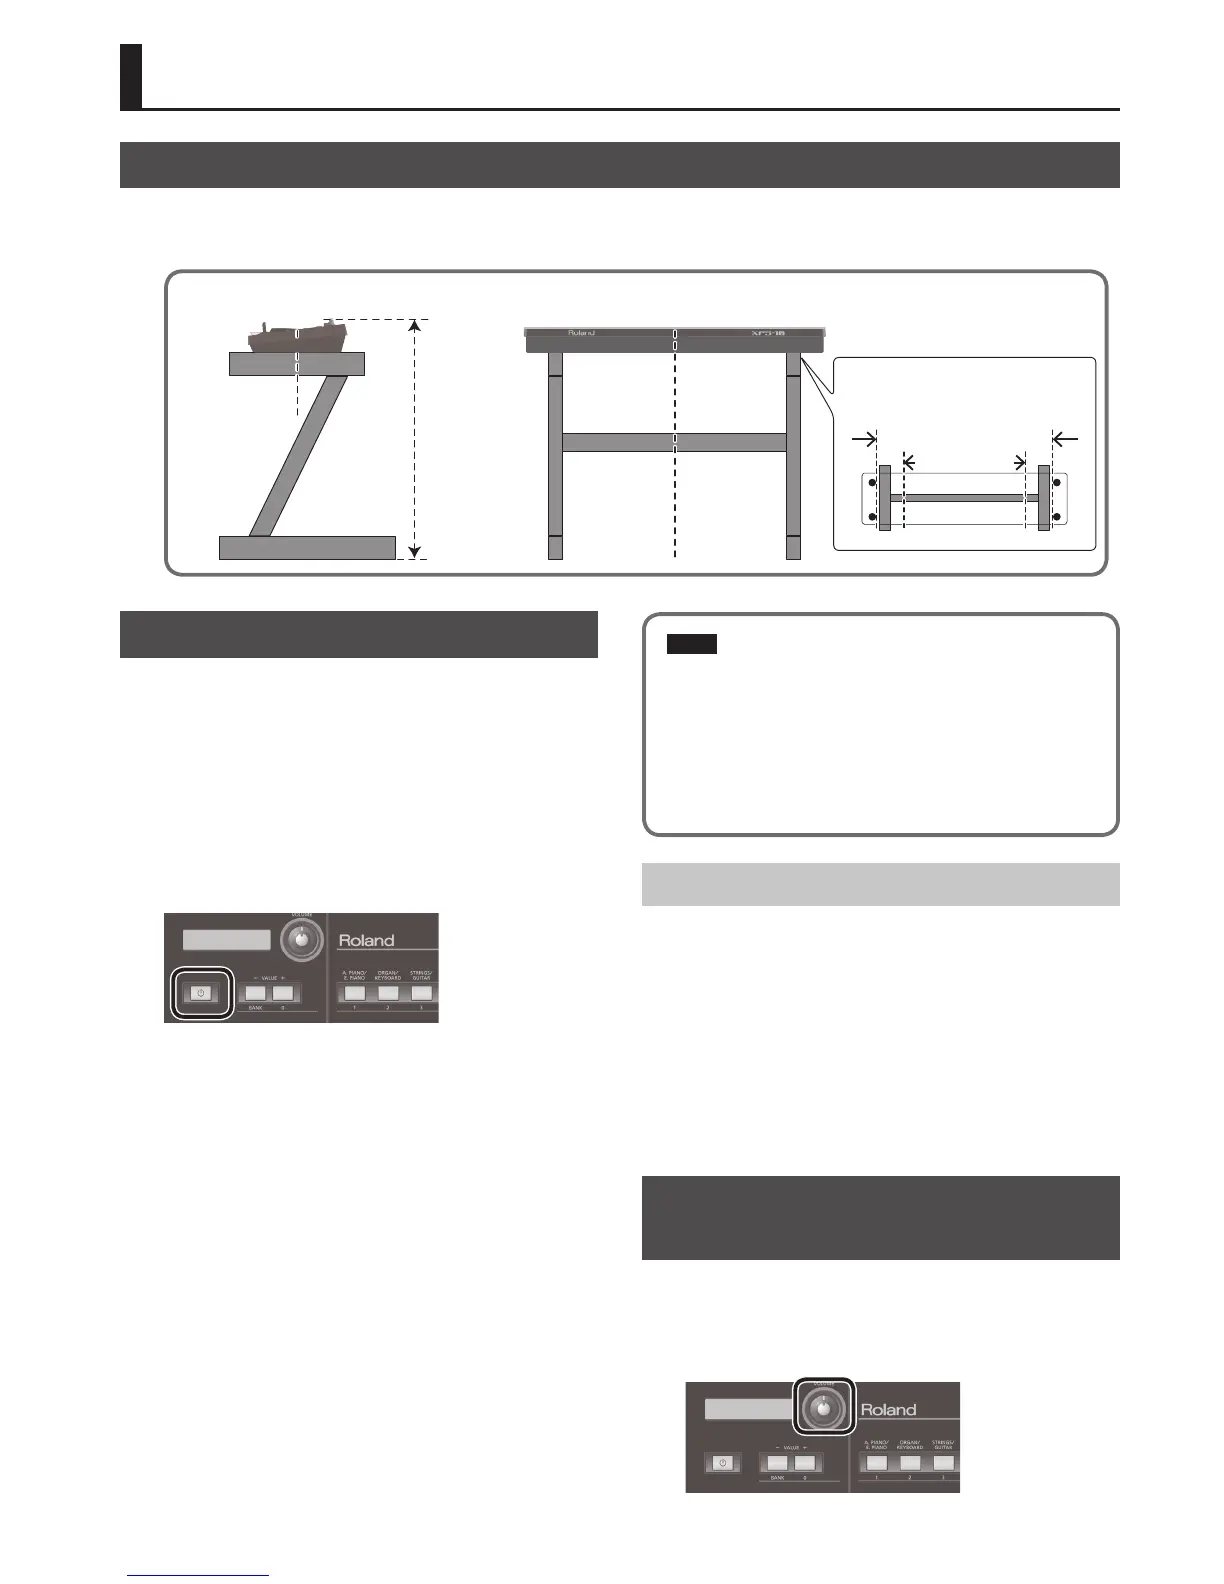
Placing the XPS-10 on a Stand
If you want to place the XPS-10 on a stand, use the Roland KS-18Z.
Be careful not to pinch your ngers when setting up the stand.
Place the instrument on the stand as follows.
KS-18Z
Place the XPS-10
so that it is in the
center of the
stand
Place the XPS-10
so that it is in the
center of the
stand
Adjust so that
the height does
not exceed 1
meter (Adjust
the stand to a
level no higher
than the third
level from the
bottom)
Adjust the outer width of the stand within
the range shown below
800 mm–between the rubber feet of the
XPS-10
Top view
Between the rubber feet
800 mm or more
Turning On/O the Power
* Once everything is properly connected, be sure to follow the procedure
below to turn on their power. If you turn on equipment in the wrong
order, you risk causing malfunction or equipment failure.
1. Before turning on the XPS-10’s power, consider these two
questions:
. Is the AC adaptor and any other equipment connected correctly?
. Have the volume controls of the XPS-10 and all connected audio
devices been turned to their lowest settings?
2. On the XPS-10’s front panel, press the [
L
] button to turn
the power on.
* This unit is equipped with a protection circuit. A brief interval (a few
seconds) after turning the unit on is required before it will operate
normally.
* Before turning the unit on/o, always be sure to turn the volume down.
Even with the volume turned down, you might hear some sound when
switching the unit on/o. However, this is normal and does not indicate
a malfunction.
* To ensure proper operation of the pitch bend lever, make sure not to
touch the lever when turning the XPS-10’s power on.
3. Turn on the power for any connected audio devices.
4. While playing the keyboard and listening to the sound,
slowly increase the volume of the XPS-10 and the volume
of the connected equipment until you obtain the desired
volume.
NOTE
The power to this unit will be turned o automatically after a predetermined
amount of time has passed since it was last used for playing music, or its
buttons or controls were operated (Auto O function).
If you do not want the power to be turned o automatically, disengage the
Auto O function (p. 31).
* Any settings that you are in the process of editing will be lost when the
power is turned o. If you have any settings that you want to keep, you
should save them beforehand.
* To restore power, turn the power on again.
Turning O the Power
1. Before turning o the power, consider these two
questions:
. Have the volume controls of the XPS-10 and all connected audio
devices been turned to their lowest settings?
. Have you saved your XPS-10 sounds or other data you’ve created?
2. Turn o the power for all connected audio devices.
3. Continue holding down the [
L
] button until the screen
indicates “POWER OFF.”
After a time, the [
L
] button goes dark.
Adjusting the Volume Level
([VOLUME] Knob)
1. Use the [VOLUME] knob to adjust the volume.
Turning the knob toward the left will decrease the volume, and turning it
toward the right will increase the volume.
Also adjust the connected device to an appropriate volume.

 Loading...