www.scheppach.com
GB
|
21
7. Safety information
safe and correct work procedures are not followed.
equipment such as protective goggles, dust masks
and ear protection can reduce the risks of possible
cannot match incorrect assessment, carelessness or
method which feels safer. Think of the following: Your
machine was designed to perform certain jobs.
be altered and it should not be used for application
product.
Warning:
can lead to serious injuries.
1. Keep work area clean Cluttered areas and bench-
es invite injuries.
2.
gases.
3. -
tact with grounded surfaces (e.g. pipes, radiators,
ranges refrigeratiors).
4.
from work area.
5. Store idle tools When not is use, tools should be
reach of children.
6.
the rate for which it was intended.
7. -
use circular saw for cutting tree limbs or logs.
8. -
gloves and nonskid footwear are recommended
when working outdoors. Wear protective hair cov-
ering to contain long hair.
9.
10.
it to disconnect it from receptacle. Keep cord from
heat, oil and sharp edges.
DIN EN ISO 3744; EN ISO 11201
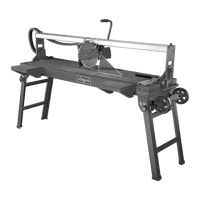
4. Delivery scope
• Translation from the original instruction manual
• Tile-cutter
• Cooling water pump
• Angle stop
• Table extension
• 4 legs
•
5. Attachment
• Open the packaging and remove the device care-
• Remove the packaging material as well as the
packaging and transport bracing (if available).
•
• -
port damage.
•
period has expired.
•
of the operating instructions manual before using
it.
•
consumables and spare parts. Spare parts can be
•
m ATTENTION!
The device and packaging materials are not toys!
Children must not be allowed to play with plastic
bags, lm and small parts! There is a risk of swal-
lowing and suocation!
6. Construction
Fig. 3 - 5
assembled.
1 Remove the machine from the packaging and
2 Unscrew the star knob screw (A) and fold the
supporting feet down. Re-tighten the star knob
screw (Fig. 3)
3 Place the machine on the feet.
4 Install the handle onto the motor housing using 2
hexagon screws (B) (Fig. 4).
5 Secure the cooling water pump (13) into the pre-
scribed position in the water pan (4)
6 Fill the water pan until the water pump is com-
-
 Loading...